2170100001L29 2109V005
25
Assembly
Entering a fixed IP address (recommended)
To reset the network settings, keep the unit
reset key located near the SD card slot
at the right side of the unit pressed using
an office paper clip or similar for 15 - 20
seconds until the screen turns black while
switching on
i
Working under
Connection
, deactivate DHCP
i
Enter the IP address, subnet mask and gateway
i
Navigate back to
Units
via the navigation bar
or close Flyout using
The configuration is saved
Testing the device
You can scan in an X-ray image to check that
the unit is properly connected
i
Open VistaSoft
i
Create an X-ray station for the connected unit
i
Log in the demo patient (patient ID:
DEMO0001)
i
Select the image type (eg Intraoral)
i
Scan an image plate, see "103 Scanning the
image data"
8.4 Configuring the appliance in
DBSWIN
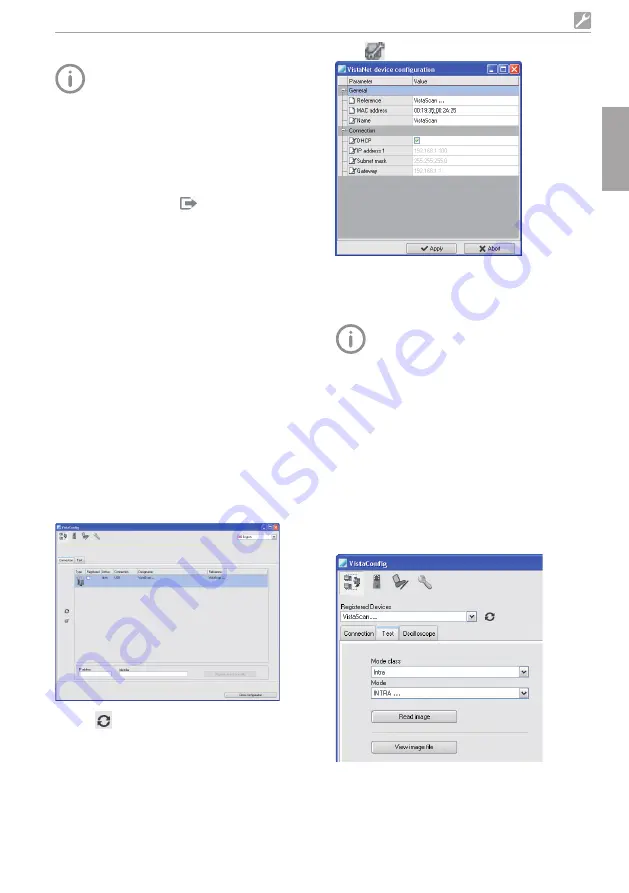
Configuration is carried out using VistaNetCon-
fig, which is automatically installed during instal-
lation of DBSWIN or VistaEasy
i
Select
Start > All Programs > Dürr Dental >
VistaConfig > VistaNetConfig
i
Click
The list of connected units is updated
i
Activate the connected unit in the
Registered
column
You can also register multiple units
The
VistaNet device configuration
window allows
you to change the device name (
name
), manually
enter an IP address or call up information
EN
Click
i
If necessary change the
name
i
Click
Apply
to save the configuration
Entering a fixed IP address (recommended)
To reset the network settings, keep the unit
reset key located near the SD card slot
at the right side of the unit pressed using
an office paper clip or similar for 15 - 20
seconds until the screen turns black while
switching on
i
Deactivate
DHCP
i
Enter the IP address, subnet mask and gateway
i
Click on Apply
The configuration is saved
Testing the device
You can scan in an X-ray image to check that
the unit is properly connected
i
Select the
Test
tab
i
Select the unit from the
Registered Units
list
i
Select the mode class
i
Select the mode
i
Click on
Scan Image
i
Scan an image plate, see "103 Scanning the
image data"
Summary of Contents for VistaScan Ultra View
Page 1: ...Installation and Operating Instructions VistaScan Ultra View 2109V005 2170100001L29 EN ...
Page 2: ......
Page 59: ......
Page 60: ......
Page 61: ......


