


Ch 3 – Preparing to Take a Picture
Image Setup Options
User’s Guide to the SPOT Cooled Color Digital Camera, 6/9/98
26
(cont.)
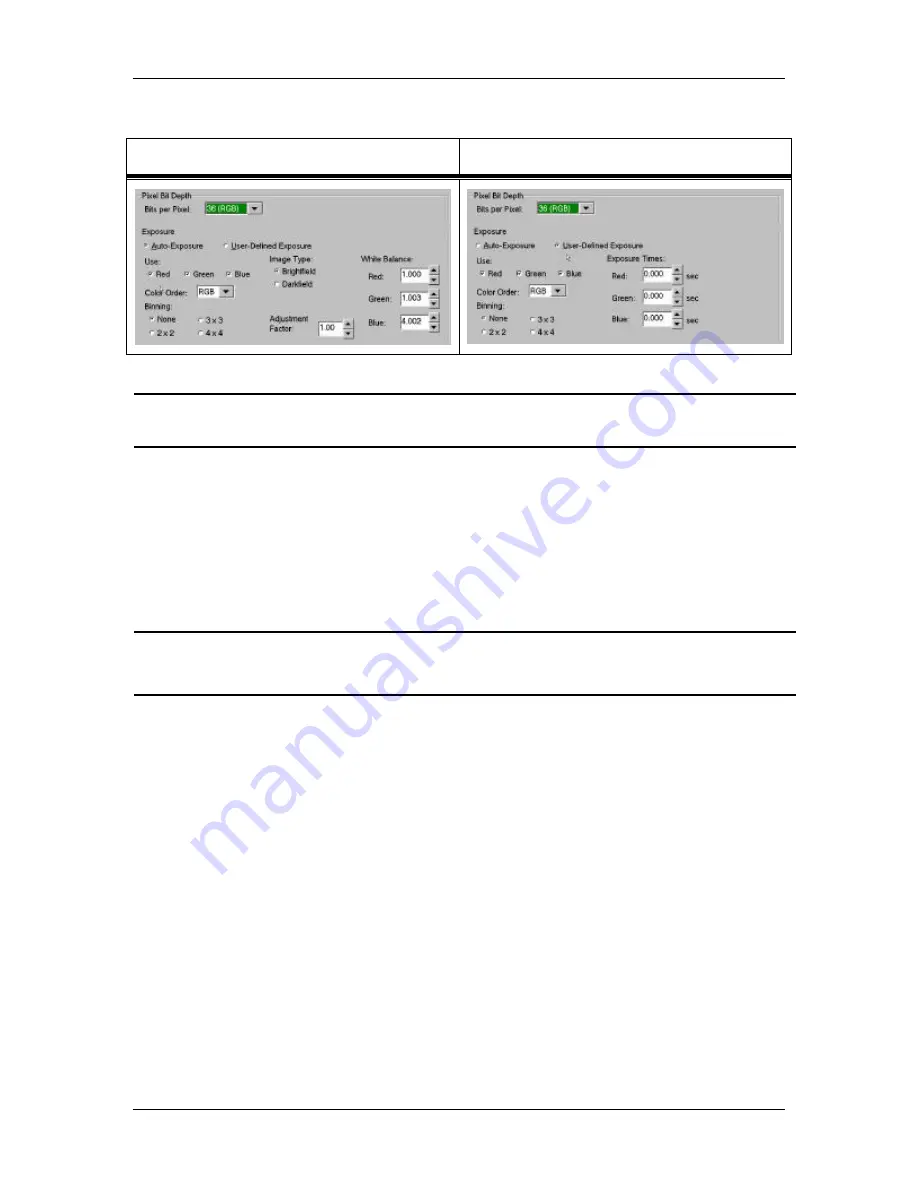
Auto-Exposure Options
User-Defined Exposure Options
!
Note: Each of the above screen captures shows only the Pixel Bit Depth and Ex-
posure sections of the Image Setup screen.
The sections that follow detail all of the Exposure options. If an option is available only
with certain Image Depth settings, or if an option is associated only with automated
exposure or user-defined exposure, this is indicated parenthetically in the heading.
Filter Color (8 and 12 bit mono)
The Filter Color option allows you to specify the color of the filter that will be used when
taking a monochrome picture.
SPOT2
SPOT2 users can slide the camera’s color filter out of the light path to produce an
entirely unfiltered image. With the filter out of the light path, it does not matter which
color is selected.
In order to ensure a high image quality, SPOT users should select the color that is closest
to the color of the specimen. Selection of the wrong filter color blocks the desired color.
For example, if you are looking at only one color, as in the case of a single stained
fluorescence, selecting the color filter that most closely matches the color of the stain will
shorten the time it takes to acquire the image.
To select a the filter color for capturing a monochrome image, follow these steps:
1.
Ensure that the Pixel Bit Depth is set to either 8 (mono) or 12 (mono).
2.
Click on either the Auto-Exposure or the User-Defined Exposure option.
3.
Select one of the following options:
−
Red
−
Green
−
Blue


