Installing Drives 9-15
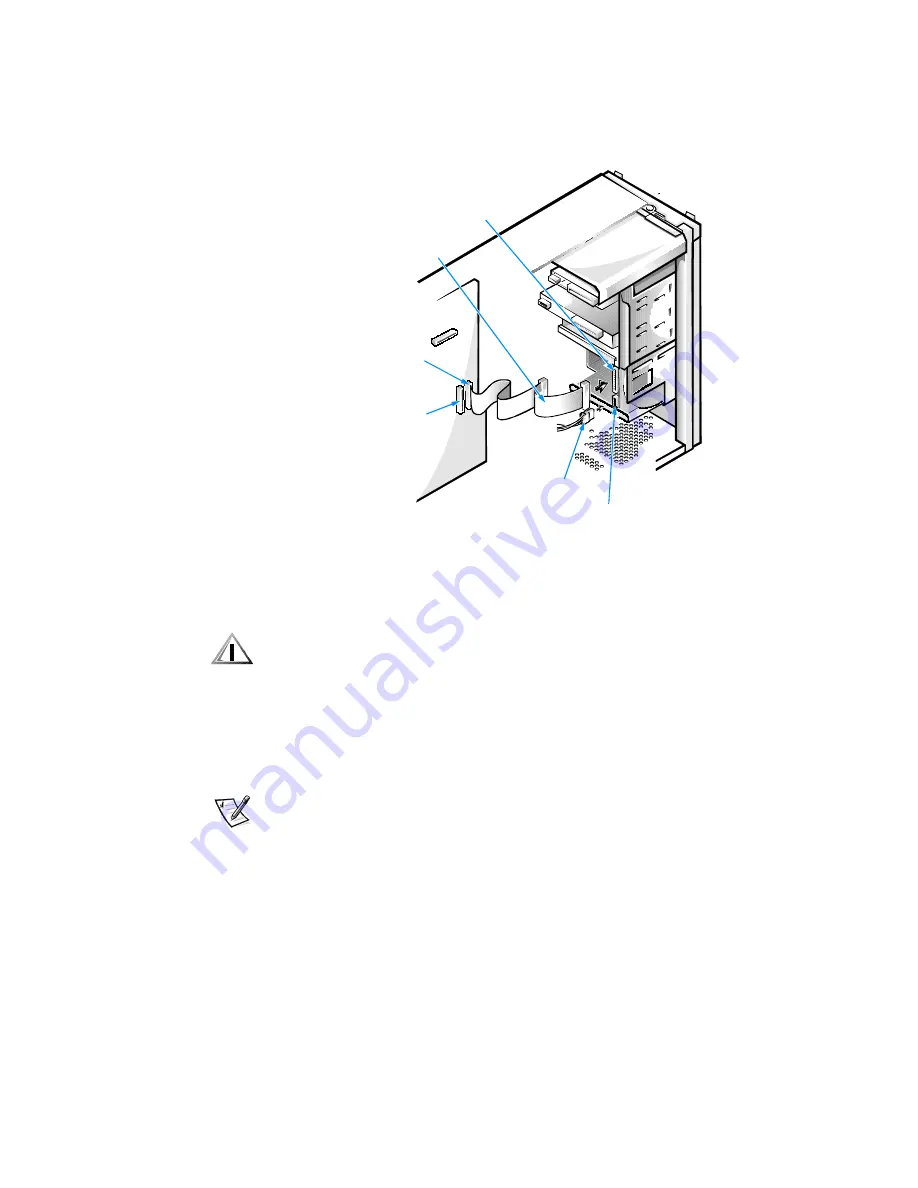
)LJXUH$WDUG'LVN'ULYH&DEOHV
12. If the other end of the EIDE cable i s not already connected, connect it to the IDE1
connector on the system board.
&$87,21<RXPXVWPDWFKWKHFRORUHGVWULSRQWKH(,'(FDEOHZLWKSLQ
RQWKH,'(FRQQHFWRUWRDYRLGSRVVLEOHGDPDJHWR\RXUV\VWHP
To locate the IDE1 connector, see Figure 8-1.
13. Replace the front bezel according to the instructions in Removing and Replacing
the Front Bezel found earlier in this chapter.
14. Replace the computer cover. Then reconnect your computer and peripherals to
their power sources, and turn them on.
NOTE: After you remove and replace the cover, the chassis intrusion detector will
cause the following message to be displayed at the next system start-up:
ALERT! Cover was previously removed.
15. Insert a bootable diskette (such as the
Dell Diagnostics Diskette
) into drive A.
16. Enter the System Setup program, and update the appropriate
Drive
category
(
0
or
1
) under
Drives: Primary
.
See Drives: Primary and Secondary in Chapter 3.
EIDE
cable
power input connector on drive
IDE1
connector
IDE2
connector
DC power cable
interface
connector
Summary of Contents for Precision WorkStation 210
Page 1: ... ZZZ GHOO FRP HOO 3UHFLVLRQ RUN6WDWLRQ 0LQL 7RZHU 6 VWHPV 86 5 6 8 ...
Page 8: ...x ...
Page 26: ...xxx ...
Page 76: ...3 26 Dell Precision WorkStation 210 Mini Tower Systems User s Guide ...
Page 112: ...6 8 Dell Precision WorkStation 210 Mini Tower Systems User s Guide ...
Page 136: ...8 16 Dell Precision WorkStation 210 Mini Tower Systems User s Guide ...
Page 158: ...9 22 Dell Precision WorkStation 210 Mini Tower Systems User s Guide ...
Page 200: ...D 10 Dell Precision WorkStation 210 Mini Tower Systems User s Guide ...
Page 210: ...E 10 Dell Precision WorkStation 210 Mini Tower Systems User s Guide ...
Page 218: ...F 8 Dell Precision WorkStation 210 Mini Tower Systems User s Guide ...
Page 236: ...18 Dell Precision WorkStation 210 Mini Tower Systems User s Guide ...


