Installing System Components
139
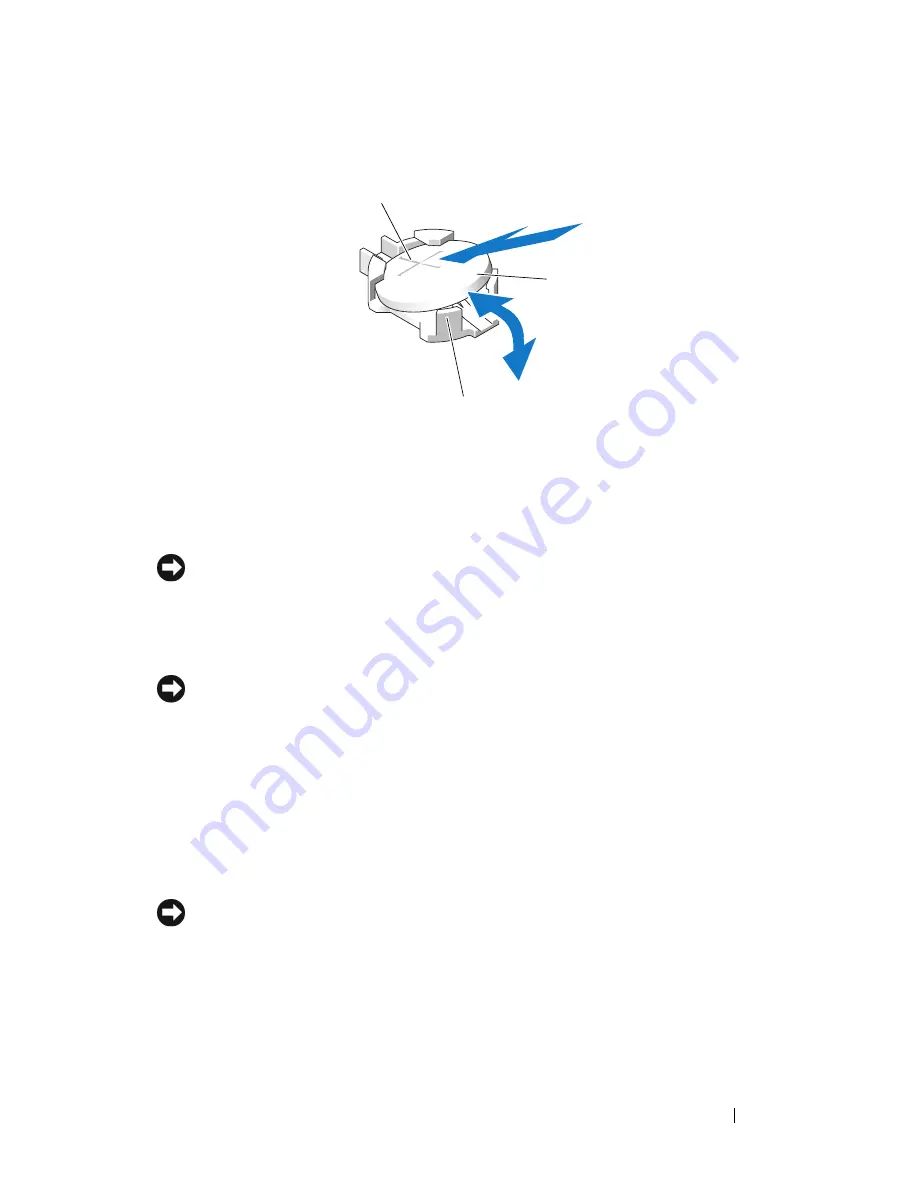
Figure 3-36.
Replacing the System Battery
5
Locate the battery socket. See
Figure 6-1
for the socket location.
NOTICE:
If you pry the battery out of its socket with a blunt object, be careful not to
touch the system board with the object. Ensure that the object is inserted between
the battery and the socket before you attempt to pry out the battery. Otherwise, you
may damage the system board by prying off the socket or by breaking circuit traces
on the system board.
NOTICE:
To avoid damage to the battery connector, you must firmly support the
connector while installing or removing a battery.
6
Remove the system battery.
a
Support the battery connector by pressing down firmly on the positive
side of the connector.
b
While supporting the battery connector, press the battery toward the
positive side of the connector and pry it up out of the securing tabs at
the negative side of the connector. See Figure 3-36.
NOTICE:
To avoid damage to the battery connector, you must firmly support the
connector while installing or removing a battery.
7
Install the new system battery.
a
Support the battery connector by pressing down firmly on the positive
side of the connector.
1
positive side of battery connector
2
system battery
3
negative side of battery connector
2
3
1
Summary of Contents for PowerEdge DR715
Page 10: ...10 Contents Glossary 207 Index 223 ...
Page 42: ...42 About Your System ...
Page 62: ...62 Using the System Setup Program ...
Page 158: ...158 Installing System Components ...
Page 192: ...192 Troubleshooting Your System ...
Page 204: ...204 Jumpers and Connectors ...
Page 206: ...206 Getting Help ...
Page 222: ...222 Glossary ...
Page 229: ...Index 229 W warning messages 41 warranty 11 wet system troubleshooting 168 ...
Page 230: ...230 Index ...


