Installing System Components
131
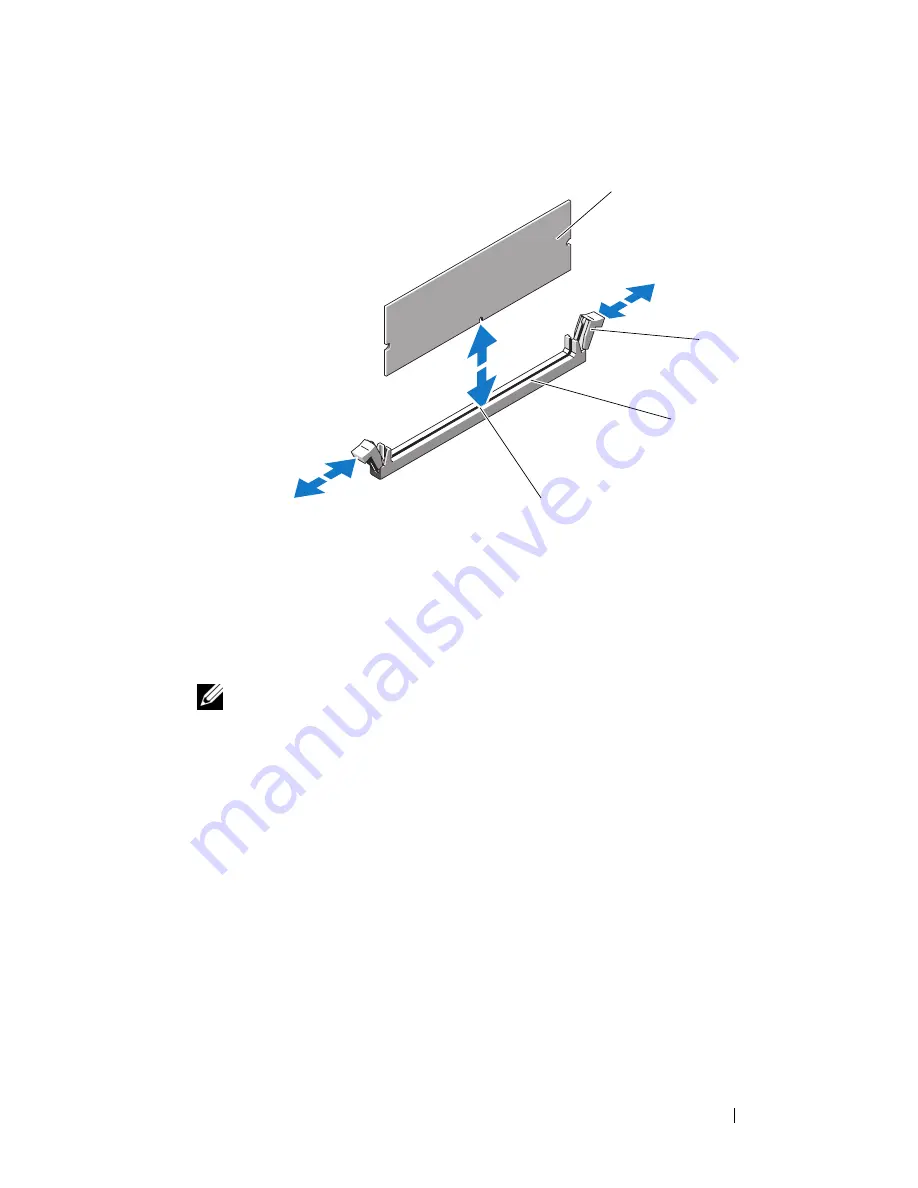
Figure 3-33.
Installing and Removing a Memory Module
7
Align the memory module's edge connector with the alignment key on the
memory module socket, and insert the memory module in the socket.
NOTE:
The memory module socket has an alignment key that allows you to
install the memory module in the socket in only one way.
8
Press down on the memory module with your thumbs while pulling up on
the ejectors with your index fingers to lock the memory module into the
socket.
When the memory module is properly seated in the socket, the ejectors on
the memory module socket align with the ejectors on the other sockets
that have memory modules installed.
9
Repeat step 6 through step 8 of this procedure to install the remaining
memory modules.
10
Install the processor shroud. See "Installing the Processor Shroud" on
page 74.
11
Install the expansion card shroud. See "Installing the Expansion Card
Shroud" on page 75.
1
memory module
2
memory module socket ejectors (2)
3
memory module socket
4
alignment key
4
2
1
3
Summary of Contents for PowerEdge DR715
Page 10: ...10 Contents Glossary 207 Index 223 ...
Page 42: ...42 About Your System ...
Page 62: ...62 Using the System Setup Program ...
Page 158: ...158 Installing System Components ...
Page 192: ...192 Troubleshooting Your System ...
Page 204: ...204 Jumpers and Connectors ...
Page 206: ...206 Getting Help ...
Page 222: ...222 Glossary ...
Page 229: ...Index 229 W warning messages 41 warranty 11 wet system troubleshooting 168 ...
Page 230: ...230 Index ...


