Printing
179
Using the Secure Print Feature
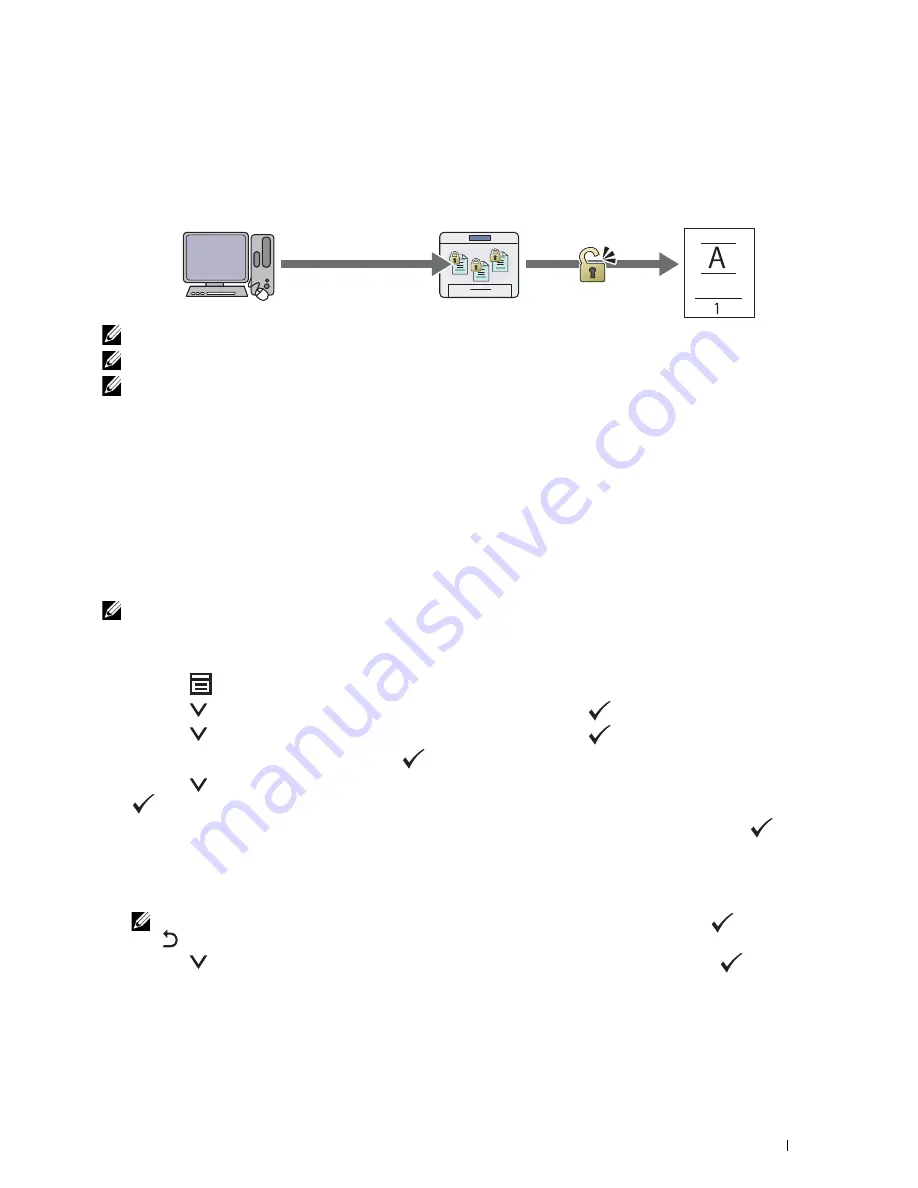
You can store print jobs secured with a password in the memory. Users with the password can print them from the
operator panel. This feature can be used to print confidential documents.
NOTE:
The Secure Print feature is available only when
RAM Disk
under
System Settings
is enabled.
NOTE:
If a print job is too large for the memory available, the printer may display an error message.
NOTE:
The Secure Print feature is available when using the PCL or PostScript 3 Compatible driver.
Procedures for Secure Print
When you send a job to the printer, you can specify the information such as user ID, password, and job name in the
printer driver to store the job in the memory. When you are ready to print the job, select the desired job name in the
memory using the operator panel.
The following are procedures for storing and printing jobs.
Storing Print Jobs
To use the Secure Print feature, select
Secure Print
for
Job Type
and specify the User ID, Password and Document
Name by clicking
Setting
in the
General
or
Paper/Output
tab of the print driver.
NOTE:
If a document name is not assigned to your print job in the printer driver, the job name will be identified using the time and
date of submission to distinguish it from other jobs you have stored under your name.
Printing the Stored Jobs
1
Press the
(Menu)
button.
2
Press the
button until
Job Status
is highlighted, and then press the
(
Set
) button.
3
Press the
button until
Print Menu
is highlighted, and then press the
(
Set
) button.
Select
Secure Print
, and then press the
(
Set
) button.
4
Press the
button until the user name that you specified in the print driver is highlighted, and then press the
(
Set
) button.
5
Enter the password that you specified in the print driver using the numeric keypad, and then press the
(
Set
)
button.
The password appears as a series of asterisks (*******) to ensure confidentiality.
The list of stored documents appears.
NOTE:
When you enter an invalid password, the message
Wrong Password
appears. Press the
(Set) button or
(Back) button to return to the screen for entering the password.
6
Press the
button until the document that you want to print is highlighted, and then press the
(
Set
)
button.
Send confidential data.
Enter the password from
the operator panel.
Print data.
Confidential
Summary of Contents for E525w
Page 1: ...Dell Color Multifunction Printer E525w User s Guide Regulatory Model Dell E525w ...
Page 2: ......
Page 260: ...260 Maintaining Your Printer 25 Maintaining Your Printer 261 26 Clearing Jams 276 ...
Page 287: ...Clearing Jams 287 8 Close the rear cover ...
Page 288: ...288 Troubleshooting 27 Troubleshooting 289 ...
Page 308: ...308 Appendix Appendix 309 ...


