background image

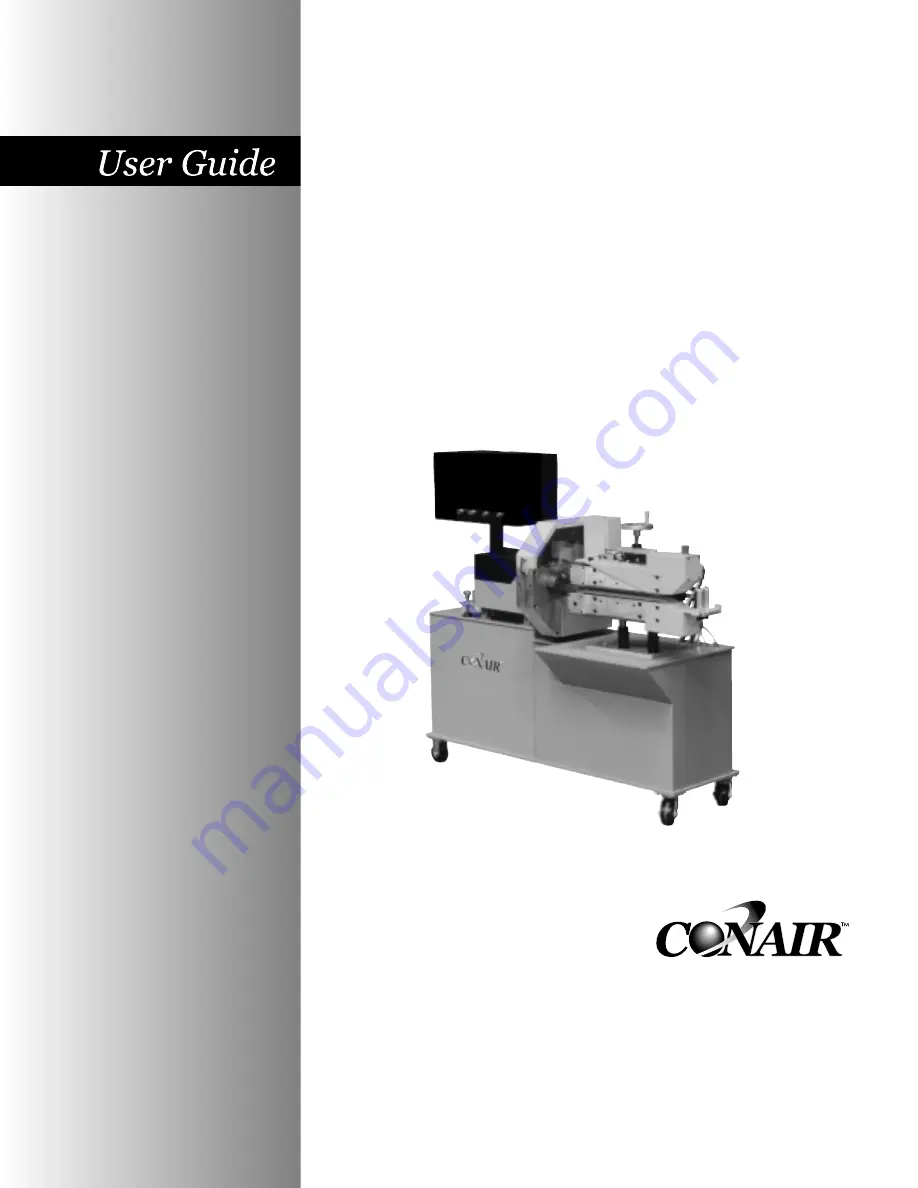
Combination
Puller/Cutter 

Instant Access 

Parts and Service

(800) 458-1960
(814) 437-6861

www.conairnet.com

The Conair Group, Inc.
One Conair Drive
Pittsburgh, PA 15202
Phone: (412) 312-6000
Fax: (412)-312-6227

CSC Model

UGE048/1103

Installation

Operation

Maintenance

Troubleshooting

Summary of Contents for 320CSC2

Page 1: ...ccess Parts and Service 800 458 1960 814 437 6861 www conairnet com The Conair Group Inc One Conair Drive Pittsburgh PA 15202 Phone 412 312 6000 Fax 412 312 6227 CSC Model UGE048 1103 Installation Ope...

Page 2: ...number s Model number s Power Specifications Amps Volts Phase Cycle DISCLAIMER The Conair Group Inc shall not be liable for errors contained in this User Guide or for incidental consequential dam ages...

Page 3: ...es 3 8 Mounting the Cutter Bushings 3 9 Adjusting Belt Tension 3 10 Setting the Belt Gap 3 12 Checking Repeatability 3 14 Repeatability Test Results 3 15 Checking Programming Values 3 16 Preparing for...

Page 4: ...mming the Puller Speed 4 30 Setting the Cutting Mode 4 31 Setting the Scale Factor 4 32 Checking the Cut Quality 4 32 Start ip Preparations 4 33 Starting the Puller 4 35 Making Adjustments during oper...

Page 5: ...ing the Encoder 6 18 Checking the Motor Reducer Assembly 6 19 Testing Repeatability 6 20 Results of Repeatability Testing 6 21 APPENDIX Customer Service Information A 1 Warranty Information A 2 Cutter...

Page 6: ......

Page 7: ...Combination Puller Cutter Purpose of the User Guide 1 2 How the User Guide is organized 1 2 Your Responsibilities as a User 1 2 ATTENTION Read this so no one gets hurt 1 3 How to Use the Lockout Devi...

Page 8: ...be hazardous to users or could damage equipment Read and take precautions before proceeding Numbers within shaded squares indicate tasks or steps to be performed by the user A diamond indicates the e...

Page 9: ...ause severe injury When the knife guard is opened the knife guard switch stops the cutter and prevents starting the cutter again Two proximity type safety switches prevent operation unless the cutter...

Page 10: ...s to sus tain production Operating without these devices could lead to hazardous conditions that can cause severe injury Walk through style belt guards which protect from injury but also allow side en...

Page 11: ...wer to the entire unit The E stop must be physically pulled up to reset the switch and start the combination puller cutter again When the knife guard is opened the knife guard switch stops the cutter...

Page 12: ...is equipped with the lockout device pictured below To use the lockout device Stop or turn off the equipment Isolate the equipment from elec trical power Turn the rotary discon nect switch to OFF or O...

Page 13: ...uller Cutter What is the Combination Puller Cutter 2 2 Typical Applications 2 3 Limitations 2 3 How the Combination Puller Cutter Works 2 4 Combination Puller Cutter Features 2 6 Specifications 2 7 Op...

Page 14: ...r portion utilizes a position controlled servo motor CSC units achieve park position repeatability less than 0 1 millisecond Combination Puller Cutter are available in several sizes WHAT IS THE COMBIN...

Page 15: ...ters can operate over a range of speeds depending on which options are included See Specifications Section 2 Different materials line speeds temperatures and material cross sections can result in diff...

Page 16: ...preventing the puller from being damaged by small lumps of extrudate or other foreign objects After passing through the belts the pulled material continues on to the cutter The cutter is mounted on l...

Page 17: ...rotate and pass between the bushings cutting the extrudate Cut pieces are collected or carried away on a conveyor Extruded material enters from the upstream side 1 3 4 Belts pull the extrudate through...

Page 18: ...tion Puller Cutter UGE048 1103 2 6 DESCRIPTION Swivel casters and lockdown screws Eye level Controls Guide rollers Belt guard E Stop button Belt guard Belt adjustment Cutter head with blade s Clear kn...

Page 19: ...1067 C Width 26 676 26 676 26 676 26 676 26 676 D Length 74 1880 74 1880 74 1880 80 2032 80 2032 Belt width 3 8 9 5 3 76 3 76 4 102 6 152 6 152 Belt traction length 20 508 20 508 26 660 26 660 26 660...

Page 20: ...ht lb kg Installed 1200 545 1200 545 1350 613 1350 613 1350 613 Shipping 1300 590 1300 590 1450 658 1450 658 1450 658 Electrical requirements Full Load Amps Drive type Puller open closed servo open cl...

Page 21: ...me accu racy Different reducer ratios A particular reducer ratio is selected at the time of purchase to optimize puller performance in a particular speed range Cutter Bushing Lubrication This is a sel...

Page 22: ...l one When this option is picked the maximum number of cuts per minute decreases However inertia and thus cutting torque is increased sig nificantly Follower Cutting Mode Follower mode allows the oper...

Page 23: ...uipment from electrical noise gen erated by the servo motor and associated amplifier NOTE An isolation transformer will not compensate for a ground that does not meet code requirements Left to Right M...

Page 24: ......

Page 25: ...Combination Puller Cutter 3 4 Connecting the Main Power Source 3 6 Installing the Cutter Blades 3 7 Mounting the Cutter Bushings 3 8 Adjusting Belt Tension 3 10 Setting the Belt Gap 3 12 Checking Repe...

Page 26: ...packing material protective paper tape and plastic Compare contents to the shipping papers to ensure that you have all the parts Carefully inspect all components to make sure no damage occurred during...

Page 27: ...icing If the servo cutter has the optional slide base be sure to check for clearance by extending the slide system in both directions PREPARING FOR INSTALLATION UGE048 1103 CSC Combination Puller Cutt...

Page 28: ...utter with the extrusion line CSC Combination Puller Cutter UGE048 1103 3 4 INSTALLATION 1 POSITIONING THE COMBINATION PULLER CUTTER CAUTION Lifting To avoid personal injury or damage to the cut ter l...

Page 29: ...nch adjustable wrench Remove the weight from the casters by locking down the floorlocks NOTE Never leave the puller cutter on casters only Use a plumb line or laser to check for a straight line from t...

Page 30: ...e required for your cutter and the most accurate electrical component information CONNECTING THE MAIN POWER SOURCE 3 WARNING Electrical hazard Before performing any work on this product disconnect and...

Page 31: ...and when handling blades Always lock out power to the cutter before opening the cutting chamber Always wait until the cutter head has com pletely stopped before opening the knife guard Combination pu...

Page 32: ...should not be deflected Tighten the set screw against the flat side of the bushing to hold the bushing in position DANGER Sharp blades Always wear cut resistant gloves when the cut ting chamber is ope...

Page 33: ...but not touching the blade Use the feeler gauge Tighten the set screw against the flat side of the bushing to hold the bushing in position Rotate the cutter head by hand to make sure the bushings did...

Page 34: ...the safety cable on the upper guard Lift off and remove guard ADJUSTING BELT TENSION 1 2 Check belt tension Use a tension measuring tool Belts should be just tight enough to prevent slipping and the...

Page 35: ...tension Lower the belts to a gap of about 1 8 inch 3 mm See Setting the Belt Gap section 3 From the upstream end of the belts look down the length of the belts at the gap between the belts If the gap...

Page 36: ...dle from one rod to the other lift it and place it on the other shaft You may have to rotate it slightly to engage the key way with the key on the shaft For the 320 models The upper and lower belt boo...

Page 37: ...INSTALLATION 3 13 The optional Pneumatic Upper Belt Actuator can also be used to position the upper belt See Appendix E Place the handwheel on the right threaded rod and turn to move the lower belt up...

Page 38: ...It is recommended that you check repeatability on a regular basis Acceleration deceleration delays of the servo do not contribute to repeatability error any error is attributed solely to motor stabili...

Page 39: ...bushing This is the repeatability of the cutting system to accelerate through the part This value is higher than the CC reading since it includes the acceleration and deceleration contributed by the s...

Page 40: ...rmly locked into position with the anchoring screws Check that all wiring conforms to electrical codes and all wiring covers are in place 1 2 3 DANGER Pinch Hazard Never remove or disable safety devic...

Page 41: ...com mands for an extended period of time Make sure that the Cut On Off is Off If necessary press button to display off Press Start Cutter button The light in the button should light On CSC cutters th...

Page 42: ......

Page 43: ...ntrol features 4 28 Before Starting the Combination Unit 4 29 Powering Up 4 30 Programing the Puller Speed 4 30 Setting the Cutting Mode 4 31 Setting the Scale Factor 4 32 Checking Cut Quality 4 32 St...

Page 44: ...onally pages will appear that allow the operator to use one of the soft keys On those occasions text would typically appear directly above the key and the key will have a function Think of the text as...

Page 45: ...ngth or time preset or cuts per minute depending on the active cut mode It displays the value only when the machine is started and softkey2 On Off is on If the machine is stopped or soft key2 On Off i...

Page 46: ...s available Additional information on how to access this screen can be found in the operator display overview in Appendix E of this manual This is typically used to count cut pieces during the day or...

Page 47: ...the batch complete output 2 briefly energizes and both outputs turn back off Sample Manual cuts are not counted When enabled the count continues to accumulate even if the batch display is not being v...

Page 48: ...ey located under the word Batch on the Batch Area Screen the preset for the Batch counter is avail able The number shown is the current batch preset A cursor will appear in the least significant digit...

Page 49: ...e Please note This value must be less than the batch preset Exit or Prev if no change is required press Exit or Prev to return to the Main screen LENGTH SCREEN By pressing the soft key located under t...

Page 50: ...If the keyed in number is correct press the enter key for it to be accepted and return to the Main screen If it is wrong press the delete key and the previous preset will reappear PRESETS TO RUN SCRE...

Page 51: ...e If the keyed in number is correct press the enter key for it to be accepted and return to the Main Timer Mode screen If it is wrong press the delete key and the previous preset will reappear TIME SC...

Page 52: ...r or Delete If the keyed in number is correct press the enter key for it to be accepted and return to the Main Timer Mode screen If it is wrong press the delete key and the previous preset will reap p...

Page 53: ...displayed Enter or Delete If the keyed in number is correct press the enter key for it to be accepted and return to the Main End Sense Mode screen If it is wrong press the delete key and the previous...

Page 54: ...layed Enter or Delete If the keyed in number is correct press the enter key for it to be accepted and return to the Blade Select or Main Mode Screen If it is wrong press the delete key and the previou...

Page 55: ...valid range will be displayed Enter or Delete If the keyed in number is correct press the enter key for it to be accepted and return to the Blade Select or Main Mode Screen If it is wrong press the de...

Page 56: ...isplays total deviation time in milliseconds This time is from a cut being requested until the blade reaches the part The smallest measured value is sub tracted from the largest measured value and the...

Page 57: ...ey1 On the display on the lower left side is a soft key labeled On or Off Pressing this key while On is displayed will reset all values and disable testing Likewise pressing this key while Off is disp...

Page 58: ...ccess this screen can be found in the operator display overview in Appendix E of this manual Press the Softkey located under the cut mode desired to select that mode If the mode is available an acknow...

Page 59: ...d Function Area Screen the calculated cuts per minute are displayed The active mode measurement value blade speed number of blades and line speed may all contribute to determining the actual value dis...

Page 60: ...ettings will reduce the performance and possibly cause severe damage to your machine Maint Softkey Located under the word Maint is the Maintenance soft key The Maintenance area is password protected T...

Page 61: ...y is the status text INCORRECT CORRECT for the encoder direc tion Exit or Prev Pressing Exit or Prev will return the display to the Encoder Area screen Change Softkey With the machine stopped by press...

Page 62: ...See the Scale Area Dist Softkey description Scale Softkey By pressing the soft key located under the word Scale on the Encoder Area Screen there are two sub menus Dist and Counts accessible Additiona...

Page 63: ...will increase the value by 0 001inch The key can be pressed once for each 0 001inch increment required or held down to scroll up Releasing the key will freeze the value at the last value Lower will de...

Page 64: ...ways to adjust this number Exit or Prev if no change is required press Exit or Prev to return to the Scale Value screen Raise will increase the value by 1 The key can be pressed once for each 1 incre...

Page 65: ...ss any key on the operator to acknowledge the fault Disconnect power fix the problem then restart the cutter After a successful home has been completed if the cutter is stopped away from the home posi...

Page 66: ...number is correct press the enter key for it to be accepted and return to the Maintenance Area screen If it is wrong press the delete key and the previous value will reap pear HOME OFFSET EXAMPLE With...

Page 67: ...eset Exit or Prev Pressing Exit Prev or the Softkey under the word Exit returns the display to the Select P M area screen Cycles Softkey Pressing the soft key located under the word Cycles on the P M...

Page 68: ...his screen will remain on longer than a couple of seconds If there are no communication problems the Conair Combination Puller Cutter program will begin to run The fol lowing message or similar shows...

Page 69: ...ART button to start the drive Note If the puller does not start make sure the E Stop button is pulled out in the extended position Using the 10 turn potentiometer adjust the puller speed Note Turn in...

Page 70: ...for an extended period of time belts can acquire set If this occurs let the puller run for 20 30 minutes before use This should remove any set from the belts SHUTTING DOWN THE PULLER 4 STOPPING THE PU...

Page 71: ...e puller belt Inspecting the cutter blades Inspecting the blade mounting hardware Making sure the cutter bushings are properly secured Inspecting the closure latch on the knife guard Checking alignmen...

Page 72: ...n Open the knife guard The machine start push button should go out If the cutter is not working properly at any time turn it off immediately and refer to the Troubleshooting section of this User Guide...

Page 73: ...adjust the prescale value See Control Instructions Encoder Area Section 4 For Product mode Use the Set button and Adjustment arrows to change the hold off time In Product mode the desired length is se...

Page 74: ...ance cut it with a knife or saw and feed it through the cutter bushings Then move the cutter into position with respect to the puller For flexible products the cutter should be very close to the pulle...

Page 75: ...ower supply matches specified belt puller power before connecting If unsure please do not hesitate to call for service Adjust the belt puller entrance guide rolls to insure consistent product guidance...

Page 76: ...ment with the extrusion line Assure the floor locks are properly engaged Thread the extrudate through the sizing equipment puller and an other devices on the extrusion line puller See the Maintenance...

Page 77: ...aily operation of the puller you should Inspect the puller belts Check puller alignment with the extrusion line Assure the floor locks are properly engaged Thread the extrudate through the sizing equi...

Page 78: ...on demand cutting Pressing Reset Test has no effect during contin uous cutting Count the total number of cuts by pressing the Total On Off soft key Use the Reset button to return the count to zero Thi...

Page 79: ...button to disable the servo motor Turn Cutter Power On Off switch to Off Power is no longer supplied to the cutter portion of the combina tion puller cutter The belt puller will continue running Foll...

Page 80: ...sure safe stopping STOPPING THE COMBINATION PULLER CUTTER To safely stop the combination puller cutter Press Cut On Off Softkey to Off to stop cutting Softkey text changes to off Press Stop Cutter but...

Page 81: ...re 5 6 Inspecting Cutter Bushing Screws 5 7 Checking the Closure Latch 5 7 Checking Floor Locks 5 7 Cleaning the Lubrication Tray 5 8 Lubricating the Slide Rail 5 8 Checking the Grease Locations 5 9 A...

Page 82: ...nance schedule depending on how often you use the servo cutter and the types of material flowing through it Follow all precautions and warnings when working on the equipment WARNING Improper installat...

Page 83: ...vice has been provided to isolate this product from potentially hazardous electricity DANGER Sharp blades Most injuries caused by knife blades occur when the cutter has been turned off Handle blades w...

Page 84: ...Section 5 Inspecting cutter bushing screws Check that the cutter bushing screws are secure See Inspecting the Cutter Bushing Screws Section 5 Checking the closure latch on the knife guard See Checking...

Page 85: ...onnections Section 5 Inspecting control panel lights Check to make sure no LEDs or lights are burned out on the control panel Replace as needed Checking motor brushes Inspect the motor bushes Replace...

Page 86: ...washers and blade securing bolt securely in place INSPECTING BLADE HARDWARE DANGER Sharp blades Most injuries caused by knife blades occur when the cutter has been turned off Handle blades with care...

Page 87: ...ECTING CUTTER BUSHING SCREWS Check the set screws that secure the cutter bushings If bush ings move during cutting cutting blades and possibly the drive chain could be damaged CHECKING THE CLOSURE LAT...

Page 88: ...on a regular basis and the lubricant replaced Open the knife guard and using a shop vac or other similar equipment remove all liquid and solids from the cutting chamber and around the bushings Replace...

Page 89: ...gular grease for all locations except thread rods vertical shafts and vertical shaft drive boxes For thread rods and vertical shafts use Never Seize or equivalent The vertical shaft drive boxes requir...

Page 90: ...oximity switch face for each bushing It should be recessed no more than 0 010 inches but should not interfere with the bushings themselves Use an Allen wrench to check the tightness of each proximity...

Page 91: ...energization or start up A lockable device has been provided to isolate this product from potentially hazardous electricity WARNING Improper installation operation or servicing may result in equipment...

Page 92: ...ied electrician make any necessary repairs or replacements Close the electrical enclosure door Inspect the exterior power cords Cords should not be crimped exposed or rubbing against the frame If the...

Page 93: ...2 Check belt tension Use a tension measuring tool Belts should be just tight enough to prevent slipping and the gap between the upper and lower belts should be even across the width of the belt NOTE I...

Page 94: ...Fine tune tension Lower the belts to a gap of about 1 8 3 mm See Adjusting Belt Gap Section 3 From the upstream end of the belts look down the length of the belts at the gap between the belts If the g...

Page 95: ...ther shaft You may have to rotate it slightly to engage the key way with the key on the shaft For the 320 models The upper and lower belt boom assemblies are controlled by a common threaded rod Turn t...

Page 96: ...CE The optional Pneumatic Upper Belt Actuator can also be used to position the upper belt Refer to Appendix E for more infor mation Place the handwheel on the right threaded rod and turn to move the l...

Page 97: ...oose enough to slide off the puller 1 2 3 Remove the belt from the puller Check the rollers and pulleys for buildup especially inside grooves Clean if necessary 4 REPLACING BELTS UGE048 1103 CSC Combi...

Page 98: ...with a non petroleum based solvent such as isopropyl alcohol Use a torque wrench to make sure the nut is tight ened to the proper installation torque 2000 in lb or 225 N m Do not overtighten it can c...

Page 99: ...6 7 Product Quality Problems 6 10 REPAIR Restoring Default Memory Settings 6 15 Restoring User Specific Memory Settings 6 15 Replacing Safety and Proximity Switches 6 16 Checking the Servo Amplifier 6...

Page 100: ...ical power sources to prevent injury from unexpect ed energization or start up A lockable device has been provided to isolate this product from potentially hazardous electricity You can avoid most pro...

Page 101: ...chamber Always wait until the cutter head has stopped completely before opening the knife guard Combination puller cutters are equipped with several safety devices to ensure safe operation Never remo...

Page 102: ...ems which focus on problems that are clearly related to the pullers mechanical compo nents and electrical control system Cutter operation problems which focus on problems that are clearly related to t...

Page 103: ...er creaks while run ning The puller does not start Possible cause The belt is too tight The bearings are failing The E stop button is pushed in Solution Check the belt tension loosen if necessary See...

Page 104: ...nec tion The relay is bad ICR The safety circuit failed The servo amplifier motion program not run ning There is a loose connec tion Solution Pull out the E stop button Check to see if Bushings are in...

Page 105: ...connection to it is loose Guard circuit is open E stop button is pressed Input from encoder failed Encoder failed Solution Check connections and replace switch if needed Check to see if The bushings a...

Page 106: ...l park site Possible cause There is a problem with the servo amplifier There is a loose connec tion There is a communication failure between the con trol and drive There is a communication failure bet...

Page 107: ...unication failure between the con trol and drive There is a communication failure between the con trol and drive The coupling between the servo motor and the Micron reducer has slipped The Trantorque...

Page 108: ...ted stopped during processing annular rings can develop especially on a thin walled product Slightly increase the distance between the puller and the cutter and test the product until the distance is...

Page 109: ...xcessive blade thickness can cause frictional heat Use a thinner blade Change angle of the blade attack or the blade style to decrease the cut path area Use blade lubrication water etc or change lubri...

Page 110: ...If the extrudate is too cold it can fracture or whiten during cutting Raise the extrudate s temperature High blade speeds can cause too much impact Lower the blade speed Change the bushing design to m...

Page 111: ...ve to the bushing holder If the cutter bushings are not properly gapped the blade may be free to move with the extrudate Check and adjust if necessary See Section 3 and Appendix C If the knife bevel i...

Page 112: ...D Symptom Length of cut is incorrect Possible cause Repeatability is wrong Encoder input device problem There is a problem with the puller Solution Test for repeatability See Section 6 Check encoder i...

Page 113: ...he Control Select button Enter the desired two digit code number from the tables on pages F 1 and F 2 Press the Enter button The two digit code displays in the lower digital dis play The current param...

Page 114: ...rd check for loose or damaged wires Replace the switch if wires appear to be undamaged Proximity Switches The proximity switches on the cutter bushings have LEDs that light when the bushing is sensed...

Page 115: ...g chamber without locking out the cutter power Most injuries caused by knife blades occur when the cutter has been turned off Handle blades with care at all times 1 2 The servo amplifier is equipped w...

Page 116: ...included with this User Guide to check and adjust the motor reducer assembly 1 3 2 4 When the encoder is working properly the measurement dis played will count up to the preset and reset to zero Check...

Page 117: ...leration delays of the servo do not contribute to repeatability error any error is attributed solely to motor stability couplings assembly power and proximity sensor alignment Use any blade speed and...

Page 118: ...accelerate through the part This value is higher than the CC reading since it includes the acceleration and deceleration contributed by the servo motor CC is the peak time variance between cuts Record...

Page 119: ...ng checklist before calling Conair Make sure you have all model serial and parts list num bers for your particular equipment Service personnel will need this information to assist you Make sure power...

Page 120: ...ercise one of the following options Inspect the equipment and perform alterations or adjustments to satisfy performance claims Charges for such inspections and corrections will be waived unless failur...

Page 121: ...e wear resistant than stainless but is also more brittle M 2 is an excellent grade of tool steel with an HRC of 63 66 It is one of the best materials for coating with titanium nitride for improved wea...

Page 122: ...ze blade and bushing buildup As a general rule curved edge knives offer improved cut quality on rigid materials if additional heat can be used However if used on cold rigid materials curved knives hav...

Page 123: ...licing action for best results This is due to the fact that even minimal interruption can cause a blade jam on a product that has little or no internal strength On the other hand rigid extrudates may...

Page 124: ...L 3 25 14 44 0 4 4 25 14 44 0 5 5 25 15 47 1 As an example calculate the blade interruption in millisec onds for an CSC2 cutter running 1 4 0 250 OD tubing The blade speed is 718 rpm and the cutting b...

Page 125: ...and puller multiply line speed by interruption time Blade Interruption X Line speed X 12 Deflection time msec fpm 60 000 in 2 25msec X 60 fpm X 0 0002 0 027 in In this example the puller and cutter m...

Page 126: ...in Stainless Steel 3515 30128 Straight 3 inch 0 020 in Stainless Steel 3515 30024 Straight 3 inch 0 025 in Stainless Steel 3515 30024 1 Straight 3 inch 0 025 in Spring Steel 3515 30136 Straight 3 inch...

Page 127: ...or shape of the bushing bore In the case of tubes this causes two marks on the tube penetration marks that show where the tube flat tened before the blade actually penetrated it The tighter the bushin...

Page 128: ...the cutter bushing must be smooth and glass like when cutting flexible extrudates otherwise exces sive drag causes jamming and can lead to variations in cut to length accuracy When cutting flexible ma...

Page 129: ...d it has a negative effect on cut quality The shear surface of both the upstream and downstream cutter bushings should be sharp and bored to the same size NOTE In high speed cutting applications the d...

Page 130: ...eing tapered On sticky flexi ble extrudates the parts will actually stick back together if the new part has to push the cut part out very far For rigid extrudates the length of the cutter bushings can...

Page 131: ...check proper gap Locate the upstream cutter bushing with 0 001 0 002 inch of the blade and lock it in place Rotate the blade through the set bushings to insure proper gap NOTE Because blades are rare...

Page 132: ...the cut face With flexible materials these lines will typically show an arc or S pattern which can be attrib uted to compression of the part as the blade passed through Rigid materials such as rigid P...

Page 133: ...uired to separate them This can be a real problem in materials such as latex silicone PP and flexible PVC Benefits of using lubricants The primary benefit of using a cutting lubricant is reducing fric...

Page 134: ...ant with good consistency If the mist is applied to the product as it enters the cutter bushings the lubricant will minimize the drag between the bushing bore and the tube or profile as well as wet th...

Page 135: ...xcellent No 3511 30112 Natural rubber 50 55 31 in 8mm tan green medium excellent No excellent 3511 30064 Natural rubber 70 31 in 8mm red excellent medium No excellent 3511 30072 Natural rubber 35 40 3...

Page 136: ...ent medium No excellent 3511 30040 Natural rubber 35 40 39 in 10mm white medium excellent Yes 173 046 05 Neoprene 40 39 in 10mm white medium excellent Yes 173 046 06 Nitrile 60 39 in 10mm white medium...

Page 137: ...0000 9999 13 High Alarm 0000 9999 14 Error Alarm 1 ramped 0000 9999 15 Error Alarm 2 scaled 0000 9999 Acceleration and Deceleration 16 Acceleration time 000 0 600 0 17 Deceleration time 000 0 600 0 Ph...

Page 138: ...threshold 0 100 Serial Communications 70 Device addresses 1 32 71 Baud rate 1 6 72 Character format 1 3 73 Control mask 0 255 Alarms and Limits 74 Zero speed logic 0 1 Scaling Format Selection and Con...

Page 139: ...contribution Trim authority determines how much of the output is influenced by Gain Reset and Rate and how much is deter mined by feed forward Rate threshold sets the amount of differential error req...

Page 140: ...or has five buttons On Off Turns the device on and off Mode Press to choose the readout in decimals fractions or millimeters Press to move up one engineering unit 0 Press to zero the reading Because a...

Page 141: ...You can adjust the opening and closing speed of the air cylin der assembly that operates the upper belt boom assembly by adjusting lifting and turning the air regulator handle ADJUSTING THE PNEUMATIC...

Reviews: