Chapter 16
16-14
16.3 Error Codes (SEND)
16.3.1 Self-Diagnostic Display
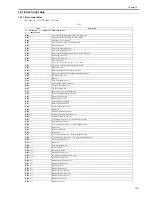
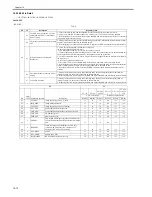
0014-6629
/ / / / iR C3380i / iR C3380 / iR C2880i / iR C2880
*10
11,21
HDD contact fault
This error seldom occurs in the course of normal read/write operations.
1. Check the cable and power connectors.
2. If the foregoing fails, suspect a fault on the HDD, and replace the HDD and reinstall the system software.
*11
13,25
WriteAbort
The text file on the HDD (e.g., Box) may be damaged.
1. Indicate the partition for CHK-TYPE, and execute HDD-CHECK (several min to several 10s of min); then,
turn off and then on the power.
2. If the forgoing fails, indicate the partition for CHK-TYPE, and execute HDD-CLEAR; then, turn off and
then on the main switch.
(In the case of BOOTDEV, BOOTDEV2, or APL_SEND, execute formatting using the SST and reinstall the
system software.)
3. If the foregoing fails, suspect a fault on the HDD, and replace the HDD and reinstall the system software.
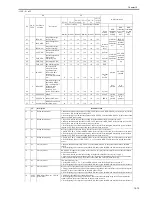
*12
10,12,
14
22,23,
24
system error, or packet data error
This error occurs in response to corruption of data or a bug in software.
1. Start up in safe mode, and execute full formatting using the SST and reinstall the system software (System,
Lang, RUI); then, turn off and then on the main power switch.
2. If the foregoing fails, suspect a fault on the HDD; replace the HDD, and reinstall the system software.
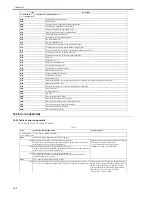
Cause
Remedy
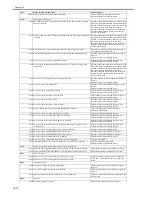
Scanning has stopped because the size of the data for the scanned original exceeds the limit. Scanning may be possible if [Data Cmprssn] is set to [High
Ratio], Resolution is lowered, or [Sharpness] is reduced.
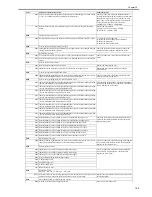
Scanning was stopped because the data size of the scanned original exceeded the
maximum data size that the machine could handle.
By selecting [High Ratio] for Data Compression Ratio, lowering the Resolution,
and lowering the Sharpness setting, scanning may become possible.
Out of resources. Wait for a moment, then perform operation again.
You cannot browse the network. There is a lack of TCP/IP resources because
documents have just been continuously sent or are being continuously sent
through FTP or Windows (SMB).
Wait for a while, and try browsing again.
Set the IP Address.
This machine is not set with an IP address.
Specify the IP Address Settings in TCP/IP Settings in Network Settings in System
Settings (from the Additional Functions screen), then turn the machine's main
power OFF and back ON again.
No response from the server. Check the settings.
The specified server settings are incorrect, or the server is not turned ON.
Alternatively, the machine's TCP/IP resources may be low.
Wait for a while, and try browsing again. If there is still no response from the
server, try selecting another server.
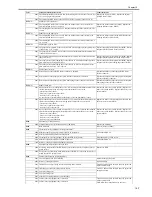
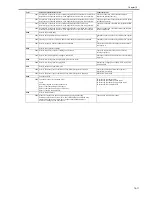
NetWare is in use. Wait for a moment, then perform operation again.
You cannot browse the network because NetWare is printing through a Pserver or
NDS PServer.
Wait until printing is complete, then try browsing again.
There are too many subdirectories.
You have exceeded the maximum number of subdirectory levels allowed.
Specify a different destination because the directory level that you are trying to
access cannot be specified.
No response.
The server was not running when you tried to send.
Make sure that the server is ON, and check the destination.
The network connection was lost when you tried to send. (Either you could not
connect to the destination, or the connection was lost before the job could be
completed.)
Check the status of the network.
You tried to send through NetWare, but the Tree name was not entered.
Enter the Tree name.
A TCP/IP error occurred when you tried to send an e-mail message or an I-fax.
Check that the network cables and connectors are properly connected.
Check the TCP/IP.
Cause The machine's TCP/IP connection is not operating.
Check the IP Address Settings (IP Address, DHCP, RARP, BOOTP) in TCP/IP
Settings in Network Settings in System Settings (from the Additional Functions
screen).
Cannot find the selected server. Check the settings.
The IP address that the machine should connect to cannot be determined.
1. Check the DNS Server Settings in TCP/IP Settings in Network Settings in
System Settings (from the Additional Functions screen).
2. Check whether the DNS server's DNS settings are correct.
If Login Information in Register LDAP Server in System Settings (from the
Additional Functions screen) is set to 'Use (security auth.)' for the LDAP server,
the machine will not be able to determine the host name.
Check the DNS Server Settings in TCP/IP Settings in Network Settings in System
Settings (from the Additional Functions screen).
Cannot connect to the selected server. Check the settings.
The machine cannot connect to the specified IP address/port.
1. Check the Gateway Address setting in IP Address Settings in TCP/IP Settings
in Network Settings in System Settings (from the Additional Functions screen).
2. Check the Server Address and Port Number in Register LDAP Server in System
Settings (from the Additional Functions screen).
3. Check whether the LDAP server is operating normally.
4. If Login Information in Register LDAP Server in System Settings (from the
Additional Functions screen) is set to 'Use (security auth.)' for the LDAP server,
check whether UDP (User Datagram Protocol) packages are blocked by the filter.
Check the user name and password or check settings.
When setting Login Information for the LDAP server to 'Use' or 'Use (security
auth.)', the user name or password is incorrect.
Check the User and Password settings when Login Information in Register LDAP
Server in System Settings (from the Additional Functions screen) is set to 'Use' or
'Use (security auth.)'.
YY
Description
Remedial action
Summary of Contents for iR C3380 series
Page 1: ...Aug 29 2006 Service Manual iR C3380 2880 Series...
Page 2: ......
Page 6: ......
Page 23: ...Chapter 1 Introduction...
Page 24: ......
Page 26: ......
Page 52: ......
Page 53: ...Chapter 2 Installation...
Page 54: ......
Page 127: ...Chapter 3 Basic Operation...
Page 128: ......
Page 130: ......
Page 136: ......
Page 137: ...Chapter 4 Main Controller...
Page 138: ......
Page 160: ......
Page 161: ...Chapter 5 Original Exposure System...
Page 162: ......
Page 188: ...Chapter 5 5 24 F 5 68 4 Remove the original sensor 2 hook 1 F 5 69...
Page 189: ...Chapter 6 Laser Exposure...
Page 190: ......
Page 192: ......
Page 206: ......
Page 207: ...Chapter 7 Image Formation...
Page 208: ......
Page 256: ......
Page 257: ...Chapter 8 Pickup Feeding System...
Page 258: ......
Page 262: ......
Page 303: ...Chapter 9 Fixing System...
Page 304: ......
Page 306: ......
Page 321: ...Chapter 10 Externals and Controls...
Page 322: ......
Page 326: ......
Page 336: ...Chapter 10 10 10 F 10 10 2 Remove the check mark from SNMP Status Enabled...
Page 337: ...Chapter 10 10 11 F 10 11...
Page 359: ...Chapter 11 MEAP...
Page 360: ......
Page 362: ......
Page 401: ...Chapter 12 RDS...
Page 402: ......
Page 404: ......
Page 411: ...Chapter 13 Maintenance and Inspection...
Page 412: ......
Page 414: ......
Page 416: ...Chapter 13 13 2 F 13 1 8 9 1 2 3 3 5 6 7 10 11 12 13 14 4...
Page 421: ...Chapter 14 Standards and Adjustments...
Page 422: ......
Page 424: ......
Page 431: ...Chapter 15 Correcting Faulty Images...
Page 432: ......
Page 434: ......
Page 459: ...Chapter 16 Self Diagnosis...
Page 460: ......
Page 462: ......
Page 481: ...Chapter 17 Service Mode...
Page 482: ......
Page 484: ......
Page 571: ...Chapter 18 Upgrading...
Page 572: ......
Page 574: ......
Page 603: ...Chapter 19 Service Tools...
Page 604: ......
Page 606: ......
Page 609: ...Aug 29 2006...
Page 610: ......


