Chapter 10
10-2
Guide to Notations
large: large-size paper (longer than 364 mm in feed direction; count increased by 1).
small: small-size paper (364 mm in feed length or shorter).
total: all (C+P; count increased by 1).
duplex: duplexing (in auto duplexing; count increased by 1).
- The 3-digit number in the counter column indicates the setting of the following service mode item: COPIER >OPTION >USER > COUNTER1 to 6
- counters 2 through 6 may be changed using the following service mode item: COPIER>OPTION>USER.
*1: F14-3019/3011/3029/3012/3049/3014/3059/3015
*2: F14-3001
*3: F14-3031
*4: F14-3041/3060/3070/3044 /3048/3078
*5: F14-3061/3068
*6: F14-3091/3094
**: by default, not indicated; may be changed in service mode.
***: if '0' is set for the following: COPIER>OPTION>USER>CNT-SW.
****: if '1' is set for the following: COPIER>OPTION>USER>CNT-SW.
10.2.2 Timing of Increasing the Count
0013-8657
/ / / / iR C3380i / iR C3380 / iR C2880i / iR C2880
The machine increases the count depending on the selected mode (single-sided, double-sided), delivery location, and the type of accessory connected to it.
1. Single-Sided Print, 2nd Side of a Double-Sided Print
In the case of a single-sided print or the 2nd side of a double-sided print, the machine increase the count when the trailing edge of paper is discharged outside
the machine, as indicated by the output of the following sensor:
T-10-2
2. 1st Side of a Double-Sided Print
The machine increases the count when the duplexing paper absent sensor(PS10) goes on, assuming that the printing on the 1st side is over.
10.3 Fans
10.3.1 Overview
0013-8659
/ / / / iR C3380i / iR C3380 / iR C2880i / iR C2880
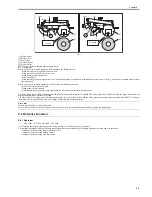
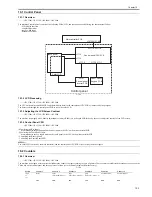
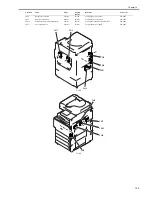
The machine is equipped with the following fans arranged as shown in the diagram:
T-10-3
100V
*1
****
total 2
copy
(full color + mono
color; 2)
total A
(full color + mono
color; 2)
copy
(black-and-white 2)
total A
(black-and-white 2)
not indicated**
102
231
148
222
133
000
120V
TW
*2
total 1
total
(black-and-white 1)
copy + print
(full color, large)
copy + print
(full color, small)
total
(mono color 1)
not indicated **
101
108
401
402
118
000
120V
UL
*3
total 1
total
(black-and-white 1)
copy
(full color + mono
color, large)
copy
(full color + mono
color, small)
print
(full color+ mono
color, large)
print
(full color + mono
color, small)
101
108
229
230
321
322
230V
*4
total 1
total
(black-and-white 1)
copy + print
(full color, large)
copy + print
(full color, small)
total
(mono color 1)
total 1
(duplex)
101
108
401
402
118
114
240V
CA*5
total 1
total
(black-and-white 1)
copy
(full color + mono
color, large)
copy
(full color + mono
color, small)
print
(full color + mono
color, large)
print
(full color + mono
color, small)
101
108
229
230
321
322
230V
AMS*6
total 1
total
(full color + mono
color, large)
total
(full color + mono
color, small)
total
(black-and-white,
large)
total
(black-and-white,
small)
scan
(total 1)
101
122
123
112
113
501
Condition
Delivery location
sensor
w/o finisher
to tray 1
No. 1 delivery sensor (PS27)
to tray 2
No. 2 delivery sensor (PS1A)
to tray 3
No. 3 delivery sensor (PS5A)
w/ finisher
delivery sensor of finisher
Notation
Name
Filter
2-speed
control
Remarks
Error code
FM1
Fixing exhaust fan (front)
absent
absent
Cooling the fixing unit.
805-0001
FM2
Fixing exhaust fan (rear)
absent
absent
Cooling the fixing unit.
805-0002
FM3
Front process unit fan
present
absent
Cooling the process unit.
807-0001
FM4
Power supply fan
absent
absent
Cooling the power supply.
804-0000
FM5
Controller fan
absent
absent
Cooling the controller.
FM6
Edge cooling fan (front)
absent
absent
Cooling the edge of the fixing unit.
840-0000
FM7
Edge cooling fan (rear)
absent
absent
Cooling the edge of the fixing unit.
840-0000
Model
Counter 1
Counter 2
Counter 3
Counter 4
Counter 5
Counter 6
Summary of Contents for iR C3380 series
Page 1: ...Aug 29 2006 Service Manual iR C3380 2880 Series...
Page 2: ......
Page 6: ......
Page 23: ...Chapter 1 Introduction...
Page 24: ......
Page 26: ......
Page 52: ......
Page 53: ...Chapter 2 Installation...
Page 54: ......
Page 127: ...Chapter 3 Basic Operation...
Page 128: ......
Page 130: ......
Page 136: ......
Page 137: ...Chapter 4 Main Controller...
Page 138: ......
Page 160: ......
Page 161: ...Chapter 5 Original Exposure System...
Page 162: ......
Page 188: ...Chapter 5 5 24 F 5 68 4 Remove the original sensor 2 hook 1 F 5 69...
Page 189: ...Chapter 6 Laser Exposure...
Page 190: ......
Page 192: ......
Page 206: ......
Page 207: ...Chapter 7 Image Formation...
Page 208: ......
Page 256: ......
Page 257: ...Chapter 8 Pickup Feeding System...
Page 258: ......
Page 262: ......
Page 303: ...Chapter 9 Fixing System...
Page 304: ......
Page 306: ......
Page 321: ...Chapter 10 Externals and Controls...
Page 322: ......
Page 326: ......
Page 336: ...Chapter 10 10 10 F 10 10 2 Remove the check mark from SNMP Status Enabled...
Page 337: ...Chapter 10 10 11 F 10 11...
Page 359: ...Chapter 11 MEAP...
Page 360: ......
Page 362: ......
Page 401: ...Chapter 12 RDS...
Page 402: ......
Page 404: ......
Page 411: ...Chapter 13 Maintenance and Inspection...
Page 412: ......
Page 414: ......
Page 416: ...Chapter 13 13 2 F 13 1 8 9 1 2 3 3 5 6 7 10 11 12 13 14 4...
Page 421: ...Chapter 14 Standards and Adjustments...
Page 422: ......
Page 424: ......
Page 431: ...Chapter 15 Correcting Faulty Images...
Page 432: ......
Page 434: ......
Page 459: ...Chapter 16 Self Diagnosis...
Page 460: ......
Page 462: ......
Page 481: ...Chapter 17 Service Mode...
Page 482: ......
Page 484: ......
Page 571: ...Chapter 18 Upgrading...
Page 572: ......
Page 574: ......
Page 603: ...Chapter 19 Service Tools...
Page 604: ......
Page 606: ......
Page 609: ...Aug 29 2006...
Page 610: ......


