Chapter 11
11-32
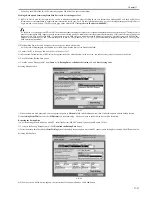
5) Reboot the main power and access the device with SMS and check that the MEAP applications are restored.
6) Restore non-MEAP backup data and settings that are saved before formatting the hard disk drive. The SDL user information is included in the backup data. You
do not have to restore it.
11.1.23 Replacing the Hard Disk Drive
0014-8089
/ / / / iR C3380i / iR C3380 / iR C2880i / iR C2880
If you must replace the hard disk drive because of a fault, all MEAP application files stored on it will also be lost, requiring you to re-install the applications and
their license files in addition to performing the normal work associated with the replacement of the hard disk.
Like other counter information, MEAP counter information will remain after replacement. Reinstallation of MEAP applications calls for special license files de-
signed to continue with the current counter readings, thus enabling the use of the applications until the date of their expiration. These special licenses are service
tools, and are not offered to general users.
If you cannot make a backup of the license files as hard disk suffers a fault, contact the support staff of the regional headquarters of Canon telling the device serial
number and the names of MEAP applications installed to the device to obtain the necessary special license files.
In the support departments of regional headquarters of Canon, all license files of the applications that have been issued are filed according to device serial numbers,
enabling you to obtain a series of license files through a single screen as long as you can identify the serial number of the device in question.
The following shows the steps to follow after you have obtained a special license from the support staff of the regional headquarters of Canon.
1) Copy the set of special license files on the PC you are using for service work.
Register the following with the Service Support Tool (SST): system file, language file, remote UI file, hard disk drive format file, MEAP contents file. (Be sure
to pay attention to the version compatibility of individual files.)
2) Have the new hard disk drive at hand and replace it on site.
While holding down the 2 and 8 keys at the same time, turn on the main power so that the machine will start up in download mode. The IP address 172.16.1.100
will automatically be used, which enables you to download files in high speed through a network.)
3) Using the SST, format the new HDD, and install the System, MEAP Contents, Language, and Remote UI files.
4) When the device has started normally, obtain the jar files of the MEAP applications from the user, and install them using the license files of the applications in
the same way as you would when installing them for the first time.
5) As necessary, make login service selections and import user information.
Memo:
If you format the hard disk without uninstalling MEAP applications, always reinstall the applications previously installed. Unless reinstalling them, lots for the
MEAP counters the applications use will not be released. The message "The number of applications that can be installed has exceeded the limit. Try to install
this application after uninstalling other applications." may appear and the device does not accept to install new application. To install new applications, once
reinstall the applications installed before formatting and uninstall unnecessary applications.
11.1.24 MEAP Safe Mode
0014-8090
/ / / / iR C3380i / iR C3380 / iR C2880i / iR C2880
Use safe mode if you need to start up the system without worrying about extra applications. It will start up only those system software files (including SMS) that
normally start up as default files while preventing MEAP applications and the like from starting up.
When you have made changes and turned off and then on the device, the control panel will indicate 'MPSF' in its lower right corner. The MEAP applications that
may have been active before you shut down the equipment will not start up on their own. Make use of safe mode when restoring the system software as when MEAP
applications or services cause a fault as the result of a conflict or wrong sequence of registration/use. You can access to SMS in this condition so that you can take
necessary measures, for example, you can stop application that may cause the trouble.
If default authentication has been selected, the mode of authentication remains valid; otherwise, the message "The login service must be set again with SMS" ap-
pears. Change the login service as necessary.
Starting in Safe Mode
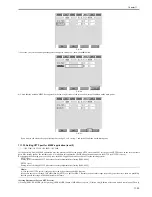
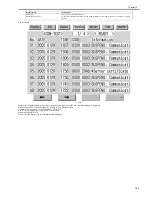
1) Start the device in service mode: click
Ad Func
key, press 2 and 8 buttons at the same time, and then click
Ad Func
key once again so that the service mode
screen appears.
2) Press
COPIER
button.
3) Press
OPTION
button.
4) Press
USER.
5) Press the right-arrow button.
6) Press
MEAPSAF
E.
Summary of Contents for iR C3380 series
Page 1: ...Aug 29 2006 Service Manual iR C3380 2880 Series...
Page 2: ......
Page 6: ......
Page 23: ...Chapter 1 Introduction...
Page 24: ......
Page 26: ......
Page 52: ......
Page 53: ...Chapter 2 Installation...
Page 54: ......
Page 127: ...Chapter 3 Basic Operation...
Page 128: ......
Page 130: ......
Page 136: ......
Page 137: ...Chapter 4 Main Controller...
Page 138: ......
Page 160: ......
Page 161: ...Chapter 5 Original Exposure System...
Page 162: ......
Page 188: ...Chapter 5 5 24 F 5 68 4 Remove the original sensor 2 hook 1 F 5 69...
Page 189: ...Chapter 6 Laser Exposure...
Page 190: ......
Page 192: ......
Page 206: ......
Page 207: ...Chapter 7 Image Formation...
Page 208: ......
Page 256: ......
Page 257: ...Chapter 8 Pickup Feeding System...
Page 258: ......
Page 262: ......
Page 303: ...Chapter 9 Fixing System...
Page 304: ......
Page 306: ......
Page 321: ...Chapter 10 Externals and Controls...
Page 322: ......
Page 326: ......
Page 336: ...Chapter 10 10 10 F 10 10 2 Remove the check mark from SNMP Status Enabled...
Page 337: ...Chapter 10 10 11 F 10 11...
Page 359: ...Chapter 11 MEAP...
Page 360: ......
Page 362: ......
Page 401: ...Chapter 12 RDS...
Page 402: ......
Page 404: ......
Page 411: ...Chapter 13 Maintenance and Inspection...
Page 412: ......
Page 414: ......
Page 416: ...Chapter 13 13 2 F 13 1 8 9 1 2 3 3 5 6 7 10 11 12 13 14 4...
Page 421: ...Chapter 14 Standards and Adjustments...
Page 422: ......
Page 424: ......
Page 431: ...Chapter 15 Correcting Faulty Images...
Page 432: ......
Page 434: ......
Page 459: ...Chapter 16 Self Diagnosis...
Page 460: ......
Page 462: ......
Page 481: ...Chapter 17 Service Mode...
Page 482: ......
Page 484: ......
Page 571: ...Chapter 18 Upgrading...
Page 572: ......
Page 574: ......
Page 603: ...Chapter 19 Service Tools...
Page 604: ......
Page 606: ......
Page 609: ...Aug 29 2006...
Page 610: ......


