1
In the application, create an original that takes up the entire space of the paper size.
Note
•
If you can specify the margin, as in Microsoft Word, set the margin at 0 mm. For instructions on specifying the
margin, refer to the software documentation.
2
Choose
in the application menu.
3
Select the printer in the dialog box, and then display the printer driver dialog box.
Driver Dialog Box from Applications .")
4
Make sure the
Main
sheet is displayed.
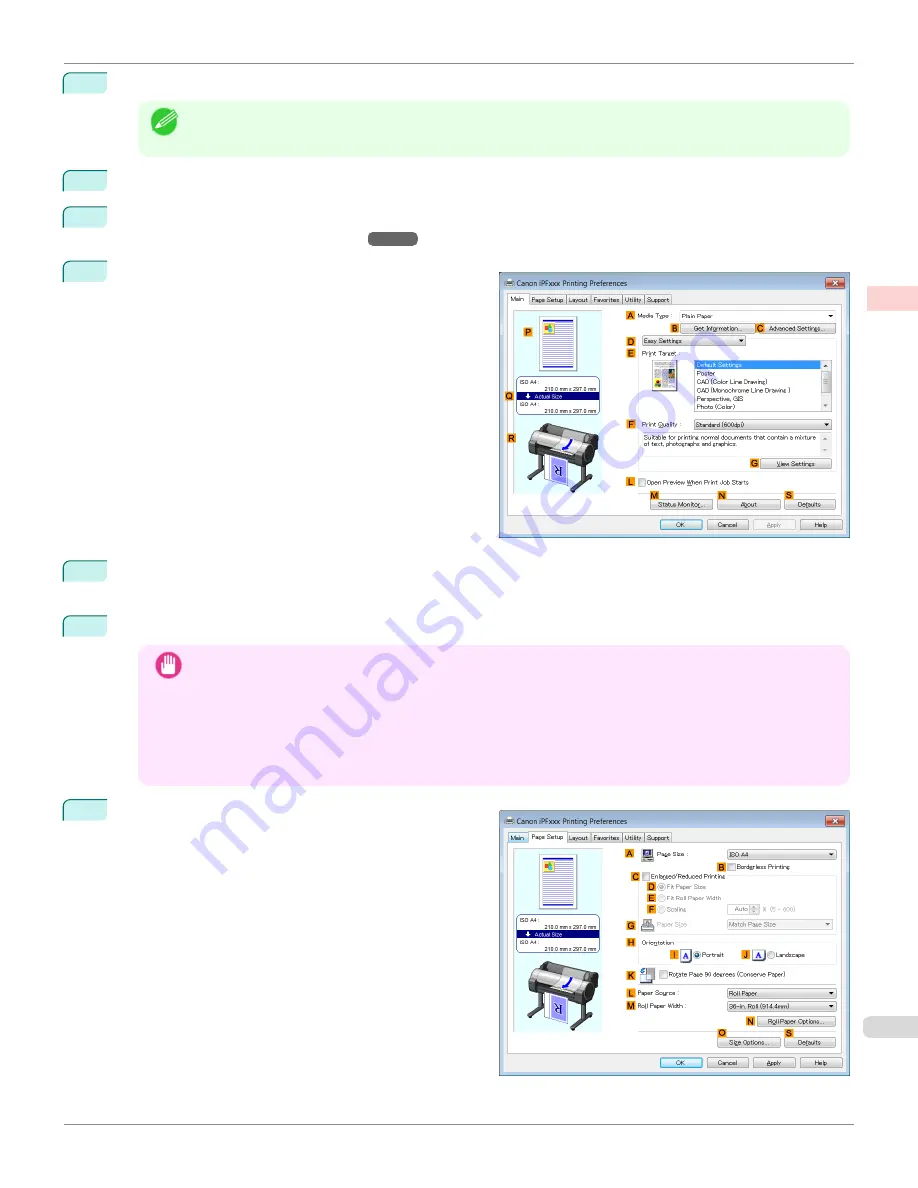
5
In the
A
Media Type
list, select the type of paper that is loaded. In this case, click
Canon Heavyweight Coat-
ed Paper
.
6
Select the print target in the
E
Print Target
list.
Important
•
When you are using paper that takes longer for ink to adhere for borderless printing and the Cutter Unit
touches printing surfaces that are not dry yet, it may damage the paper or the edge of the document that is
cut, depending on frequency of use. In this kind of situation, change the ink drying time using the following
procedure.
•
Click
Advanced Settings
in
Media Type
.
•
Select an ink drying time in the list for the
Between Pages
setting of
Drying Time
.
7
Click the
Page Setup
tab to display the
Page Setup
sheet.
iPF780
Borderless Printing by Resizing Originals to Match the Paper Size (Windows)
Enhanced Printing Options
Borderless Printing
89
Summary of Contents for image Prograf iPF780 Series
Page 14: ...14 ...
Page 30: ...iPF780 User s Guide 30 ...
Page 156: ...iPF780 User s Guide 156 ...
Page 358: ...iPF780 User s Guide 358 ...
Page 470: ...iPF780 User s Guide 470 ...
Page 480: ...iPF780 User s Guide 480 ...
Page 520: ...iPF780 User s Guide 520 ...
Page 574: ...iPF780 User s Guide 574 ...
Page 626: ...iPF780 User s Guide 626 ...


