


2. Installation Manual
- 80 -
(14) Backing Up When Installing
1) Purpose
In case of re-installing the CXDI application, the necessary files ex) the exposure
position and other parameters must be backed up so that can be restored at the status of
first installation.
2) Necessary
items
2-1) Removable drive such as MO drive or external HDD that can connect to USB 2.0
3) Notes
3-1) Before performing backup procedure, delete any “BodyPart” and image data exposed
for tests.
Deleting image data: Refer to the “Deleting Data” item.
Deleting “BodyPart”: Refer to the CXDI Series Operation Manual.
3-2) Backup should be performed immediately before handing over the product to the
customer only for new installations.
4) Connections
4-1) Check that all equipment is turned off.
4-2) Connect the keyboard and mouse removal drive to the control PC.
5) Settings
5-1) Turn on the operation unit power and then the control PC power.
5-2) The CXDI application starts. Press the [Alt] + [Tab] keys to switch the program to the
Command Prompt screen.
5-3) The message “Welcome to Canon CXDI” appears. Input [8] and press the [Enter] key.
(Select “8 Exit”.)
5-4) The Windows XP desktop screen appears.
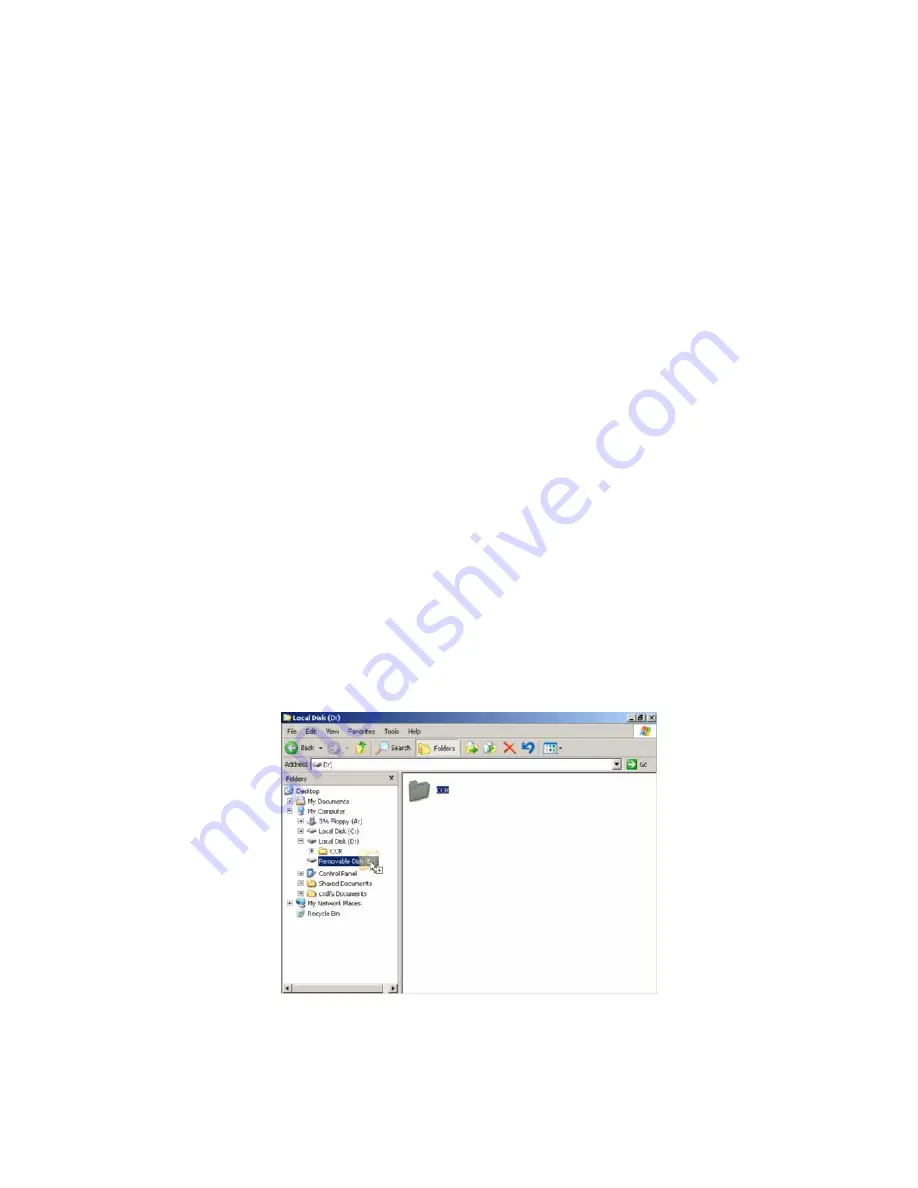
5-5) Right click on My Computer on the Desktop screen, and select Explorer from Menu.
5-6) Explorer appears. Copy the CCR folder onto Removable Drive.
Summary of Contents for CXDI-50G
Page 20: ...2 Installation Manual 3 CXDI 50G Power Box assemble package 4 Grid optional 6 ...
Page 32: ...2 Installation Manual When normal imaging When timeout due to RX_REQ not negating 18 ...
Page 58: ...2 Installation Manual 44 Input parameters Fig 3 ...
Page 104: ...2 Installation Manual 90 2 Power Box Unit mm Mass 4 2Kg ...


