


2. Installation Manual
- 38 -
2) Procedure
2-1) Start up the CXDI system.
2-2) After the exposure screen appears on the operation unit, use the keyboard to enter
Debug mode. (Use [Alt] + [Tab].)
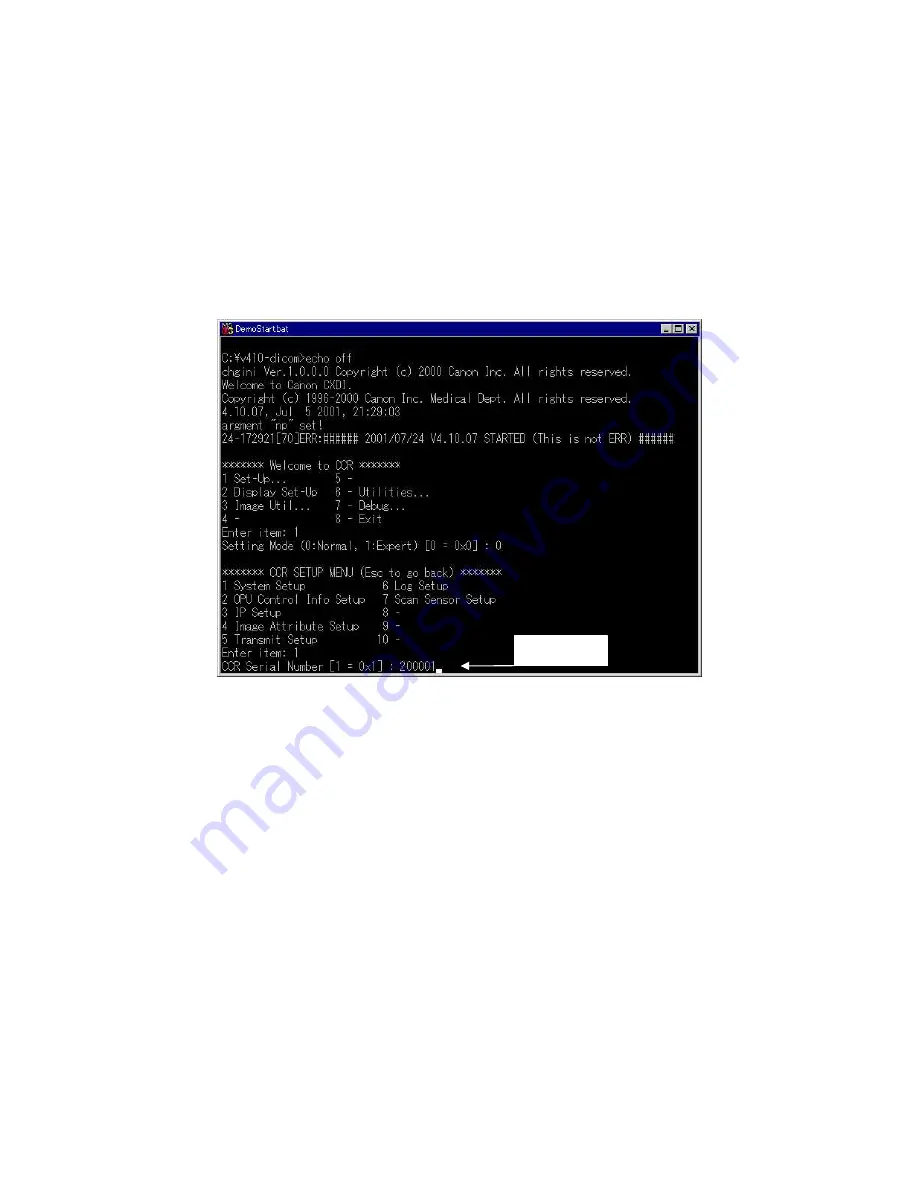
2-3) “Welcome to CCR” screen appears. Select the command “1. Set-Up…”
2-4) The “Setting Mode (0: Normal, 1: Expert) [0=0
×
0]:” is prompted. Select “0: Normal”
2-5) “CCR SETUP MENU” appears. Select the command ”1. System Setup”.
2-6) “CCR Serial Number [0=0
×
0] : ” appears. Enter the six-digit number indicated on the
naming label of the control PC unit. Press [Enter] key until “CCR SETUP MENU”
appears. [Fig 1]
Enter here
[Fig 1]
2-7) Press [Esc] key after “CCR SETUP MENU” appears to return to “Welcome to CCR”
screen.
2-8) Select “8-Exit”to exit CXDI application software.
2-9) This returns you to the Windows NT desktop. Restart the CXDI application, and
perform the procedure from steps 2) to 5). Check that the serial number for the “CCR
Serial Number” item was entered correctly in step 6).
* Restart the CXDI application. The screen displays the following message:
Alert System Info Error (-6) A/D board info is updated. Click “OK”
Summary of Contents for CXDI-50G
Page 20: ...2 Installation Manual 3 CXDI 50G Power Box assemble package 4 Grid optional 6 ...
Page 32: ...2 Installation Manual When normal imaging When timeout due to RX_REQ not negating 18 ...
Page 58: ...2 Installation Manual 44 Input parameters Fig 3 ...
Page 104: ...2 Installation Manual 90 2 Power Box Unit mm Mass 4 2Kg ...


