136
C
HAPTER
6: U
SING
RF P
LANNING
5
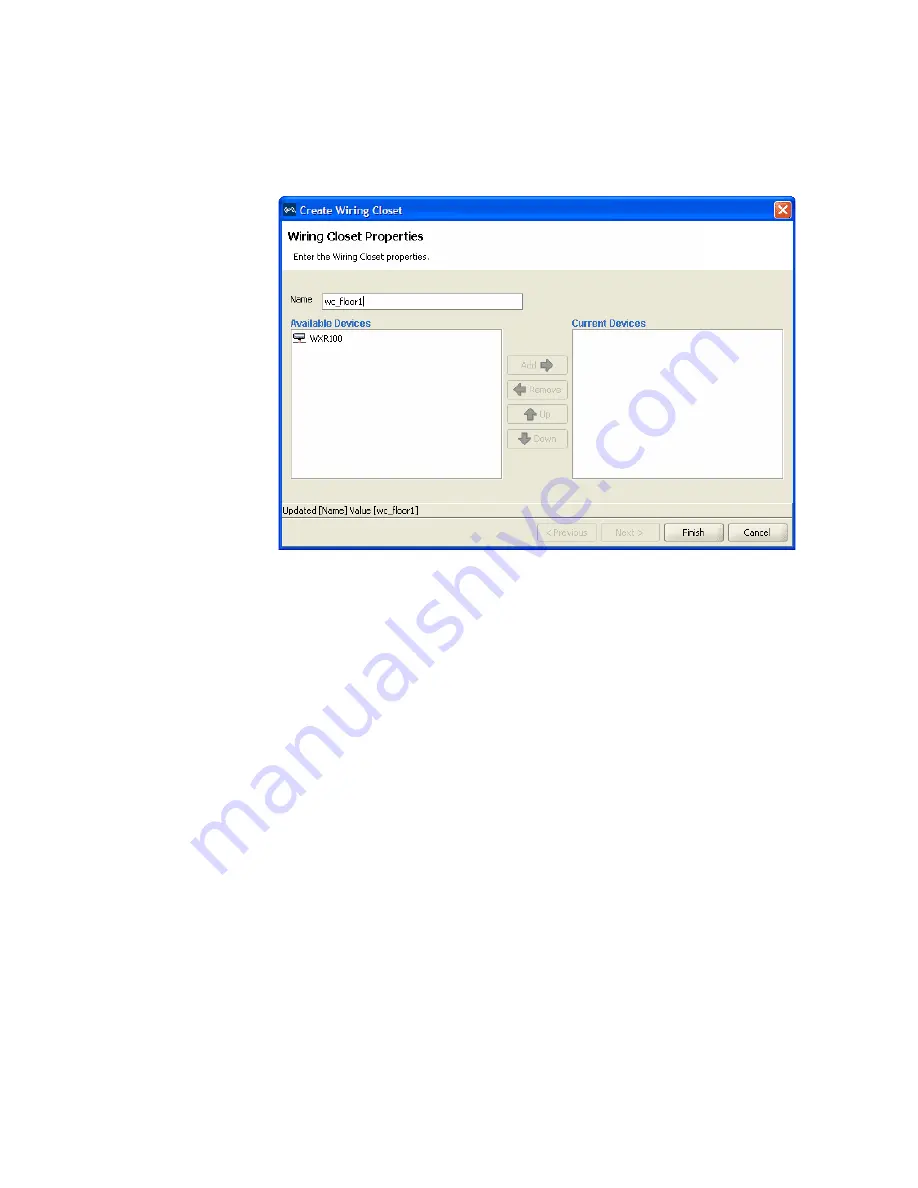
In the Name box, type the name of the wiring closet (1 to 60 characters,
with no tabs).
6
Click a WX switch in the Available Devices box, then click the
Add
button
to move it to the Current Devices box.
7
Click
Finish
to save the changes. The wiring closet is displayed on your
floor plan.
Create Coverage
Areas
The RF coverage area is the geographical area in your network you define
RF coverage. As you configure the RF coverage area, consider the amount
of bandwidth required for the area, as well as the number of users. You
define the coverage area graphically on your floor plan using the
coverage area drawing tool. Almost all shapes for a coverage area are
possible. However, the following restrictions apply:
A shape where two sides intersect each other is not permitted.
A shared coverage area where there is a partial intersection is not
supported.
3WXM supports the sharing of coverage areas if one area is completely
within a larger area. For example, you might want to provide 802.11a
and 802.11b coverage in a conference room that is part of a larger
coverage area only providing 802.11a coverage. MAPs are shared only in
the overlapped area.
Summary of Contents for OfficeConnect WX2200
Page 8: ......
Page 28: ...28 CHAPTER 1 GETTING STARTED...
Page 50: ...50 CHAPTER 2 PLANNING AND MANAGING YOUR WIRELESS NETWORK WITH 3WXM...
Page 88: ...88 CHAPTER 3 CONFIGURING WIRELESS SERVICES 9 Click Next Select WPA and deselect Static WEP...
Page 132: ...132 CHAPTER 6 USING RF PLANNING 5 When you are satisfied with the results click Finish...
Page 154: ...154 CHAPTER 6 USING RF PLANNING...
Page 178: ...178 CHAPTER 7 MANAGING AND MONITORING YOUR NETWORK...
Page 198: ...198 APPENDIX A OBTAINING SUPPORT FOR YOUR 3COM PRODUCTS...
Page 204: ...204 INDEX...


