background image


VC4000 Manual 

In

tr

o

d

u

cti
o

n


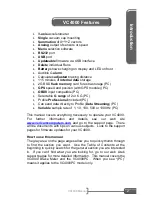
3-axis

 accelerometer 


Single

 vacuum cup mounting 


Summation

 of X+Y+Z vectors 


Analog

 output of sensors or speed 


Menu

 selection software 


RS232

 port 


USB

 port 


Updateable

 firmware via USB interface 


Delete

 individual Runs 


Battery

 shows charging on display and LED on front 


Audible G 

alarm


Calculates 

adjusted

 braking distance 


115 minutes of 

internal data

 storage 


2GB SD 

flash memory

 card for extra storage (PC) 


GPS

 speed and position (with GPS module) (PC) 


OBDII

 input compatible (PC) 


Selectable 

G range

 of 2 or 6 G (PC) 


Profile 

Professional

 included (PC) 


Can send data directly to Profile (

Data Streaming

) (PC) 


Variable

 sample rate of  1, 10, 100, 500 or 1000Hz (PC) 

 
This  manual  covers  everything  necessary  to  operate  your  VC4000.  
For 

further 

information 

and 

details, 

see 

our 

web 

site 

www.vericomcomputers.com


and  go  to  the  support  page.    There 

will be documents with tips on various subjects.  Look to the support 
pages for firmware updates for your VC4000. 
 

How to use this manual 

The gray area on the page edges allow you to quickly thumb through 
to  find  the  section  you  want.    Use  the  Table  of  Contents  at  the 
beginning to quickly search for the general section you are interested 
in.    If  you  can’t  find  what  you  are  looking  for,  go  to  our  web  site’s 
support pages for more detailed information.  This manual covers the 
VC4000  Brake  Meter  and  the  VC4000PC.    When  you  see  “(PC)” 
means it applies to the VC4000PC model only. 

VC4000 Features 


Содержание VC4000

Страница 1: ......

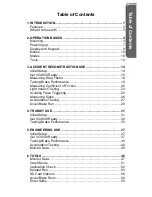
Страница 2: ...ce 19 Measuring Coefficient of Friction 20 Light Impact Testing 23 Avoiding False Triggering 25 Measuring Slope 26 Acceleration Testing 27 Accel Brake Run 29 4 TRANSIT USE 31 Initial Setup 31 Get VC4000 Ready 32 Testing Brake Performance 35 5 ENGINEERING USE 37 Initial Setup 37 Get VC4000 Ready 37 Testing Brake Performance 40 Acceleration Testing 42 Monitor Data 45 6 TOOLS 46 Monitor Data 47 Crash...

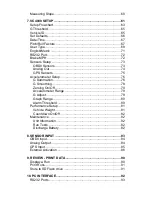
Страница 3: ...erometer Setup 76 G Summation 76 G Smoothing 78 Zeroing On Off 79 Accelerometer Range 79 G Adjust 79 Graph Range 80 Alarm Threshold 80 Performance Setup 81 Vehicle Weight 81 Countdown On Off 82 Maintenance 82 Unit Information 82 Run Tests 82 Discharge Battery 82 8 SENSOR INPUT 83 OBDII Input 84 Analog Output 84 GPS Input 85 External Activation 86 9 REVIEW PRINT DATA 90 Display a Run 90 Print Runs ...

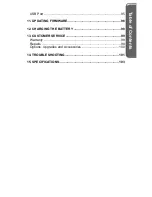
Страница 4: ...le of Contents USB Port 95 11 UPDATING FIRMWARE 96 12 CHARGING THE BATTERY 98 13 CUSTOMER SERVICE 99 Warranty 99 Repairs 99 Options Upgrades and Accessories 100 14 TROUBLESHOOTING 101 15 SPECIFICATIONS 103 ...

Страница 5: ...en designed for ease of use and simplicity of operation for quick and easy results yet has advanced features for doing much more The unit is preprogrammed with standard defaults so that it is ready to operate immediately The new VC4000 measures X Y and Z axis acceleration OBDII and GPS The more acquainted you become with the VC4000 the more applications you will discover D ...

Страница 6: ...ming PC Variable sample rate of 1 10 100 500 or 1000Hz PC This manual covers everything necessary to operate your VC4000 For further information and details see our web site www vericomcomputers com and go to the support page There will be documents with tips on various subjects Look to the support pages for firmware updates for your VC4000 How to use this manual The gray area on the page edges al...

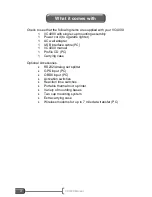
Страница 7: ...l adapter 1 USB interface cable PC 1 VC4000 manual 1 Profile CD PC 1 Carrying case Optional Accessories RS232 Analog out splitter GPS input PC OBDII input PC Activation switches Reaction time switches Portable thermal micro printer Variety of mounting bases Two cup mounting system Extra carrying case Wireless modems for up to 7 mile data transfer PC What it comes with ...

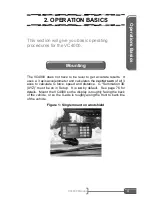
Страница 8: ... uses a 3 axis accelerometer and calculates the vector sum of all 3 axes to calculate G force speed and distance G Summation 3D XYZ must be on in Setup It is on by default See page 76 for details Mount the VC4000 so the display is roughly facing the back of the vehicle or so the X axis is roughly along the front to back line of the vehicle Figure 1 Single mount on windshield Mounting ...

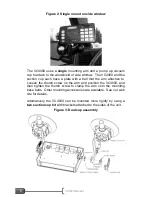
Страница 9: ...ate with a ball that the arm attaches to Loosen the thumb screw on the arm and position the VC4000 and then tighten the thumb screw to clamp the arm onto the mounting base balls Other mounting accessories are available See our web site for details Alternatively the VC4000 can be mounted more rigidly by using a two suction cup kit with brackets attached to the sides of the unit Figure 3 Dual cup as...

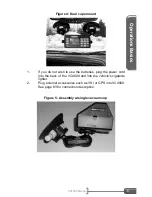
Страница 10: ...f you do not wish to use the batteries plug the power cord into the back of the VC4000 and into the vehicle s cigarette lighter 2 Plug external accessories such as VSI or GPS into VC4000 See page 83 for connection description Figure 5 Assembly w single vacuum cup ...

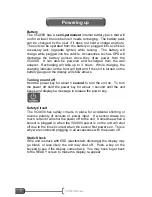
Страница 11: ...l show arrows Turning on and off Hold the power key for about 1 second to turn the unit on To turn the power off hold the power key for about 1 second until the unit beeps and displays a message to release the power key Safety Circuit The VC4000 has safety circuits in place for accidental shorting or reverse polarity of sensors or power input If a sensor draws too much current it will shut the pow...

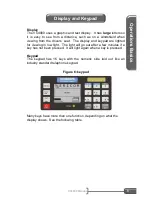
Страница 12: ... display and keypad are lighted for viewing in low light The light will go out after a few minutes if a key has not been pressed It will light again when a key is pressed Keypad The keypad has 16 keys with the numeric side laid out like an industry standard telephone keypad Figure 6 keypad Many keys have more than one function depending on what the display shows See the following table Display and...

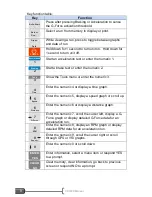
Страница 13: ...ter the numeric 3 Time 4 Enter the numeric 4 or display a time graph Speed 5 Enter the numeric 5 display a speed graph or scroll up Distance 6 Enter the numeric 6 or display a distance graph G Force 7 Enter the numeric 7 scroll the cursor left display a G Force graph or display detailed G Force data for an acceleration run RPM 8 Enter the numeric 8 display an RPM graph or display detailed RPM data...

Страница 14: ...Braking key while at a complete stop If the Braking key was pressed while reviewing data from a previous test or if the zeroing setting was turned off it s not necessary to come to a complete stop before pressing the Braking key The VC4000 will use the zero reference from the previous test or if zeroing was turned off it will use the zero reference established at the factory See page 79 in setup f...

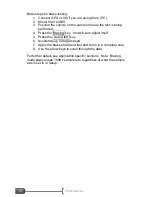
Страница 15: ...ormed 4 Press the Braking key Unit will zero adjust itself 5 Press the Auto Start key 6 Accelerate up to target speed 7 Apply the brakes hard and fast and come to a complete stop 8 Use the arrow keys to scroll through the data For further details see application specific sections Note Braking mode always uses 100Hz sample rate regardless of what the sample rate is set to in Setup ...

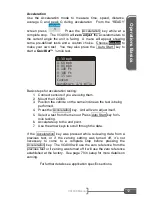
Страница 16: ...n the vehicle on the same incline as the test is being performed 4 Press the Acceleration key Unit will zero adjust itself 5 Select a test from the menu or Press Auto Start key for mile testing 6 Accelerate up to the end point 7 Use the arrow keys to scroll through the data If the Acceleration key was pressed while reviewing data from a previous test or if the zeroing setting was turned off it s n...

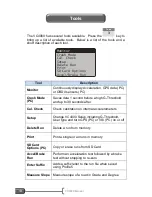
Страница 17: ...bration on internal accelerometers Setup Change VC4000 Setup including G Threshold User type and turn GPS PC or VSI PC on or off Delete Run Delete a run from memory Print Print a single or all runs in memory SD Card Options PC Copy or erase runs from SD Card Accel Brake Run Perform an acceleration test followed by a brake test without stopping to re zero Enter Suffix Adds a suffix letter to the ru...

Страница 18: ...s the Tools key 2 Scroll to Setup and press ENTER YES 3 Scroll down to User Type and press ENTER YES 4 Scroll up to Accident Reconst and press ENTER YES 5 Press CLEAR NO to get back to the READY screen Or use Profile to change the setup in the VC4000 from your PC 1 Start the Profile program 2 Connect the VC4000 to your computer 3 Turn on the VC4000 4 In Profile Click on the VC4000 Setup icon VC400...

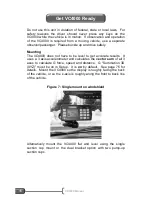
Страница 19: ... be level to get accurate results It uses a 3 axis accelerometer and calculates the vector sum of all 3 axes to calculate G force speed and distance G Summation 3D XYZ must be on in Setup It is on by default See page 76 for details Mount the VC4000 so the display is roughly facing the back of the vehicle or so the x axis is roughly along the front to back line of the vehicle Figure 7 Single mount ...

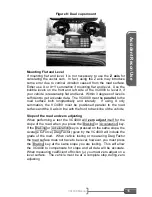
Страница 20: ...ion the VC4000 must be positioned parallel to the road surface and the X axis in line with the front to back line of the vehicle Slope of the road and zero adjusting When performing a test the VC4000 will zero adjust itself for the slope of the road when you press the Braking or Acceleration key If the Braking or Acceleration key is pressed on the same slope the Average G Force Drag Factor given b...

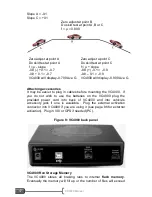
Страница 21: ...sories It may be easier to plug in cables before mounting the VC4000 If you do not wish to use the batteries on the VC4000 plug the provided power cord into back of VC4000 and into vehicle s accessory jack if one is available Plug the external activation connector into VC4000 if you are using it see page 86 for external activation Plug in VSI or GPS if needed PC Figure 9 VC4000 back panel VC4000 R...

Страница 22: ...card on which to store run data To transfer runs onto the SD flash memory card follow these steps 1 From the READY screen press the Tools key 2 Scroll to SD Card Options and press ENTER YES 3 Select Copy All Runs and press ENTER YES 4 Press CLEAR NO twice to get back to the READY screen All runs in the VC4000PC memory will be copied onto the SD card The runs will remain in the VC4000PC memory unti...

Страница 23: ...e the car to the desired initial braking speed After reaching the desired initial braking speed hit the brakes hard and fast applying maximum brake pedal pressure until the vehicle comes to a complete stop 7 If you wish to do another skid test on the same slope in the same direction do not press the CLEAR NO key and the VC4000 will retain the calibration for that grade Press the Braking key and re...

Страница 24: ...for vehicles equipment with ABS 5 Press the Auto Start key The VC4000 will display Auto Start Ready and the current G reading 6 Accelerate the car to the desired initial braking speed After reaching the desired initial braking speed hit the brakes hard and fast applying maximum brake pedal pressure until the vehicle comes to a complete stop 7 If you wish to do another skid test on the same slope i...

Страница 25: ...e Auto Start key The VC4000 will display Auto Start Ready and the current G reading 6 Accelerate the car to the desired initial braking speed After reaching the desired initial braking speed hit the brakes hard and fast applying maximum brake pedal pressure until the vehicle comes to a complete stop 7 If you wish to do another skid test on the same slope in the same direction do not press the CLEA...

Страница 26: ...o the G Threshold Shows only if externally triggered R T Dist The distance traveled during the reaction time Shows only if externally triggered G x x The instantaneous G Force at the corresponding time Graphs Press the Graph Data key to display graphs of the run Press Speed Distance G Force or Sensor Press the same key again to scroll through multiple graphs such as G Force or Sensor The VC4000 s ...

Страница 27: ...ENTER YES 3 Scroll down to Accelerometer and press ENTER YES 4 Scroll to Accel Range and press ENTER YES 5 Choose 6G and press ENTER YES 6 Scroll to Sample Rate and press ENTER YES 7 Choose 500 or 1000Hz and press ENTER YES 8 Press CLEAR NO twice to get back to the READY screen Or use Profile to change the accelerometer range Brake Mode Crash Mode Acceleration Mode or Monitor may be used for these...

Страница 28: ... to the desired initial speed After reaching that speed trigger the VC4000 using the external trigger or it will activate when it impacts an object and generates 4xG Threshold or more Using Monitor 1 Drive to the area where you want to take a measurement or close where the slope is the same 2 To power on press the POWER key and hold for 1 second until the unit beeps 3 From the READY screen press t...

Страница 29: ...tart key The VC4000PC will display Auto Start Ready and the current G reading 5 Accelerate the car to the desired initial braking speed After reaching the desired initial braking speed trigger the VC4000PC using the external trigger or tap the brakes hard enough to break the G Threshold 0 200 default Then impact the object NOTE Be sure to set the G Range back to 2G for other types of testing so sp...

Страница 30: ...uilt in Measure Slope tool to measure the slope in Percent Grade and in Degrees Measure the slope 1 Drive to the slope you want to measure facing directly uphill 2 Press the Tools key Scroll to the bottom of the list Measure Slope and press ENTER YES 3 With the vehicle at a complete stop press the Auto Start key The VC4000 will zero adjust the accelerometers then show Position Downhill 4 Now turn ...

Страница 31: ... hold for 1 second until the unit beeps 3 From the READY screen press the 1 Acceleration key with the vehicle at a complete stop The VC4000 will zero adjust the accelerometers show the available record time in seconds display the run number being saved and then display 4 Choose one of the presets shown or choose Custom For Custom scroll down to Distance and press ENTER YES Type in the distance in ...

Страница 32: ...celerometers show the available record time in seconds display the run number being saved and then display 4 Choose one of the presets shown or choose Custom For Custom scroll down to Speed and press ENTER YES 5 Type in the START FROM speed in mph or kph and press ENTER YES Then type in the UP TO speed and press ENTER YES 6 The VC4000 will display Auto Start Ready and the current G reading 7 Accel...

Страница 33: ... Force The Acceleration Mode operating limits are Imperial Metric Maximum time 99 9 seconds 99 9 seconds Maximum speed 255 MPH 511 KPH Maximum distance 9000 feet 1800 meters Maximum acceleration 2G 2G The VC4000 can be used to measure an acceleration test then a brake test from one run This is useful for measuring the acceleration to a point then getting a drag factor without having to come to a s...

Страница 34: ... ENTER YES 5 The VC4000 will zero adjust the accelerometers and applicable sensors show the available record time in seconds and display the run number being saved 6 Then it will display Auto Start Ready and the current G reading 7 Accelerate the vehicle until the VC4000 beeps indicating it has reached the preset 8 Now apply the brakes to perform a brake test The unit will beep 5 short times when ...

Страница 35: ...y 2 Scroll to Setup and press ENTER YES 3 Scroll down to User Type and press ENTER YES 4 Scroll up to Transit and press ENTER YES 5 Press CLEAR NO to get back to the READY screen Or use Profile to change the setup in the VC4000 from your PC 1 Start the Profile program 2 Connect the VC4000 to your computer 3 Turn on the VC4000 4 In Profile Click on the VC4000 Setup icon or Tools VC4000 Setup 5 Prof...

Страница 36: ...ve to be level to get accurate results It uses a 3 axis accelerometer and calculates the vector sum of all 3 axis to calculate G force speed and distance G Summation 3D XYZ must be on in Setup It is on by default See page 76 for details Mount the VC4000 so the display is roughly facing the back of the vehicle or so the x axis is roughly along the front to back line of the vehicle Figure 10 Single ...

Страница 37: ...ug provided power cord into back of VC4000 and into vehicle s accessory jack if one is available Plug external activation connector into VC4000 if you are using it see page 86 for external activation Plug in VSI or GPS if necessary PC Figure 12 VC4000 back panel PC Turn on external sensors if using them Each GPS or VSI sensor must be turned on for the VC4000PC to record data from it ...

Страница 38: ... exceed 65 535 When this happens you will have to clear memory The display will prompt you to clear memory after the error message appears You should clear run data memory periodically to ensure data storage is successful To clear memory press the CLEAR NO key from the READY screen and follow the prompts Monitor and acceleration runs can store to internal flash memory or use Data Streaming PC Data...

Страница 39: ...raking key with the vehicle at a complete stop The VC4000 will zero adjust the accelerometers and applicable sensors show the available record time in seconds display the run number being saved and then display 4 Position the vehicle before the test area allowing enough distance to accelerate to your desired target speed As an example back up approximately 300 feet A typical braking test speed on ...

Страница 40: ...btained from activation to stop and the time where it occurred 1 st PkGx The maximum longitudinal G Force obtained from activation to 0 75 seconds and the time where it occurred This is useful to determine if a braking systems mechanical reaction time is sufficient Reaction Time R T The time from external trigger to the G Threshold Shows only if externally triggered R T Dist The distance traveled ...

Страница 41: ... never press any keys on the VC4000 while the vehicle is in motion If observation and operation of the VC4000 is required from a moving vehicle use a separate observer passenger Please buckle up and drive safely Mounting The VC4000 does not have to be level to get accurate results It uses a 3 axis accelerometer and calculates the vector sum of all 3 axis to calculate G force speed and distance G S...

Страница 42: ...cups Figure 14 Dual cups mount Attaching accessories It may be easier to plug in cables before mounting the VC4000 If you do not wish to use the batteries on the VC4000 plug provided power cord into back of VC4000 and into vehicle s accessory jack if one is available Plug external activation connector into VC4000 if you are using it see page 86 for external activation Plug in VSI or GPS if necessa...

Страница 43: ...gram 2 Connect the VC4000 to your computer 3 Turn on the VC4000 4 In Profile Click on the VC4000 Setup icon or Tools VC4000 Setup 5 Profile will connect and retrieve the VC4000 setup 6 Turn on the sensors using the tabs for each section 7 Click the Send Setup key VC4000 Run Storage Memory The VC4000 stores all braking runs to internal flash memory Eventually the memory will fill up or the number o...

Страница 44: ...s ENTER YES 4 Press CLEAR NO twice to get back to the READY screen All runs in the VC4000PC memory will be copied onto the SD card The runs will remain in the VC4000PC memory until you delete them A typical 1GB SD card will hold over 200 000 runs When testing the performance of a vehicles braking system perform the tests on a flat and level surface An optional brake pedal activation switch is avai...

Страница 45: ...n the VC4000 was activated see threshold page 65 Distance Distance the vehicle traversed during the braking time Distance AdjD Stopping distance assuming the vehicle was traveling at exactly the Brake MPH usually 20 when the brakes were applied Avg Gx Average longitudinal G force from when the VC4000 was activated to stop Avg Gy Average lateral G force from when the VC4000 was activated to stop Pe...

Страница 46: ...est using the zero reference established the last time the Braking key was pressed from the READY screen The VC4000 can be used to measure to a preset Time Speed or Distance QuickSet is Vericom s term for one button programming for the mile It assumes a mile acceleration run so programming to 1320 feet is not necessary The VC4000 records data at 7 other distance points and 2 speeds called Waypoint...

Страница 47: ...e VC4000 beeps indicating it has reached the preset distance 8 For a custom test if you wish to do another test on the same slope in the same direction do not press the CLEAR NO key and the VC4000 will retain the calibration for that grade and use the same custom distance Press the Acceleration key select Repeat Last Run and repeat step 6 The VC4000 will record any Waypoint reached using any of th...

Страница 48: ...the same direction do not press the CLEAR NO key and the VC4000 will retain the calibration for that grade and use the same custom speed Press the Acceleration key select Repeat Last Run and repeat step 6 Information available after an acceleration test using User Type General After an acceleration run bring the vehicle to a complete stop The ending Time Speed Distance instantaneous Gx and Average...

Страница 49: ...rtical G Force The Acceleration Mode operating limits are Imperial Metric Maximum time 99 9 seconds 99 9 seconds Maximum speed 255 MPH 511 KPH Maximum distance 9000 feet 1800 meters Maximum acceleration 2G 2G The VC4000 can continuously display and store the 3 internal accelerometers and GPS speed and any VSI OBDII sensors that are turned on You may choose to not save the data to conserve memory s...

Страница 50: ...le tools in the VC4000 The VC4000 has several tools available Press the 3 Tools key to bring up a list of available tools Below is a list of the tools and a short description of each Monitor Cal Check Setup Delete Run Print SD Card Options Accel Brake Run Crash Mode ...

Страница 51: ...cel Brake Run Perform an acceleration test followed by a brake test without stopping to re zero Enter Suffix Adds a suffix letter to the run file when saved using Profile 5 Measure Slope Measure slope of a road in Grade and Degree The VC4000 can continuously display and store the 3 internal accelerometers and GPS speed location altitude and any VSI OBDII sensors that are turned on You may choose t...

Страница 52: ...NO to display without saving Storing Data while monitoring There are two ways to store the data 1 Start monitor mode on the VC4000 and choose to save in internal flash memory 2 PC Start Data Streaming from Profile and store the data to your computer s hard drive If you choose to save the data the X Y and Z axis accelerometers are always stored when saving to memory regardless of which sensor is be...

Страница 53: ...lick on Import Data Streaming See Profile help or the Profile manual for more detailed information Monitor G Force If G Summation is turned off acceleration in G Force of the X axis longitudinal Y axis lateral and Z axis vertical will display on the screen along with the peak acceleration of each If G Summation is turned on acceleration in G Force of the vector sum of all three axes will display a...

Страница 54: ...itor GPS With the optional 5Hz GPS antenna GPS speed Latitude Longitude and Altitude can be monitored along with the number of satellites in range and other GPS diagnostic information Plug the GPS sensor into RS232 port one If saving data and GPS is turned on GPS speed will be recorded every sample period and Latitude and Longitude will be saved at the beginning and end of the run If GPS location ...

Страница 55: ...C4000PC will continue to store data until the car has been at a stop for 2 seconds with a maximum record time of 30 seconds The 3 accelerometers must not have acceleration values change by more than 0 150G for 2 seconds for the run to end or it will record to the 30 second max time You could press any key to stop the recording and it will retain the data stored so far Mounting considerations Remov...

Страница 56: ...ts an object and generates 4xG Threshold or more The VC4000 accelerometer calibration can be checked easily using this tool No setup changes are necessary when checking calibration this way Select Cal Check from the list The VC4000 will prompt you to turn it onto its back front each side top and bottom The VC4000 does not need to be periodically calibrated Vericom offers calibration certificates f...

Страница 57: ...ng gravity in the opposite direction 1Gx Turn the unit so its display and keypad are facing down with the lower half of the unit flat on the desk Hold it there until the unit beeps Figure 17 Calibration check on front The next prompt is to turn the unit on its right side with the lateral accelerometer reading gravity 1Gy The right side is the side closest to the CLEAR NO key Set the VC4000 on its ...

Страница 58: ...he vertical accelerometer is reading gravity 1Gz The top is the area with the VERICOM logo Hold it there until the unit beeps Figure 20 Calibration check on top Finally turn the unit so the bottom is flat on the level surface with the vertical accelerometer reading gravity 1Gz If the ball mount is attached to the bottom of the unit you will have to hold the unit flat with the ball mount hanging ov...

Страница 59: ...leted Once deleted it cannot be restored Select Delete Run and choose the file number from the numeric keypad then press ENTER YES or simply press ENTER YES to select the most recent run without typing in a file number It will prompt you to press ENTER YES or CLEAR NO Pressing ENTER YES will delete the run and pressing CLEAR NO will abort the delete process Deleting the run does not free up any me...

Страница 60: ... Setup to set the RS232 port to Printer RS232 1 is set for the printer by default Select Print from the Tools menu and then choose Print Run or Print All Runs The VC4000PC can copy stored runs onto a Secure Digital Flash Card SD card The SD card does not need to be installed into the VC4000PC during testing It is used for transferring data from your VC4000PC to a computer in lieu of a USB cable or...

Страница 61: ...g system Erase and format the SD Card 1 Select SD Card Options and press ENTER YES 2 Select Erase SD Card and press ENTER YES 3 Press ENTER YES twice to confirm erasure The VC4000PC stores the data on the SD Card with the file name RUNxxxxx VC4 where xxxxx is the run number Use Profile to open the run files In Profile set the file type to SD Run Files VC4 If copying runs with the same run number t...

Страница 62: ...data for 0 60mph and 60 0mph from one test but in two separate files 1 Drive to the area where you want to take a measurement where the slope is the consistent 2 To power on press the POWER key and hold for 1 second until the unit beeps 3 From the READY screen press the Tools key then select Accel Brake Run with the vehicle at a complete stop It will display 4 Choose one of the presets shown or ch...

Страница 63: ... beep 5 short times when activated and beep again when at a complete stop Adds a suffix letter the run file name when saved using profile It serves as a way to organize your data during testing For example you could use the suffix A for all the tests at scene A and B for the tests at the next scene etc The run file would then have the format of Run0001A_Brake run if it were a brake run and the suf...

Страница 64: ...e facing directly uphill 2 Press the Tools key Scroll to the bottom of the list Measure Slope and press ENTER YES 3 With the vehicle at a complete stop press the Auto Start key The VC4000 will zero adjust the accelerometers then show Position Downhill 4 Now turn the vehicle 180 degrees so it is facing directly downhill and press the Auto Start key again The VC4000 will read the acceleration then d...

Страница 65: ...e without any operator intervention Usually only the sensors need to be turned on or off Following is a flowchart to help you navigate to the setting you may want to change All of these settings can be changed using Profile software as well and will be easier using Profile since the settings are laid out on forms Brake Meters can use Profile VC4000 Setup but will not transfer data Figure 24 Profil...

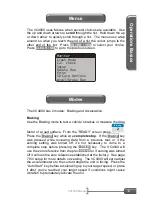
Страница 66: ...nual 62 VC4000 Setup To change setup using the VC4000 keypad click the 3 Tools key and select Setup The VC4000 will store the settings when setup is exited and confirm with a message at the bottom of the screen ...

Страница 67: ...t OT Rehab General English Metric RS232 Port Brake MPH Sensors Data Transfer Printer VSI OBDII PC Off Port1 OBDII Sensors PC OBDII PIDS ON OFF OBDII PIDS All OFF OBDII Delay OBDII Port Analog Out GPS Sensors PC OFF Long Accel Gx Lat Accel Gy Vert Accel Gz G Summation Speed GPS Speed PC GPS Speed GPS Location GPS Altitude See PID list ...

Страница 68: ...f Accel Range PC G Adjust Graph Range Alarm Threshold Summation OFF Summation 2D XY Summation 3D XYZ Gx Smooth 0 9 2G 6G Vehicle Weight Countdown On Off Unit Information Run Tests Discharge Battery Factory Maintenance Pitch Roll Factors 0 000 to 1 000 0 0 to 9 9 0 0 to 9 9 Sample Rate PC 1 10 100 500 1000 ...

Страница 69: ...is starting too soon such as in a large truck that decelerates quickly when there is no throttle applied use a 0 3G threshold Crash mode will use the G Threshold and multiply it by 4 for the Crash mode G Threshold with a maximum of 4G To set G Threshold 1 Select G Threshold from the Setup menu 2 Type in the new threshold using the keypad a For example for 0 100 type 100 3 Press ENTER YES G Thresho...

Страница 70: ...0 Pitch Roll Factors 1 G adjust 0 9700 User Type Unchanged Units Imperial RS232 Port Printer Port 1 Brake MPH 20 Sensors o PC OBDII Sensors All OFF o Analog out OFF o PC GPS Sensors All OFF Accelerometer o G Summation Summation 3D XYZ o G Smoothing 3 o Zeroing ON OFF ON o PC Accel Range 2G o G Adjust 0 9700 Pitch Roll 1 o Graph Range 1 0 o Alarm Threshold 0 0 o PC Sample Rate 100 Performance o Veh...

Страница 71: ...tup menu 2 Set the time for your time zone by entering every number including zeros To enter time of 9 00 enter 0 9 0 0 3 Enter 1 for am or 2 for pm after the digits are entered 4 Enter the date including zeros After the date is entered the VC4000 sets the time and date in memory 5 Alternatively use Profile to set the time and date to your computers time and date CLEAR NO may be pressed anytime to...

Страница 72: ...ent of 0 9700 The Pitch and Roll adjustment can be finely adjusted using G adjust For rail cars vehicles with abnormal or no suspension system and marine application the following guide will help you decide which pitch and roll factor to use Pitch and roll factor 0 Low Pitch and roll factor for vehicles with no suspension system such as transit rail cars fork lifts or farm tractors Also for testin...

Страница 73: ...YES Changing the user type changes the data that is displayed after a test and when runs are selected from memory In some cases it will change how the test starts and will change other user settings Accident Reconstruction Display Brake mode Reaction Time Reaction Time distance Elapsed Time Speed Distance Avg G or avg Gx if summation not on Avg Gy only if summation off Peak G or Gx and the time it...

Страница 74: ...parameter Speed to programmed parameter Distance to programmed parameter Avg G or avg Gx if summation not on OT Rehab Does not zero the accelerometer before a run Display Brake mode Reaction Time Reaction Time distance Elapsed Time Speed Distance Display Acceleration mode Time to programmed parameter Speed to programmed parameter Distance to programmed parameter Avg G or avg Gx if summation not on...

Страница 75: ...mation off Peak HP at time speed dist torque RPM To set User Type 1 Select User Type from the Setup menu 2 Select user type 3 Press ENTER YES The VC4000 can give Imperial or metric data for braking or acceleration runs The Metric data will be displayed in the following units KPH Kilometers Per Hour M Meters Metric acceleration runs are limited to 511 KPH and 1800 meters and the start to stop speed...

Страница 76: ...e the RS232 port settings 1 Select RS232 Port from the Setup menu 2 Select the function from the menu 3 Select port1 or OFF The VC4000 will calculate the distance for an exact speed as long as the actual test speed and desired target speed are within 5mph The default is 20 MPH Speeds from 1 to 100 may be entered To set Brake MPH 1 Select Brake MPH from the Setup menu 2 Type in the new speed using ...

Страница 77: ...nd store up to 14 OBDII parameters There are more parameters available on OBDII but the others are not normally used so for the sake of simplicity they are not listed NOTE The more OBDII sensors you have turned on the slower the vehicles OBDII information will be updated Turn on as few as possible to get the fastest response from the vehicles computer To turn the OBDII sensors on 1 Select Sensors ...

Страница 78: ...ts the number of milliseconds that the VC4000 will delay before sending the next request for OBDII data Normally this delay is set to 10 milliseconds but some vehicles require a longer delay to function correctly If the OBDII timeout count Monitor OBDII Mode increments either a non supported OBDII parameter is being monitored or this delay needs to be increased OBDII Port Choose Port 1 for the VSI...

Страница 79: ... Figure 27 GPS sensor To use it plug the GPS sensor into the RS232 port and the VC4000 will automatically recognize it and turn on GPS speed When GPS speed is on it will store the location at the beginning and end of the run and also store GPS speed every 5Hz To turn the GPS location sensor on 1 Select Sensors from the Setup menu 2 Select GPS Sensors 3 Select GPS Location 4 Select ON to store long...

Страница 80: ...m Threshold Set the accelerometer alarm for monitor G mode Sample Rate PC Choose 1 10 100 500 or 1000Hz G Summation Summation OFF o VC4000 mounted flat and level testing direction in line with the X axis o Uses X axis only for calculations Summation 2D XY o VC4000 mounted flat and level o Uses the summation of X and Y vectors for G and calculations o G is the summation of X Y vectors o Gz is the v...

Страница 81: ...e X and Y axes to calculate a vector sum This vector sum is then the new acceleration G The Z axis is still monitored and stored Use 2D summation if mounting the VC4000 flat and level but the X axis is not necessarily in line with the test direction such as on an angled windshield like on a split window bus or on a curved windshield where the VC4000 is mounted to one side The VC4000 must be mounte...

Страница 82: ...best accuracy may be achieved when mounting the VC4000 using 2 suction cups flat and level and using G summation OFF or 2D XY On a relatively smooth surface 3D summation accuracy will not be degraded To change the G Summation 1 Select Accelerometer from the Setup menu 2 Select G Summation 3 Select OFF 2D or 3D from the list Default is 3D XYZ G Smoothing Smoothing is used to eliminate some of the v...

Страница 83: ...ng OFF or Zeroing ON PC Accel Range The accelerometer in the VC4000PC has 2 ranges 2G and 6G Use 2G for braking or acceleration testing to use the most resolution possible Use 6G for light impact testing Speed and distance calculations may not be as accurate if using the 6G range The range is for all 3 axes To set the Accelerometer Range 1 Select Accelerometer from the Setup menu 2 Select Accel Ra...

Страница 84: ...each axis 4 Press ENTER YES Default adjustment is 0 9700 Graph Range Set the maximum range of the VC4000 acceleration bar graphs and friction circle graph when monitoring acceleration To set the Graph Range 1 Select Accelerometer from the setup menu 2 Select Graph Range 3 Type in a number from 0 1 to 6 0 4 Press ENTER YES Default graph range is 1 0 Alarm Threshold There are 3 acceleration alarms t...

Страница 85: ...00 Brake Meter is always 100Hz To set the Sample Rate 1 Select Accelerometer from the Setup menu 2 Select Sample Rate 3 Select 1 10 100 500 or 1000 Default Rate is 100 These settings generally are for acceleration testing Vehicle Weight The VC4000 defaults to 1000 pounds unless you have changed it Profile reads the VC4000 s weight when uploading to a computer Vehicle weight is used in horsepower a...

Страница 86: ...ollout distance is reached In Braking mode the run starts when the countdown is completed and the display shows B R A K I N G Default countdown On Off is Off Basic maintenance and information Unit Information Displays the VC4000 model Firmware version number the date the firmware was released and when the VC4000 was last calibrated Run Tests Tests some of the VC4000 hardware Tests flash memory acc...

Страница 87: ... 5Hz External Activation o Only activates the start of the test o 5 36VDC To calculate the total storage time when extra sensors are used use the formula rate sample sensors of 3 2096400 Example 100Hz sample rate 3 extra sensors turned on seconds 3494 600 2096400 100 3 3 2096400 When using GPS sensors speed counts as 1 sensor location counts as 4 sensors and altitude counts as 1 sensor Since there...

Страница 88: ...r the dash or in another location near the driver s seat Figure 30 OBDII connector After locating the OBDII connector and with vehicle running connect the Vericom OBDII Vehicle Sensor Interface VSI to the vehicles OBDII connector Figure 31 VSI connector The Vericom OBDII Vehicle Sensor Interface connects to the RS232 port on back panel marked RS232 Analog out The port must be configured for the VS...

Страница 89: ... Gxyz Speed Calculated from VC4000 accelerometers GPS Speed PC Connect the RJ12 plug of the Analog output cable to the RS232 Analog out port of the VC4000 or if using the RS232 and analog out at the same time to the RS232 Analog out splitter jack marked Analog out The other end is bare wire for connection to another data acquisition system Figure 32 RS232 Analog splitter Wiring White Analog out Bl...

Страница 90: ...ze it and turn on GPS Speed Route the cable out the passenger side door or window so it doesn t interfere with driving and set the magnetic base of the GPS sensor on the roof to get the best reception When GPS Speed is on it will store the location at the beginning and end of the run and also store GPS speed every 5Hz To turn the GPS location sensor on 1 Select Sensors from the Setup menu 2 Select...

Страница 91: ...un will start the instant a key is pressed and a lamp turns on When using the brake light switch or brake pedal switch the brake run will start the instant the brake lights come on or the pedal is touched which is typically before the 0 2G threshold is reached Drag Factor Average G will be significantly less when using the external activation switch because of the increase in time due to the braki...

Страница 92: ...404 2x Box crimp terminals Molex 16 02 0102 Assembly instructions 1 Solder two crimp terminals to one end of the wires 2 Place the positive wire terminal into pin 1 of the housing 3 Place the ground wire terminal into pin 2 of the housing Figure 36 Molex crimp housing Insert the black 4 pin connector of the cable into the External Activation connector located in the back of the VC4000 ...

Страница 93: ...m where the switch was activated to where the vehicle came to a complete stop Reaction distance is the distance traveled during the reaction time To avoid false triggering of your braking run you may press Auto Start at any time after zero adjusting If connected to the brake lights your foot may be on the brake pedal when the Auto Start key is pressed but the next time the brake lights come on the...

Страница 94: ...rinted or saved to the SD Flash memory card SD Card PC anytime Press the Select Run key on the keypad From the menu select Display Run Type a number using the keypad or press ENTER YES to select the last run The data is displayed on the screen Any changes to setup such as Pitch factor or User Type will change how the data is presented or change the calculated values Display Run Display a Run Print...

Страница 95: ... YES to select the last run From the menu select SD Card Options Copy All Runs Copy all runs stored in the VC4000 memory to the SD Card Copy A Run Only store one run to the SD Card Erase SD Card Erase all data and format the SD Card When only copying one run type the run number using the numeric keypad or press ENTER YES to select the last run If runs are already on the SD Card copying a file with...

Страница 96: ... parameters can be analyzed and compared Profile is a powerful program utilizing graphs and data tables to analyze every sample of data with the VC4000PC Once a connection to the computer is established and the VC4000PC is turned on no additional key presses on the VC4000PC are required Profile controls communications See Profile Software Manual for software description and USB driver installation...

Страница 97: ...al port is available on the VC4000PC To transfer data through it you must set it to Data Transfer in Setup Go to Tools Setup RS232 Port Data Transfer and choose Port 1 See Setup on page 72 for more information Figure 38 RS232 Port location The ports are marked on the back of the VC4000 RS232 Analog out is port1 In order to use the Analog output feature and use the RS232 port Vericom s RS232 Analog...

Страница 98: ...C4000 RS232 port 2 In Profile click on the menu Tools Options or click the icon and set the COM port to Auto or specifically choose the COM port usually port 1 3 To import data click on the menu Import Auto or click the icon To set or get VC4000 settings click menu Tools VC4000 Setup or click the icon ...

Страница 99: ... into your computer and into the VC4000 USB port A USB icon will appear at the bottom of the screen to indicate valid connection 2 The first time you plug the VC4000 into your computer it will detect new hardware and ask you to install the drivers for it With the Profile CD in the drive follow the prompts and accept the defaults Choose Continue anyway if that prompt comes up 3 In Profile click on ...

Страница 100: ...port VC4000_Support html or from an email attachment To update the firmware 1 Install Reflash VC4000ReflashSetup exe from the VC4000 support web page 2 Start the reflash program found at Start Programs Vericom Computers VC4000 Reflash 3 Before starting the process plug the wall adapter into the VC4000 so the battery won t go dead in the middle of an operation 4 Connect VC4000 to computer See PC In...

Страница 101: ...e firmware into the program area of flash memory 10 Then it will ask you to hold the power button after which it will delete the run file flash memory 11 The reflash program may be exited after the is shown and the VC4000 displays Power off on 12 Reflashing firmware is complete If power is lost in the middle of the reflash process the VC4000 will have to be sent back to the factory for reflashing ...

Страница 102: ...rge The battery gauge on the display will show arrows indicating that the battery is charging The green charging LED on the front of the unit will light while it is charging and go out when it is fully charged The green LED will turn on anytime the unit is plugged in and stays on until the battery is fully charged DO NOT use the charger from the VC4000 to charge or power the portable thermal print...

Страница 103: ...r from the date of purchase The manufacturer does not warranty the installation of the VC4000 computer and therefore will not be responsible for damage caused by installation This warranty covers only the VC4000 computer and is not extended to equipment or component parts used in conjunction with the VC4000 computer The manufacturer will not be liable for incidental and consequential damages or th...

Страница 104: ...rs Inc 14320 James Rd Suite 200 Rogers MN 55374 763 428 1381 Fax 763 428 4856 vericom vericomcomputers com www vericomcomputers com VC4000PC VC4000DAQ OBDII Monitoring 5Hz GPS position altitude and speed Portable micro thermal printer 12V activation cable Brake pedal activation switch Brake Reaction Timer hardware software is included standard RS232 Analog out splitter Analog output cable Dual vac...

Страница 105: ...t dead Recharge battery Electrical noise interference Eliminate noise from source Inaccurate data VC4000 was not at same incline as when zero adjusted or level of VC4000 changed since zero adjusting See page 4 for mounting Summation was not on and unit was mounted at an angle VC4000 started timing too soon If 3D summation is on a bump may have triggered it See page 65 to adjust threshold Electrica...

Страница 106: ...ings can cause this GPS not working PC GPS not on Turn GPS speed on in Setup RS232 port not selected Set GPS RS232 port to 1 May take up to 1 minute to acquire satellites FLASH ERROR There was a problem writing to the flash memory Import data to Profile if necessary and clear memory RUN FILE FULL Memory is full Import data to Profile if necessary and clear memory RUN FILE LEN File is too long for ...

Страница 107: ...nimum Resolution 0 001 G Shock survival 10 000 G Bandwidth sample rate 1 1000Hz Accuracy 0 0030 G Analog Output Range 0 5VDC Resolution 12 bits Accuracy 2 LSB External Activation 5V 36V DC Power cord Length 6 feet Plug 2 5 mm ID center positive 5 mm OD Right angle Preferred 10 mm L Fuse 1 25 inches 3 AG 1 Amp Dimensions 6 75 inches long 3 50 inches high 4 40 inches deep Manufacturer Vericom Comput...

Страница 108: ...Specifications VC4000 Manual 104 This page intentionally left blank ...

Отзывы: