7-8
7.11
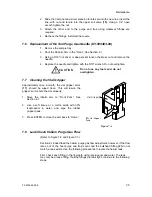
Drip Pan Cleaning
The drip pan, located under the sample tray, should be cleaned occasionally to
prevent or remove any algae buildup.
WA R N IN G :
S H O C K H A ZA R D
Disconnect instrument from power source
before proceeding.
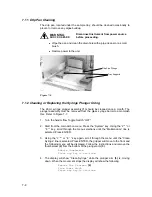
Wipe the pan and clean the drain hole with a pipe cleaner or a small
brush.
Restore power to the unit.
Figure 7-6
7.12
Cleaning or Replacing the Syringe Plunger O-ring
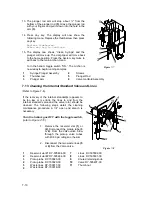
The 26 ml syringe plunger assembly (1) should be cleaned once a month. The
plunger assembly must be removed from the glass syringe barrel to accomplish
this. Refer to Figure 7-7.
1. Turn the helium flow Toggle Switch “OFF.”
2. Start from the main Archon menu. Press the “System” key. Using the “2
” or
“8
” key, scroll through the menu selections until the “Maintenance” line is
selected. Press ENTER.
3. Using
the
“2
” or “8
” key again, scroll through the menu until the “Clean
Syringe” line is selected. Press ENTER, the gripper will move to the front and
the following menu will be displayed. Follow the instructions and remove the
thumbscrew (2) from the bottom of the plunger arm (3).
Remove thumbscrew.
Press any key to continue.
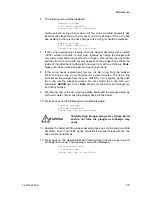
4. The display will show “Clean Syringe” while the plunger arm (3) is moving
down. When the movement stops the display will show the following
Remove the 2 screws
(4)
from lower block
Press any key to continue.
Tray Supports
Drip Pan Fittings
Содержание archon
Страница 43: ...4 6 ...
Страница 73: ...6 18 ...
Страница 103: ...9 4 ...
Страница 117: ...11 10 11 6 Interconnect Diagram Note F R L R and U D P O T should be set at 3 4 std valve full power ...
Страница 119: ...12 2 ...

