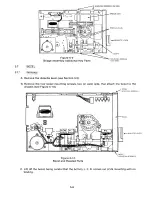
TRACK 00
SENSOR
ASSEMBLY
MO U NTING
SCREWS
2
0 .
0 +
P S P
I
P2
BRACKET
Qo
0o
TIE WRAPS
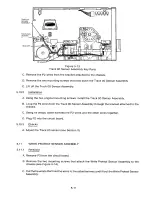
Figure 5-13
Track 00 Sensor Assembly Key Parts
C. Remove the P2 wires from the bracket attached to the chassis.
D. Remove the two mounting screws that hold down the Track 00 Sensor Assembly.
E. Lift off the Track 00 Sensor Assembly.
5 .10.2
Ins t a l l a t io n
A. Using the two original mounting screws, install the Track 00 Sensor Assembly.
B. Loop the P2 wires from the Track 00 Sensor Assembly through the bracket attached to the
chassis.
C. Using tie wraps, cable harness the P2 wires and the other wires together.
l3. Plug P2 into the circuit board.
5 .10.3
Ch ec k s
A. Adjust the Track 00 sensor (see Section II).
5 .11
W R I T E P R O T E C T SE N S O R A S S E M B L Y
5 .11.1
Re mo v a l
A. Remove P3 from the circuit board.
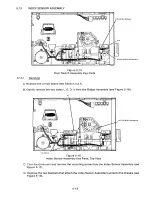
B . Remove the tw o m o u n t ing screws that attach the W r ite Protect Se nsor Assembly to t h e
chassis (see Figure 5-14).
C. Cut the tie wraps that hold the wires to the cable harness, and lift out the Write Protect Sensor
Assembly.
5-1 1
Содержание TM848-1
Страница 32: ...HUB CENTER LINE TRACK 0 TRACK 38 TRACK 76 Figure 2 2 Hub Center Line and Track Locations 2 3 ...
Страница 81: ...APPENDIX I PRINTED CIRCUIT BOARD S CHEM A T ICS AND ASSEM B LY DRAW IN G S ...
Страница 88: ...APPENDIX II RECOM M E N D E D SPARE PARTS LIST ...
Страница 90: ...Pi N 1 79031 001 1 082 ...

