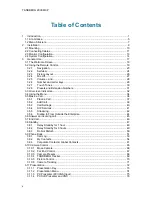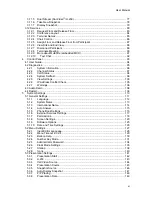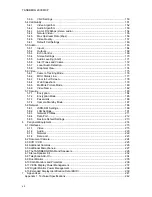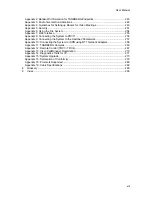
TANDBERG 2000 MXP
vi
Information for Recyclers
As part of compliance with the European WEEE Directive, TANDBERG provides recycling
information on request for all types of new equipment put on the market in Europe after August
13th 2005.
Please contact TANDBERG at
and provide the following details for the
product for which you would like to receive recycling information:
•
Model number of TANDBERG product
•
Your company’s name
•
Contact name
•
Address
•
Telephone
number
•
address
Digital User Guides
TANDBERG is pleased to announce that we have replaced the printed versions of our User
Guides with a digital CD version. Instead of a range of different user manuals, there is now one
CD – which can be used with all TANDBERG products – in a variety of languages. The
environmental benefits of this are significant. The CDs are recyclable and the savings on paper
are huge. A simple web-based search feature helps you directly access the information you need.
In addition, the TANDBERG video systems now have an intuitive on-screen help function, which
provides a range of useful features and tips. The contents of the CD can still be printed locally,
whenever needed.
Содержание 2000 MXP
Страница 14: ......
Страница 24: ...TANDBERG 2000 MXP 10 2 1 Mounting When mounting the TANDBERG 2000 MXP follow the figures below ...
Страница 195: ...Administrator Settings 181 Voice Switched mode ...
Страница 202: ...TANDBERG 2000 MXP 188 5 8 Network The network menu contain ISDN BRI Settings LAN Settings Network Profiles Data Port ...
Страница 247: ...Peripheral Equipment 233 ...
Страница 249: ...Peripheral Equipment 235 6 9 Dual Monitor Note that this requires a system with dual monitor video output ...
Страница 273: ...Appendices 259 ...
Страница 277: ...Appendices 263 Top view ...
Страница 279: ...Appendices 265 Pin 5 GND Pin 4 RXD in Pin 3 TXD out Pin 2 Presence 12V in daisy chain Pin 1 GND ...
Страница 280: ...TANDBERG 2000 MXP 266 Dimensions Front view Side view Rear view Underside view ...
Страница 288: ...TANDBERG 2000 MXP 274 Figure 1 3 Enter the Release key in the Release Key field and press the Install Software button ...

