TANDBERG 2000 MXP
252
IP Password
By setting an IP Access Password on the system, all access to the system using IP (Telnet, FTP
and WEB) requires a password. This password can be enabled from telnet or dataport using the
command: ippassword <ip-password>. The default IP username and password is "TANDBERG".
To remove this password, use the command: "ippassword ”. From telnet, this is only possible by
first entering the correct password.
IP
Services
The different IP services on the system - FTP, Telnet, Telnet Challenge, HTTP, HTTPS, SNMP
and H.323 can be disabled to prevent access to the system. By using the commands below, the
services can be independently enabled/disabled:
xconfiguration Telnet/TelnetChallenge/FTP/HTTP/HTTPS/H323 Mode: <On/Off>
xconfiguration TelnetChallenge Mode: <On/Off> [port]
xconfiguration SNMP Mode: <On/Off/ReadOnly/TrapsOnly>
SNMP Security alert
This function will notify any Management Application (such as TMS - TANDBERG Management
Suite) if anyone tries to perform Remote Management on the system using an illegal password.
The Security alert that is sent to the Management Application will contain information about the IP
address and the service (WEB, Telnet, FTP) being used for the attempt. If TMS is used, email
notifications or alarms about the attempt can be sent to specified persons.
Encryption
All TANDBERG systems support both AES and DES encryption. By default this feature is
enabled such that when connecting with any other video system or MCU, a TANDBERG system
will attempt to establish a secure conference using AES or DES encryption. The TANDBERG
system will attempt this for both IP and ISDN connections. Where a remote system or MCU
supports encryption, the highest common encryption algorithm will be selected on a port-by-port
basis.
The type and status of the encryption negotiated is indicated by padlock symbols and on-screen
messages. Encryption on the TANDBERG systems is fully automatic, and provides clear security
status indicators;
An open padlock indicates that encryption is being initialized, but the conference is not
yet encrypted.
Single padlock indicates DES encryption.
Double padlock indicates AES encryption.
In addition to on-screen indicators the Call Status menu provides two information fields regarding
call encryption. The first field is the Encryption Code, which will identify either AES or DES. The
second field is the Encryption Check Code and is comprised of an alphanumeric string. This
string will be the same for systems on either side of an encrypted conference. If the Check Codes
do not match, this would indicate that the call has been exposed to a Man In The Middle attack.
When a system with MultiSite functionality hosts a conference, the highest possible encryption
algorithm will be negotiated on a site-by-site basis. MultiSite conferences can therefore support a
mix of AES and DES encrypted endpoints in the same conference. A conference will only be as
secure as its weakest link.
All systems supporting DES encryption can upgrade to AES encryption. Please contact your
TANDBERG representative for more information. The standards supporting the encryption
Содержание 2000 MXP
Страница 14: ......
Страница 24: ...TANDBERG 2000 MXP 10 2 1 Mounting When mounting the TANDBERG 2000 MXP follow the figures below ...
Страница 195: ...Administrator Settings 181 Voice Switched mode ...
Страница 202: ...TANDBERG 2000 MXP 188 5 8 Network The network menu contain ISDN BRI Settings LAN Settings Network Profiles Data Port ...
Страница 247: ...Peripheral Equipment 233 ...
Страница 249: ...Peripheral Equipment 235 6 9 Dual Monitor Note that this requires a system with dual monitor video output ...
Страница 273: ...Appendices 259 ...
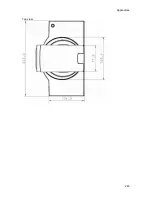
Страница 277: ...Appendices 263 Top view ...
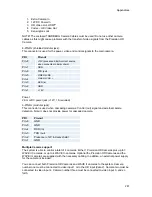
Страница 279: ...Appendices 265 Pin 5 GND Pin 4 RXD in Pin 3 TXD out Pin 2 Presence 12V in daisy chain Pin 1 GND ...
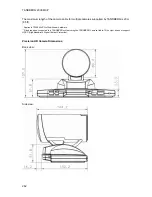
Страница 280: ...TANDBERG 2000 MXP 266 Dimensions Front view Side view Rear view Underside view ...
Страница 288: ...TANDBERG 2000 MXP 274 Figure 1 3 Enter the Release key in the Release Key field and press the Install Software button ...

