Peripheral Equipment
225
6.3 DVD / VCR
DVD/VCR Playback
Mono
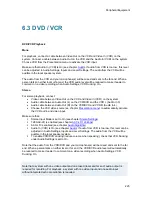
For playback, connect a cable between Video Out on the VCR and Video In (VCR) on the
system. Connect a cable between Audio Out on the VCR and the Audio In (VCR) on the system.
Choose VCR from the Presentation menu to activate the VCR input.
Make sure that Audio In (VCR) is On (see chapter
Audio
). If audio from VCR is too low, this level
can be adjusted in Audio Settings, Inputs and Level Settings. The audio from the VCR will be
audible in the local speaker system.
The audio from the VCR and your microphone(s) will be mixed and sent to the far end. When a
person talks on either local or far end, the VCR audio level will be reduced to make it easier to
comment on a video recording when Audio Settings, VCR Ducking: On.
Stereo
For stereo playback, connect:
•
Video cable between Video Out on the VCR and Video In (VCR) on the system
•
Audio cable between Audio Out (L) on the VCR/DVD and the VCR L (Audio In 3)
•
Audio cable between Audio Out (R) on the VCR/DVD and VCR R (Audio In 4)
•
Choose the VCR video source (se chapter
Presentation menu
) to automatically activate
the VCR audio and video input.
Make sure that:
Stereo Input Mode is set to On (see chapter
Stereo Settings
)
128 AAC-LD is enabled (see chapter
AAC-LD 128 kbps
)
AAC-LD is enabled (see chapter
Audio Algorithm
)
Audio In (VCR) is On (see chapter
Audio
). If audio from VCR is too low, this level can be
adjusted in Audio Settings, Inputs and Level Settings. The audio from the VCR will be
audible in the local speaker system.
To enable VCR/DVD ducking (reduce volume when speaking), check that VCR Ducking
under Audio Settings is set to On.
Note that the audio from the VCR/DVD and your microphone(s) will be mixed and sent to the far
end. When a person talks on either local or far end, the VCR/DVD audio level will automatically
be reduced to make it easier to comment on a video recording when Audio Settings, VCR
Ducking: On.
Note that a system with one video output and one mixed (local and far end) audio output is
required for recording. For playback, a system with one video input and one audio input
without integrated echo cancellation is required.
Содержание 2000 MXP
Страница 14: ......
Страница 24: ...TANDBERG 2000 MXP 10 2 1 Mounting When mounting the TANDBERG 2000 MXP follow the figures below ...
Страница 195: ...Administrator Settings 181 Voice Switched mode ...
Страница 202: ...TANDBERG 2000 MXP 188 5 8 Network The network menu contain ISDN BRI Settings LAN Settings Network Profiles Data Port ...
Страница 247: ...Peripheral Equipment 233 ...
Страница 249: ...Peripheral Equipment 235 6 9 Dual Monitor Note that this requires a system with dual monitor video output ...
Страница 273: ...Appendices 259 ...
Страница 277: ...Appendices 263 Top view ...
Страница 279: ...Appendices 265 Pin 5 GND Pin 4 RXD in Pin 3 TXD out Pin 2 Presence 12V in daisy chain Pin 1 GND ...
Страница 280: ...TANDBERG 2000 MXP 266 Dimensions Front view Side view Rear view Underside view ...
Страница 288: ...TANDBERG 2000 MXP 274 Figure 1 3 Enter the Release key in the Release Key field and press the Install Software button ...

