Appendices
275
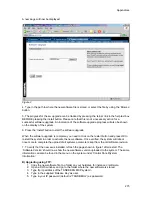
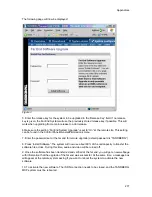
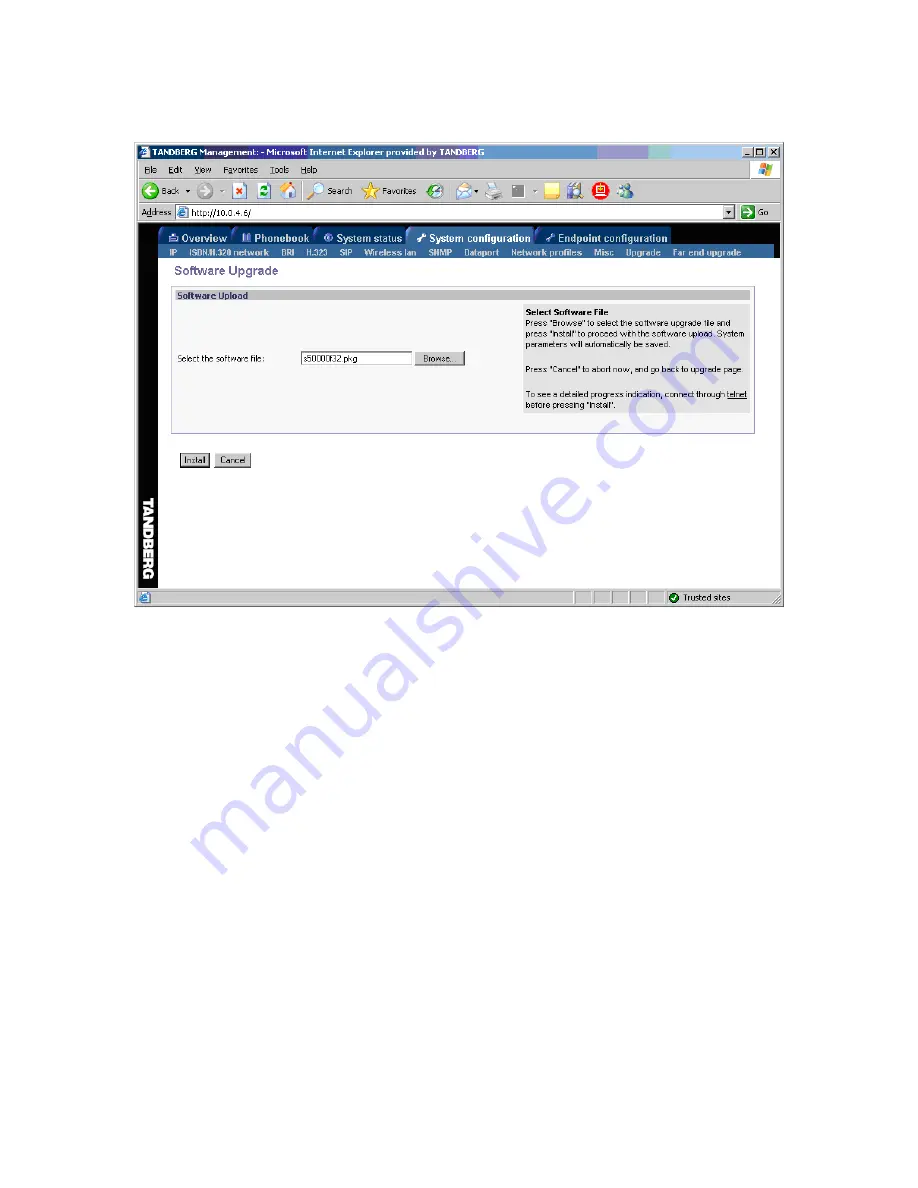
A new page will now be displayed:
Figure 2
4. Type in the path to where the new software file is stored, or select the file by using the ‘Browse’
button.
5. The progress for the sw upgrade can be tracked by pressing the ‘telnet’ link in the help text box
BEFORE pressing the install button. Please note that this is not a necessary action for a
successful software upgrade. An indication of the software upgrade progress will also be shown
on the display of the system
6. Press the ‘Install’ button to start the software upgrade.
When the software upgrade is complete, you need to click on the restart button and press OK to
restart the system in order to activate the new software. Once verified, the system will reboot
once more to complete the upload of all systems parameters kept from the old software revision.
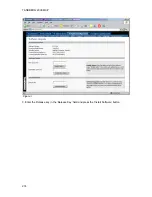
7. To verify that the new sw is installed, refresh the page shown in figure1 after restart. The
‘Software Version’ should now show the new software version uploaded to the system. The same
information can also be found in the menu on the system under ‘Control Panel/System
Information’.
B) Upgrading using FTP:
1. Copy the new software file to a folder on your harddisk, for instance c:\software.
2. Open a DOS window, and go to the folder where the new software is stored.
3. Type ftp <ip address of the TANDBERG MXP system>.
4. Type in the supplied ‘Release Key’ as user.
5. Type in your IP password (default is “TANDBERG”) as password.
Содержание 2000 MXP
Страница 14: ......
Страница 24: ...TANDBERG 2000 MXP 10 2 1 Mounting When mounting the TANDBERG 2000 MXP follow the figures below ...
Страница 195: ...Administrator Settings 181 Voice Switched mode ...
Страница 202: ...TANDBERG 2000 MXP 188 5 8 Network The network menu contain ISDN BRI Settings LAN Settings Network Profiles Data Port ...
Страница 247: ...Peripheral Equipment 233 ...
Страница 249: ...Peripheral Equipment 235 6 9 Dual Monitor Note that this requires a system with dual monitor video output ...
Страница 273: ...Appendices 259 ...
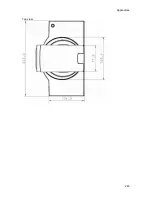
Страница 277: ...Appendices 263 Top view ...
Страница 279: ...Appendices 265 Pin 5 GND Pin 4 RXD in Pin 3 TXD out Pin 2 Presence 12V in daisy chain Pin 1 GND ...
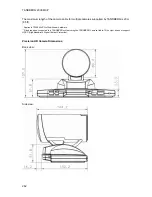
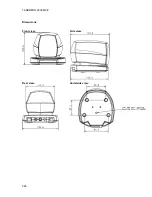
Страница 280: ...TANDBERG 2000 MXP 266 Dimensions Front view Side view Rear view Underside view ...
Страница 288: ...TANDBERG 2000 MXP 274 Figure 1 3 Enter the Release key in the Release Key field and press the Install Software button ...

