TANDBERG 2000 MXP
222
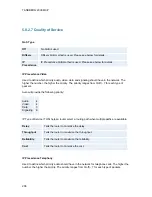
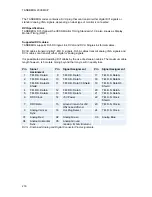
6.1.3 Network
Ethernet:
1 x Ethernet (RJ-45 Jack) LAN interface (10/100 Mb) up to 2 Mbps or 2.3 Mbps depending on the
bandwidth option installed.
To connect the system to a LAN, use the Ethernet cable provided by TANDBERG (or a standard
Ethernet cable).
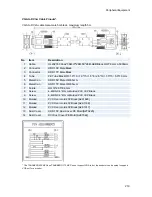
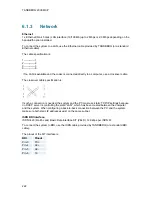
The cable specification is:
1 ------------ 1
2 ------------ 2
3 ------------ 3
6 ------------ 6
If no LAN is available and the codec is connected directly to a computer, use a crossover cable.
The crossover cable specification is:
If such a connection is needed, the system and the PC must use ‘static’ TCP/IP settings because
no DHCP server is controlling the small “LAN”, which has been created between the computer
and the system. When configuring a back-to-back connection between the PC and the system,
make sure both static IP addresses exist on the same subnet.
ISDN BRI Interface:
ISDN I.420 (RJ-45 Jack) Basic Rate Interface S/T (2B+D), 128 kbps per ISDN I/F
To connect the system to BRI, use the ISDN cable provided by TANDBERG (or a standard BRI
cable).
The pinout of the S/T interface is:
BRI
Pinout
Pin-3
TX+
Pin-4
RX+
Pin-5
RX-
Pin-6
TX-
Содержание 2000 MXP
Страница 14: ......
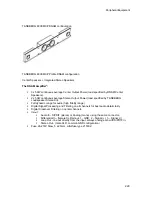
Страница 24: ...TANDBERG 2000 MXP 10 2 1 Mounting When mounting the TANDBERG 2000 MXP follow the figures below ...
Страница 195: ...Administrator Settings 181 Voice Switched mode ...
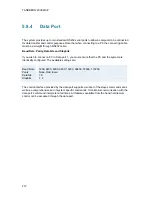
Страница 202: ...TANDBERG 2000 MXP 188 5 8 Network The network menu contain ISDN BRI Settings LAN Settings Network Profiles Data Port ...
Страница 247: ...Peripheral Equipment 233 ...
Страница 249: ...Peripheral Equipment 235 6 9 Dual Monitor Note that this requires a system with dual monitor video output ...
Страница 273: ...Appendices 259 ...
Страница 277: ...Appendices 263 Top view ...
Страница 279: ...Appendices 265 Pin 5 GND Pin 4 RXD in Pin 3 TXD out Pin 2 Presence 12V in daisy chain Pin 1 GND ...
Страница 280: ...TANDBERG 2000 MXP 266 Dimensions Front view Side view Rear view Underside view ...
Страница 288: ...TANDBERG 2000 MXP 274 Figure 1 3 Enter the Release key in the Release Key field and press the Install Software button ...

