1-10
BBBB
P
lay
b
a
ck
39
The numerical portions of the following files are the same.
—A small-size image file recorded in E-MAIL mode and its corresponding image file
—An uncompressed image file recorded in TIFF mode and its corresponding image file
—An audio file recorded in VOICE mode and its corresponding image file
—An image file recorded in TEXT mode and its corresponding index image file
—An image file recorded with Clip Motion and its corresponding index image file
Imcif100
DSC0
ssss
.JPG
•
Small-size image file recorded in E-
MAIL mode (page 51)
DSC0
ssss
.TIF
•
Uncompressed image file recorded in
TIFF mode (page 53)
Moml0001
MOV0
ssss
.MPG
•
Moving image file recorded normally
Momlv100
DSC0
ssss
.MPG
•
Audio file recorded in VOICE mode
(page 51)
Tips
The digital still camera saves recorded images as digital data. The format of the
saved data is called as the file format. The formats that can be used with this
camera are as follows:
JPEG format
Most digital still cameras, operating systems of computers, and browser software
adopt this format. This format is able to compress files without appreciable
deterioration. However, if the image is compressed and saved on repeated
occasions, the image will deteriorate. This camera records still images using the
JPEG format for normal recording.
GIF format
Using this format, the image will not deteriorate even if the image is compressed
and saved on repeated occasions. This format limits the number of colors to 256
colors. This camera records still images using the GIF format in Clip Motion
(page 49) or TEXT mode (page 52).
TIFF format
Stores shooting images without compression, so the image does not deteriorate.
Most of operating systems and applications correspond to this format. This camera
records still images using the TIFF format for the TIFF mode (page 53).
MPEG format
This format is very typical for moving images. This camera records audio using
the MPEG format for the moving images recording and the VOICE mode
(page 51).
Folder
File
Meaning
40
Advanced operations
Before performing advanced
operations
This section describes the basic control methods that are frequently used for
“Advanced operations.”
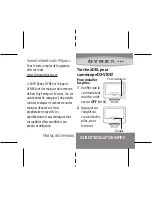
How to use the PLAY/STILL/MOVIE selector
The PLAY/STILL/MOVIE selector selects whether you can use your camera to
record or play back and edit images. Set the selector as follows before starting to
operate your camera.
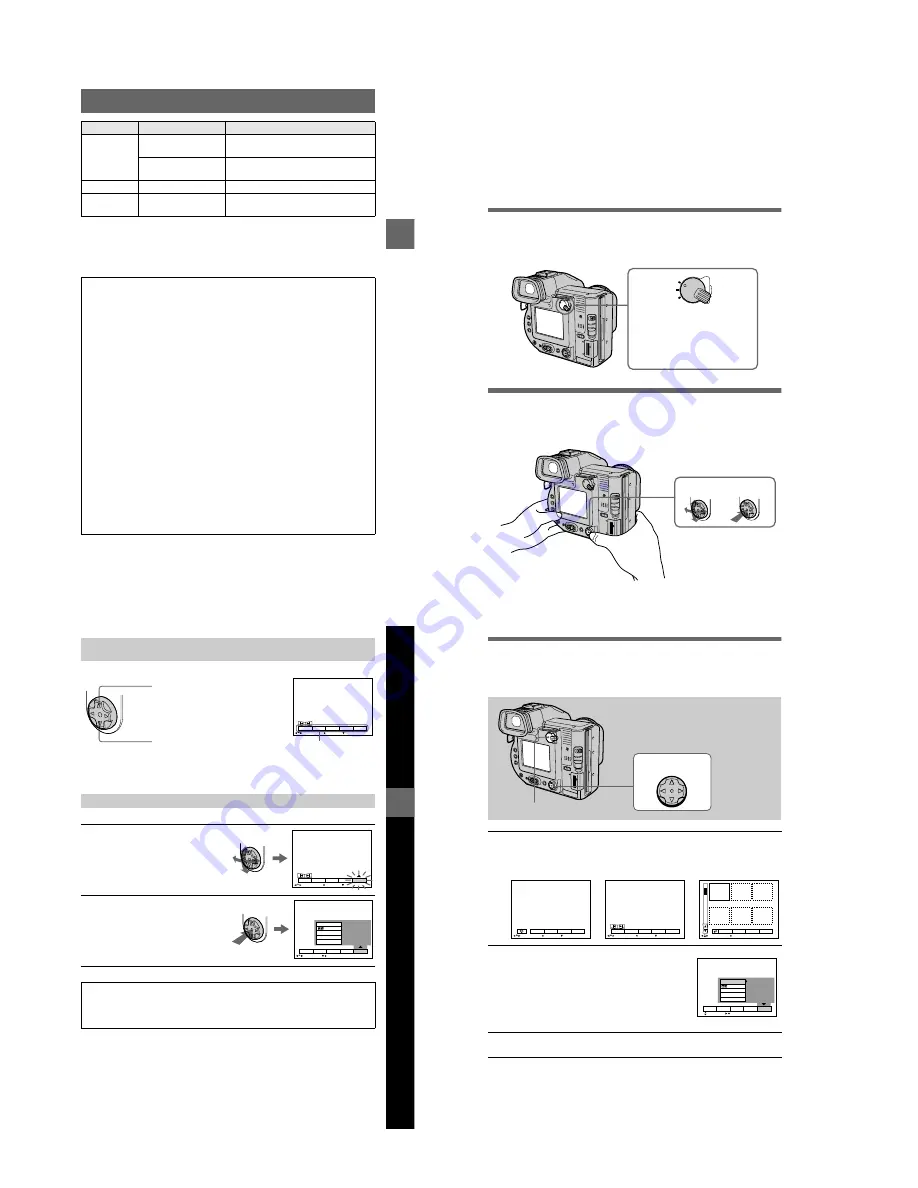
How to use the control button
The control button is used to select the buttons, images and menus displayed on the
LCD screen or on the finder of your camera and modify the settings. The operation
methods that are frequently used for “Advanced operations” are described below.
PLAY
STILL
MOVIE
PLAY:
To play back or edit
images
STILL:
To record still images,
VOICE images and Clip
Motion images
MOVIE:
To record moving
images
Select
Set (enter)
Bef
ore
p
erf
o
rm
ing
a
d
v
a
nce
d
ope
ration
s
41
Note
You cannot clear the menu bar on the INDEX screen (page 61).
Turning on/off the operation buttons (menu bar) on the LCD screen or
on the finder
Selecting items or images on the LCD screen or on the finder
1
Press
v
/
V
/
b
/
B
on the control
button to select the item you
want to set or the image you
want to display.
The color of the selected item or the
frame of the selected image
changes from blue to yellow.
2
Press the center
z
to enter
the item.
Repeat steps
1
and
2
to execute
each function.
The “Advanced operations” section of this manual refers to
selecting and entering items by the above procedure as
“Select [item name].”
SELECT
OK
MENU BAR OFF
DELETE
INDEX
FILE
SETUP
TOOL
Press
v
to display the menu bar
on the LCD screen or on the finder.
Press
V
to clear the menu bar
from the LCD screen or on the
finder.
Menu bar
SELECT
OK
DELETE
INDEX
FILE
SETUP
TOOL
MENU BAR OFF
LCD BRIGHT
BEEP
CLOCK SET
VIDEO OUT
/LANGUAGE
SELECT
CLOSE
DELETE
INDEX
FILE
SETUP
TOOL
42
How to change the menu settings
Some of the advanced operations for your camera are executed by selecting menu
items displayed on the LCD screen or on the finder with the control button.
To cancel the setup
Press
V
on the control button repeatedly until the LCD screen or finder returns to the
menu bar display in step
1
. To clear the menu bar, press
V
again.
1
Press
v
on the control button to display the menu bar.
The menu bar appears as follows according to the position of the PLAY/STILL/
MOVIE selector.
2
Select the desired item with
v
/
V
/
b
/
B
on the
control button, then press the center
z
.
The color of the selected item changes from blue to
yellow, and when you press the center
z
, the settings
that can be set for its item are displayed.
Note
The displayed items are changed according to the position
of the MS/FD selector.
3
Select the desired setting with
v
/
V
/
b
/
B
on the control button, then
press the center
z
.
1
–
3
PLAY/STILL/MOVIE selector
Control button
EFFECT
FILE
SETUP
CAMERA
SELECT
OK
MENU BAR OFF
SELECT
OK
MENU BAR OFF
DELETE
INDEX
FILE
SETUP
TOOL
2 0 0 1 7 4 1 0 : 3 0 P M
M V C – 0 0 1 F
SELECT
SINGLE DISPLAY
DELETE
FILE
SETUP
TOOL
STILL/MOVIE
PLAY (single mode)
PLAY (INDEX mode)
LCD BRIGHT
BEEP
CLOCK SET
VIDEO OUT
/LANGUAGE
SELECT
OK
DELETE
INDEX
FILE
SETUP
TOOL
NTSC
Содержание FD Mavica MVC-FD97
Страница 97: ...5 29 R Y B Y 4 mm 4 mm Fig 5 1 19 A Fig 5 1 19 B R Y B Y 1 mm 1 mm 6 mm 6 mm ...
Страница 103: ...5 35 H t1 µsec Falling edge of waveform when data is 08 Falling edge of waveform when data is 09 Fig 5 1 21 ...
Страница 143: ... 170 MVC FD97 9 929 887 32 2001F0500 1 2001 6 Published by PV Customer Center Sony EMCS Co Kohda TEC ...