36
00
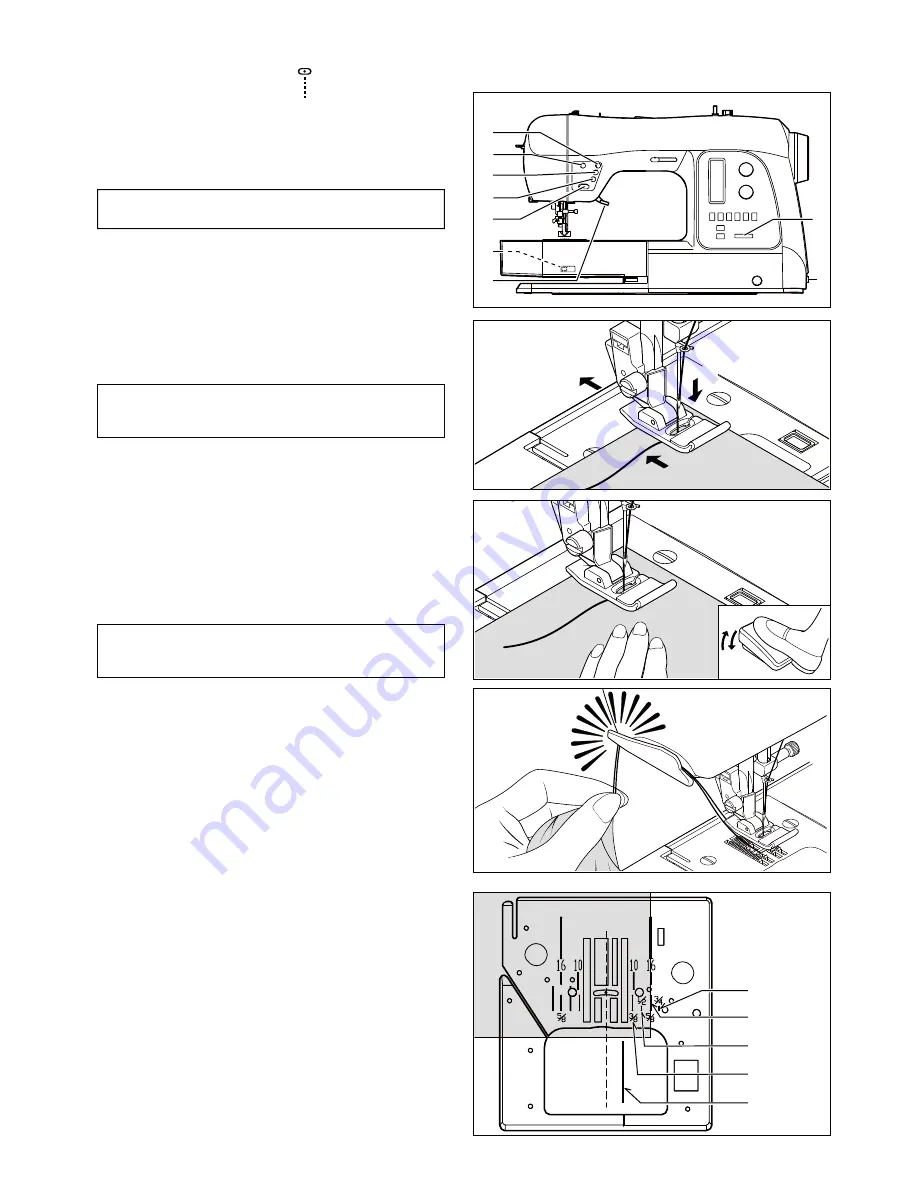
A
B
C
D
E
F
G
I
1
H
STRAIGHT STITCHING
6WUDLJKWVWLWFKLVPRVWIUHTXHQWO\XVHGIRUDOOW\SHVRIVHZLQJ
/HW¶VEHJLQE\IROORZLQJWKHVWHSVEHORZ
6(77,1*6
3UHVVHUIRRW*HQHUDO3XUSRVH)RRW
$ 7KUHDGFXWWHU
B. Tacking stitch mode button
C. Needle up/down position selector button
'5HYHUVHVWLWFKEXWWRQ
( 6WDUWVWRSEXWWRQ
) )HHGGRJFRQWURODWUHDUVLGH
*3UHVVHUIRRWOLIWHU
+7KUHDGWHQVLRQFRQWUROEXWWRQ
I. Power/light switch
2. Pull both threads under the presser foot toward the left of
WKHPDFKLQHOHDYLQJDERXW´FPFOHDU
3. Place the fabric under the presser foot and lower the
presser foot lifter.
7XUQWKHKDQGZKHHOFRXQWHUFORFNZLVHWRZDUGV\RXXQWLO
the needle enters the fabric.
6WDUWWKHPDFKLQH*XLGHWKHIDEULFJHQWO\ZLWK\RXUKDQGV
When reaching the edge of the fabric, stop the sewing
machine.
)LUVW WXUQ WKH KDQGZKHHO FRXQWHU FORFNZLVH WRZDUG \RX
until the needle is in its highest position, then raise the
SUHVVHUIRRW'UDZWKHIDEULFWRWKHUHDUDQGFXWRIIH[FHVV
thread with the thread cutter located on the bottom of the
face cover, as shown.
.((3,1*6($06675$,*+7
To keep the seam straight, use one of the numbered guide
lines on the needle plate. The numbers indicate distance from
the needle at its center position.
7KHJXLGHOLQHRQWKHEREELQFRYHUSODWHLVDó´PPVHDP
JXLGH OLQH XVHG IRU SLHFLQJ TXLOW EORFNV RU IRU VHZLQJ QDUURZ
seams.
mm
mm
mm
mm
mm
127( %DVHG XSRQ WKH ZHLJKW RI WKH IDEULF VOLJKW
³¿QHWXQLQJ´RIWKHWHQVLRQPD\EHGHVLUHG
127( 6LQFH D VWUDLJKW VWLWFK KDV QR ZLGWK WKH
VWLWFK ZLGWK FRQWURO LV XVHG WR FKDQJH WKH QHHGOH
SRVLWLRQ
127( 7KH 1HHGOH 3ODWH KDV ERWK 0HWULF DQG ,QFK
0DUNLQJV DV DQ DLG IRU JXLGLQJ \RXU IDEULF ZKHQ
VHZLQJDVHDP
2
3
6
5
4
Содержание XL-580
Страница 1: ... INSTRUCTION MANUAL MANUEL D INSTRUCTION MANUAL DE INSTRUCCIONES ...
Страница 8: ......
Страница 140: ...11 13 9 14 3 ENGLISH FRANÇAIS ESPAÑOL 19342 D03 8254 ...


