


7-3
HOW TO REMOVE MISFEEDS
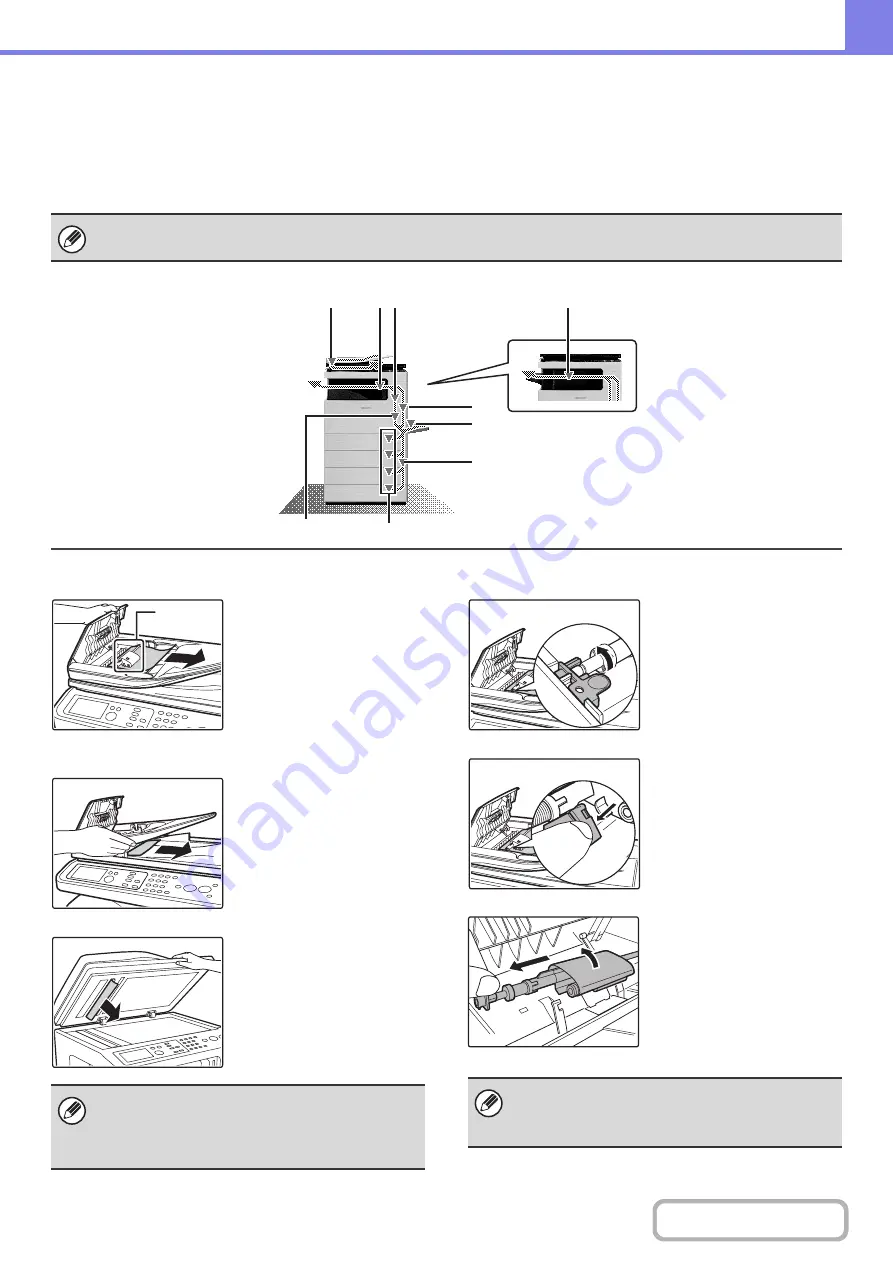
If you require more information when reading the instructions in the display, see the paper misfeed illustrations below.
Refer to the illustration below and then go to the appropriate illustration (1 to 10) for your situation.
☞
(1): page 7-3, (2)-(8): page 7-4, (9)-(10): page 7-5
(1) Original misfeed
Open the document feeder
cover and remove the paper
feed roller.
If it is difficult to remove
misfed paper, remove the
paper feed roller. To remove
the paper feed roller, see
"
Pull out the document feeder
tray and remove the misfed
paper.
Open the automatic
document feeder and
remove the original.
Removing the paper feed roller
Lift up the knob that holds
the roller shaft.
Pull down the release lever.
Remove the shaft rotating
the roller cover upward and
remove the shaft.
When removing a misfeed or closing a cover, tray, or the finisher, take care that your fingers do not become pinched.
(1)
(2)
(10)
(5)
(9)
(3)
(4)
(6)
(6), (7)
After removing the misfeed, open and close the
automatic document feeder (or the document feeding
area cover or document feeder tray) to clear the
misfeed display from the display.
Paper
feed roller
• If the roller cover is not pointing straight up when
the shaft is removed, a failure may occur.
• Carefully pull the misfed paper out without tearing it.
Содержание DX-C310 Operation
Страница 5: ...Make a copy on this type of paper Envelopes and other special media Transparency film ...
Страница 7: ...Assemble output into a pamphlet Create a pamphlet Staple output Create a blank margin for punching ...
Страница 10: ...Conserve Print on both sides of the paper Print multiple pages on one side of the paper ...
Страница 33: ...Search for a file abc Search for a file using a keyword ...
Страница 34: ...Organize my files Delete a file Periodically delete files ...
Страница 226: ...3 18 PRINTER Contents 4 Click the Print button Printing begins ...