

Chapter 6: Using the Web Interface
69
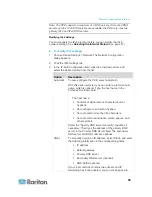
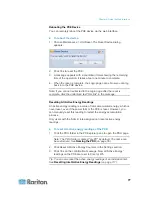
To disable service advertisement:
1. Choose Device Settings > Network Services to deselect the Service
Advertisement checkbox.
2. Click Yes on the confirmation message to switch off the zero
configuration advertising. The feature is disabled and the Service
Advertisement checkbox is deselected in the submenu.
Setting the Date and Time
Set the internal clock on the PXE device manually, or link to a Network
Time Protocol (NTP) server and let it set the date and time for the PXE.
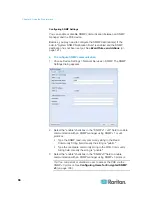
To set the date and time:
1. Choose Device Settings > Date/Time. The Configure Date/Time
Settings dialog appears.
2. In the Time Zone field, click the drop-down arrow, and select your
time zone from the list.
3. If the daylight saving time applies to your time zone, verify the
Automatic Daylight Saving Time Adjustment checkbox is selected.
If the daylight saving time rules are not available for the selected time
zone, the checkbox is not configurable.
4. Choose one of the methods to set the date and time:
To customize the date and time, select the User Specified Time
radio button, and then enter the date and time in appropriate
fields. Use the yyyy-mm-dd format for the date and the hh:mm:ss
format for the time.
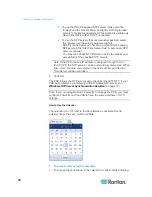
To set the date, delete existing numbers in the Date field and
type new ones, or click the calendar icon
to select a
date.
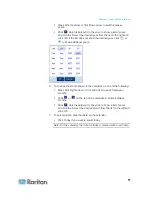
The time is measured in 24-hour format so enter 13 for
1:00pm, 14 for 2:00pm, and so on. You can enter the time by
deleting existing numbers and typing new ones in the hour,
minute and second fields, or clicking the arrows
to
adjust each number.
To let an NTP server set the date and time, select the
"Synchronize with NTP Server" radio button. There are two ways
to assign the NTP servers.
Содержание PXE
Страница 1: ...Copyright 2014 Raritan Inc PXE 0C v3 0 E August 2014 255 80 0008 00 Raritan PXE User Guide Release 3 0...
Страница 12: ...Contents xii To Assert and Assertion Timeout 352 To De assert and Deassertion Hysteresis 354 Index 357...
Страница 16: ......
Страница 50: ...Chapter 5 Using the PDU 34 4 Pull up the operating handle until the colorful rectangle or triangle turns RED...
Страница 200: ...Chapter 6 Using the Web Interface 184 10 To print the currently selected topic click the Print this page icon...
Страница 339: ...Appendix A Specifications 323 RS 485 Pin signal definition al 4 5 6 D bi direction al Data 7 8...
Страница 353: ...Appendix D LDAP Configuration Illustration 337 5 Click OK The PX_Admin role is created 6 Click Close to quit the dialog...
Страница 380: ...Index 364 Z Zero U Products 1...
Страница 381: ......


