Date
26/6/2017
Document 923860006_09_006
Document code 923860006_09_006
Page 14 from 44
4.
Programming
The programming of the panel can be done using the keypad and the screen. Alternatively, can be done using a
PC via Ethernet connection. In case of a network of panels, some settings can only be done using a PC.
4.1 Programming using the keypad
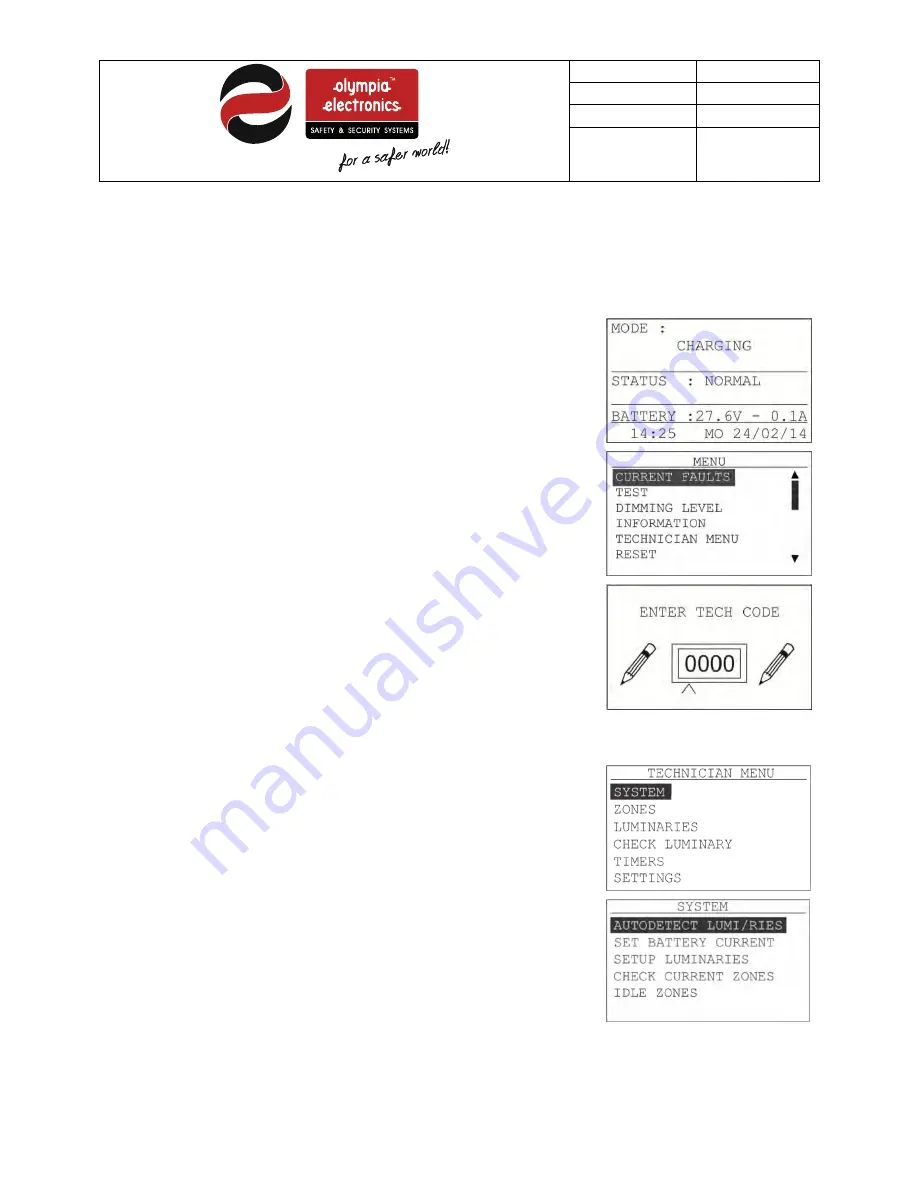
After correctly completing the whole installation and powering on the system,
the screen on the right should appear.
If “Enter” key is pressed the next screen shows up (MENU). In order to start
programming the system, press the down arrow until the cursor goes to the
selection TECHNICIAN MENU and select by pressing the “Enter” key again.
For safety reasons, programming can be done only by personnel that are
allowed know the technician code. To enter the 4-digit code, use the arrow
keys. Use the up/down arrow keys for increasing/decreasing the value and
the right/left keys to go to the next or previous digit. When the code is
entered press Enter.
The factory default code for the Technician Menu is “1000”.
4.1.1 Programming the System
If a correct code is given and the “Enter” key is pressed the Technician Menu
screen is shown, else an error is displayed. The Technician Menu also has
some additional settings that can be shown if you scroll down the menu,
pressing down arrow. These are CHANGE TECH CODE, MODE INHIBIT,
SET FUNCTION TEST, SET CAPACITY TEST, MAKE A CAPACITY TEST,
RESET DEFAULTS, ANNUAL CHECK DONE, and NETWORK.
By selecting SYSTEM and pressing the “Enter” key the menu on the right is
shown.
By pressing “Enter” on the first option, AUTODETECT LUMI/RIES, the
system goes on an auto-detection process where all installed luminaries in
the illumination circuits (zones) are automatically registered in the system’s
memory. Before starting this process first make sure that all connections
have been made properly and all the luminaries have been correctly
addressed.
This process is crucial for the system when a new installation takes place, in


