5-16 Function and Performance Checking Method
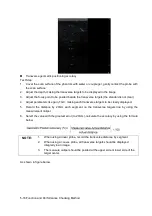
Transverse geometric positioning accuracy
Test Step:
1. Cover the scan surface of the phantom with water or couple gel, gently contact the probe with
the scan surface
2. Adjust the depth, making the transverse targets to be displayed in the image.
3. Adjust the focus point to be posited beside the transverse targets (the standard is not clear)
4. Adjust parameters like gain, TGC, making each transverse targets to be clearly displayed.
5. Record the distance by 20mm each segment on the transverse targets line by using the
measurement caliper
6. Select the value with the greatest error (to 20mm), calculate the accuracy by using the formula
below
NOTE:
1.
When using a linear probe, record the transverse distance by segment.
2.
When using a convex probe, all transverse targets should be displayed
integrally in an image.
3.
The measure caliper should be posited at the upper side or lower side of the
target center.
As shown in figure below.
Содержание Z6
Страница 2: ......
Страница 14: ......
Страница 16: ...2 2 Product Specifications Left side 9 4 7 5 6 8 ...
Страница 72: ......
Страница 119: ...Structure and Assembly Disassembly 7 35 图 7 59 Disassembly of Speaker 8 ...
Страница 120: ......
Страница 132: ......
Страница 142: ......
Страница 152: ......
Страница 168: ......
Страница 171: ...Phantom Usage Illustration B 3 ...
Страница 172: ......
Страница 173: ...P N 046 010452 00 5 0 ...


