7-24 Structure and Assembly/Disassembly
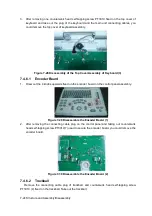
3. After removing one countersunk head self-tapping screw PT3X10 fixed on the top cover of
keyboard and take out the plug of the keyboard and the main unit connecting cables, you
could remove the top cover of keyboard assembly.
Figure 7-28 Disassembly of the Top Cover Assembly of Keyboard (3)
7.4.6.1
Encoder Board
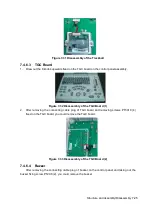
1. Draw out the 4 knobs upwards fixed on the encoder board on the control panel assembly.
Figure 7-29 Disassemble the Encoder Board (1)
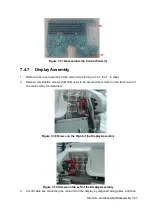
2. After removing the connecting cable plug on the control panel and taking out countersunk
head self-tapping screw PT3X10(7) used to secure the encoder board, you could remove the
encoder board.
Figure 7-30 Disassemble the Encoder Board (2)
7.4.6.2
Trackball
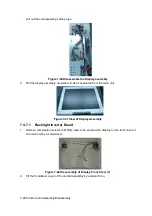
Remove the connecting cable plug of trackball, and countersunk head self-tapping screw
PT3X10 (4) fixed on the trackball. Take out the trackball;
Содержание Z6
Страница 2: ......
Страница 14: ......
Страница 16: ...2 2 Product Specifications Left side 9 4 7 5 6 8 ...
Страница 72: ......
Страница 119: ...Structure and Assembly Disassembly 7 35 图 7 59 Disassembly of Speaker 8 ...
Страница 120: ......
Страница 132: ......
Страница 142: ......
Страница 152: ......
Страница 168: ......
Страница 171: ...Phantom Usage Illustration B 3 ...
Страница 172: ......
Страница 173: ...P N 046 010452 00 5 0 ...


