background image

- xvii -

How to read this Operation Manual

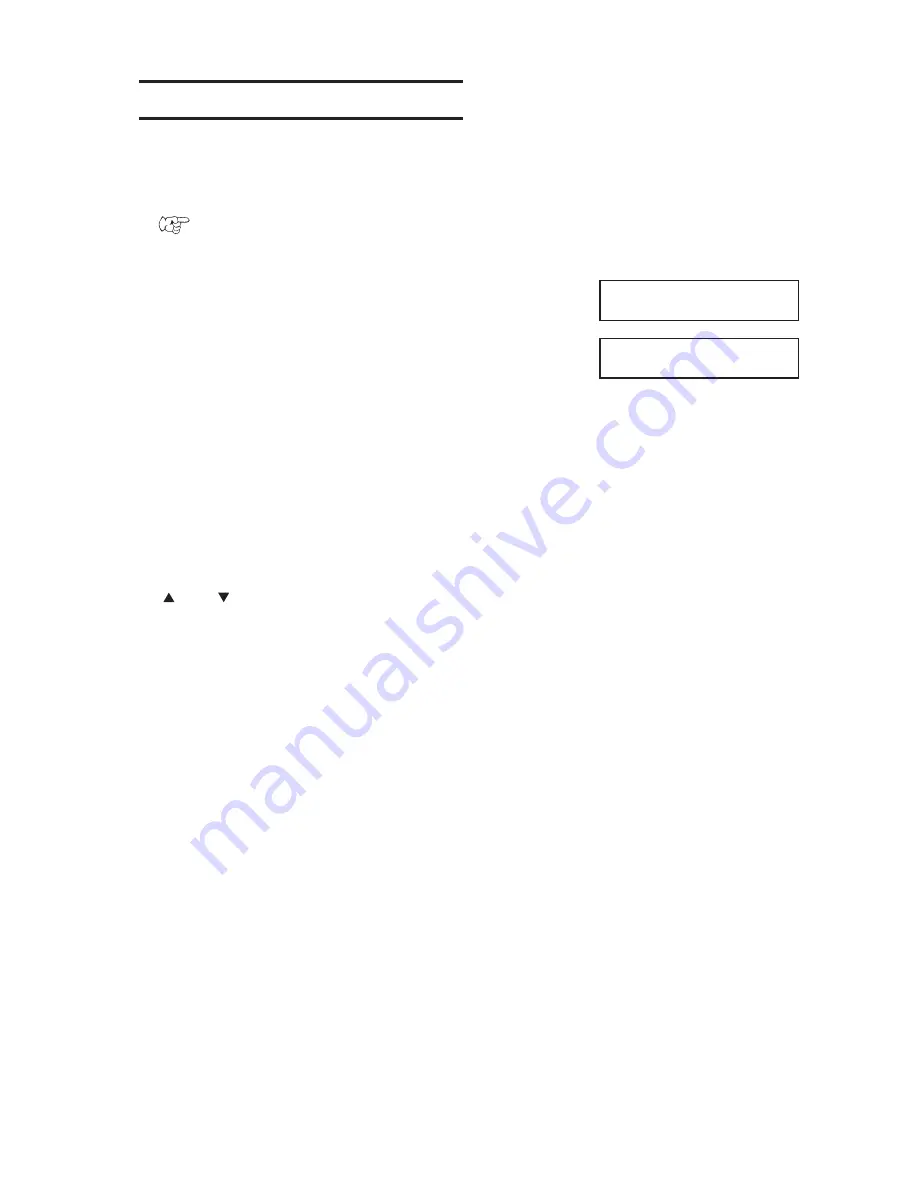
Display on the LCD and Indication of the Keys

In this Operation Manual, the characters displayed on the LCD of the operation panel and

the keys used to operate the device are explained, together with the operation procedure.

 P.1-18.

Operate the device while confirming the display on the LCD.

Display on the LCD

The content of display is shown in characters in a

box as shown at right.

Operate the device according to the explanation of

the operation procedure and the content of display

on the LCD.

In this Operation Manual, each setting and mes-

sages displayed on the LCD is enclosed in [ ], like

[TYPE.1], [PLEASE WAIT], etc.

Operation keys

In the text of this Operation Manual, the operation

keys are shown enclosed in brackets.

[ ] and [ ] indicate Jog keys.

The other operation keys are enclosed in brackets,

as [FUNCTION].

FUNCTION

SET UP

 < ENT >

SET UP

SELECT

:  TYPE.1

Содержание UJF-605C

Страница 1: ...t with your naked eyes or it may cause pain in your eyes or visual impairment This device is equivalent to Class II laser device Never look at the laser light or it may cause pain in your eyes or visu...

Страница 2: ......

Страница 3: ...IMAKI BE LIABLE FOR SPE CIAL INCIDNETAL OR CONSEQUENTIAL DAMAGES OR FOR LOSS OF PROFITS OF DEALER OR CUSTOMERS OF ANY PRODUCT Requests This Operation Manual has been carefully prepared for your easy u...

Страница 4: ...and Drug Administration Implement regulations for laser products The sentence of This product complies with 21 CFR chapter I and subchapter J indicates compliance with the CDRH regulations and is lab...

Страница 5: ...evice Please read and fully understand this Operation Manual before putting the machine into service It is also necessary to keep this Operation Manual on hand Make arrangements to deliver this Operat...

Страница 6: ...tation 1 8 Flushing tray 1 9 Connecting the cables 1 10 Connecting the interface cable 1 10 IEEE 1394 interface is used 1 10 IEEE 1284 interface is used 1 10 Connecting the power cable 1 11 UV unit an...

Страница 7: ...and solving nozzle clogging 2 19 Normal pattern 2 19 Printing an image from source data 2 21 Starting the printing operation 2 21 Printing repeatedly COPY 2 23 Interrupting the printing operation 2 24...

Страница 8: ...MARK SENSOR 4 8 Set the operation of the registration mark detection MARK SETUP 4 8 Check the sensor for the registration mark detection MARK Check 4 12 Turning off UV Irradiation device UV LAMP OFF 4...

Страница 9: ...olor SP REFRESH 5 28 Displaying device information INFORMATION 5 29 Set the type of the cap rubber CAP RUBBER 5 30 CHAPTER 6 When abnormal conditions are encountered Before taking a phenomenon as a si...

Страница 10: ...High speed interface used Use of high speed interface IEEE1394 allows high speed data reception from computers Curing and fixing of ink enabled after printing Use of an ultraviolet curing device UV l...

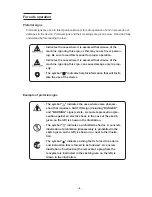
Страница 11: ...nformation that will facili tate the use of the device Example of pictorial signs The symbol indicates the case where some phenom enon that requires a CAUTION sign including DANGER and WARNING signs e...

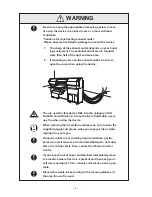
Страница 12: ...device falls into the category of UN No 3082 and UN Class 9 Since the ink is flammable never use fire when using the device When cleaning the ink station and head be sure to wear the supplied goggle a...

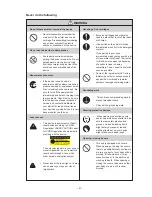
Страница 13: ...look at the laser light or it may cause pain in your eyes or visual impairment Handling of ink cartridges Store ink cartridges and waste ink tank in a place that is out of the reach of children If in...

Страница 14: ...ear or on the UV lamp or it may cause fire Do not break a used UV lamp put it in a container and discard likewise ordinary fluorescent lamps according to the local regulations Breaking a UV lamp will...

Страница 15: ...liquid or mixed soft water with anti freezing liquid gets on the skin immediately wash it off with soap and cool with iced water Then consult a doctor as soon as possible If you swallowed the Anti fr...

Страница 16: ...ad the exclusive one Never refill the ink cartridge with ink Neither pound the ink cartridge nor shake it violently so as to prevent leakage of ink adhering locations Periodic exchange parts There are...

Страница 17: ...lead to electrical shock of personnel or fire In order to prevent accidents from occurring be sure to carry out periodic inspections and replacement of time change components About hot parts The UV l...

Страница 18: ...if installed in a place that vibrates A place where fire is present The printer is a precision machine Do not use it in a place that is filled with dirt and dust CAUTION Notes on UV lamp The UV lamp p...

Страница 19: ...the LCD The content of display is shown in characters in a box as shown at right Operate the device according to the explanation of the operation procedure and the content of display on the LCD In th...

Страница 20: ...care This chapter describes the recovery procedure for ink clogging and the cleaning procedure for each section Chapter 4 Setting function This chapter describes the setting function Chapter 5 Mainte...

Страница 21: ...device as well as ink and media Table of contents Installing the device 1 2 Configuration and function 1 4 Connecting the cables 1 10 UV unit and UV irradiation device 1 12 Installing the ink cartridg...

Страница 22: ...2250 mm About 1570 mm About 1370 mm About 420 Kg 4250 mm or more 1000 mm or more 1000 mm or more 1000 mm or more 3570 mm or more 1000 mm or more This unit cannot be installed by the customer Its insta...

Страница 23: ...unit wait until the UV lamp is cooled When moving the device take care not to apply excessive shock to it Be sure to adjust the level feet to level the device at the new location Do not hold the table...

Страница 24: ...he device and the LCD for displaying set items etc 5 Power switch It turns on off the power to the device 6 UV lamp status indicator Indicates the UV lamp status P 1 13 Error red UV lamp OFF then cool...

Страница 25: ...tor Bidirectional parallel interface connector complies with IEEE1284 4 Air filter Clean an air for the blower table 1 2 4 3 1 2 3 Name Function 1 D SUB connector Connects the UV lamp interface cable...

Страница 26: ...y Repeats printing of already printed data P 2 23 REMOTE key Change the operation mode between the REMOTE mode and the LOCAL mode ENTER key Used to move to the lower level menu and establish the setti...

Страница 27: ...b panel is used for moving the table up down copying and setting blower ON OFF JOG keys Move the table up down COPY key Repeats printing of already printed data P 2 23 2 24 Vacuum switch Sets table ON...

Страница 28: ...amp condition the carriage is positioned differently The carriage sits in the left station cover during UV lamp ON The carriage sits in the right station cover during UV lamp OFF Capping station The c...

Страница 29: ...y Flushing tray is inside of the left maintenance cover at the front side When printing head executes flushing operation waste ink may be collected in the flushing tray Clean the waste ink from the tr...

Страница 30: ...an IEEE 1394 interface cable to connect the computer and the device together if the computer has IEEE1394 interface The RIP used must be applicable to IEEE 1394 Either of the two IEEE 1394 connectors...

Страница 31: ...required Connecting the power cable cannot be installed by the customer Contact your local distributor to call for service to connect the power cable as well as moving installation of the device We s...

Страница 32: ...h UV lamp In 2 minutes after setting the power to this unit ON this device is enabled for irradiation UV unit and UV irradiation device UV unit The UV unit installed in the lower right corner of this...

Страница 33: ...chart for the UV indicator UV lamp OFF REMOTE key pressed TEST DRAW started UV lamp preheated Display Indication Preheating completed UV lamp steadily ON Error occurred UV lamp turn OFF No operation 3...

Страница 34: ...s been set OFF it is cooled The UV lamp cannot be set ON again and this unit cannot start printing Please wait for going the light off once OFF Other 2 modes Error mode ON red 1 Error in UV power 2 UV...

Страница 35: ...Each color is displayed on the LCD as follows Black K Cyan C Magenta M Yellow Y Light cyan c Light magenta m White W Spot color S Relationships between ink station and head row One color ink is applie...

Страница 36: ...o thoroughly consume the ink in the ink cartridge once it is opened within six months If an extended period of time has passed after opening the cartridge tank printing quality would be poor Store ink...

Страница 37: ...cked Curling of media Tabular media should be flat or curled downward swelled at the center with the printing surface facing up Media curled upward may not be ab sorbed to the table When storing media...

Страница 38: ...has received 5 Pressing the FUNCTION key to set printing conditions FUNCTION mode While the device is in the LOCAL mode press the FUNCTION key to put the device into the FUNCTION mode This is the mod...

Страница 39: ...on 2 2 Turning the power on 2 3 Opening closing covers 2 5 Initial setting of inks 2 6 Setting the media 2 7 Establishing the origin and the print area 2 15 Checking and solving nozzle clogging 2 19 P...

Страница 40: ...detected if the registration mark detection function is set OFF Set the origin CONTINUE mode THICKNESS Media thickness known Media thickness unknown Setting the media SENSE mode Sense mode Enter the...

Страница 41: ...initial operation of the device is per formed To avoid injuries keep your hands away from the device while in motion If the UV device power is OFF an error is indicated Turn the UV device power ON and...

Страница 42: ...re that the Local mode is dis played 2 Press the ENTER key and display the Ink remaining 3 Press the ENTER key and display the firm ware version used command ver sion Refer to Information in the Maint...

Страница 43: ...printing operation stop for safety In this case restart this unit and computer in the procedures described below STEPS 1 When opening the cover during printing the message shown on the right will be d...

Страница 44: ...ss the ENTER key 8 Select the print head color by pressing the or keys 9 Display the print head color must be filled by pressing the or keys Put symbol for colors to be filled with no ink 10 Press the...

Страница 45: ...to the cover Adhesive tape when used must be of the kind that leaves no adhesive materials or tape itself on the table Do not use curled media or normal printing will be disabled Do not use media larg...

Страница 46: ...Attach it with the magnetic part up 2 Insert the curtain all the way until it hit a wall into the handle 3 Attach the small curtains to the both cover ends Make sure to attach them to prevent leakage...

Страница 47: ...edia is reflected to all media Enter a desired value The registered type number is displayed P 4 4 Allowable set range 0 9 to 2 0 mm Initial value 1 0 mm STEPS 1 Make sure that the LOCAL mode is dis p...

Страница 48: ...his mode when continuously using media of the same thickness Once the head gap is adjusted here it is no longer adjusted for printing Be sure to check the gap P 2 13 STEPS 1 Make sure that the LOCAL m...

Страница 49: ...CAL mode is dis played 2 Press the FUNCTION key 3 Select the GAP CHECK by pressing the or keys 4 Press the ENTER key 5 Select the SELECT by pressing the or keys 6 Press the ENTER key 7 Select the THIC...

Страница 50: ...ER key 12 Press the ENTER key Table raise up unto the height of the media Adjust the table height that the highest part of the media is to be same as the head gap setting value 13 Press the ENTER key...

Страница 51: ...adjust the head gap for the gap check is not performed when the media thickness has been changed STEPS 1 Make sure that the LOCAL mode is dis played after setting media 2 Press the FUNCTION key three...

Страница 52: ...es upward and at the same time the head gap is automatically adjusted 9 When adjustment has completed CHECK START is restored 10 Press the END key twice the device enters the LOCAL mode LOCAL GAP CHEC...

Страница 53: ...lishing the origin and the print area Initial value The origin and the print area are set as following by default until they are changed Effective printing area Media 60mm 60mm Origin 60mm Out put dir...

Страница 54: ...sh an origin by pressing the and keys Red light pointer mark is put on the table or media This point becomes the origin of the coordinates displayed 3 After deciding the origin press the EN TER key Th...

Страница 55: ...ure that the LOCAL mode is dis played 2 Press the FUNCTION key 3 Select ORIGIN by pressing the or keys 4 Press the ENTER key 5 Select X OFFSET by pressing the EN TER key Set the X origin 6 Enter the s...

Страница 56: ...lue by pressing the or keys 11 Press the ENTER key and set the Y origin Display enters the procedure 8 The origin of coordinates has been set 12 Press the END key three times the de vice enters the LO...

Страница 57: ...e ENTER key The device prints the test pattern 4 After the printing test pattern the table moves towards and then the device enters the LOCAL mode 5 Check the test patterns If a failure occurs proceed...

Страница 58: ...ng the or keys Select the head by color 3 Display the print head for execution of cleaning by pressing the or keys Select for the heads not to be cleaned 4 Press the ENTER key 5 Select the method of c...

Страница 59: ...when Sense mode has been set See the descrip tion of gap check P 2 13 In other mode gap check is per formed as well with the latest mode and the head gap value in the case the head gap mode is changed...

Страница 60: ...the method of data transmission see the manual for the output software 5 During the printing The origin remain unchanged after printing When printing the same data repeatedly use the copy function P...

Страница 61: ...raw a copy 3 Press the ENTER key Printing condition and the number of copies that is being drawn are displayed alternately When using the sub panel pressing the ENTER key is not required Adjust the he...

Страница 62: ...R is displayed 4 Press the ENTER key The data that has been received is erased and the device enters the LOCAL mode Printing multi editions repeatedly multi editions copy Data printing at most 4 editi...

Страница 63: ...g all editions data press the COPY key and complete the MEMORY mode Perform the change of the MEMORY mode before printing or after printing and do not change during printing 5 Press the REMOTE key to...

Страница 64: ...ts to the LOCAL mode 12 In case of copying again replace media and perform copying from the STEP 5 Clear the number of copies You can initialize the number of copies that you have drawn repeatedly to...

Страница 65: ...dge hold it laterally with the side containing the IC chip upward When the amount of ink becomes small during printing Indicate the ink color which has run out The display at right indicates that blac...

Страница 66: ...the LCD The contents of cartridge error can be checked For details see Troubles with Messages Dis played in Chapter 6 Troubleshooting 2 Press the ENTER key while in LOCAL mode 3 Press the ENTER key ag...

Страница 67: ...the operation for the turning off of UV irradiation device and turn the device off when Orange Cooling lamp has been gone dark STEPS 1 Perform the operation for the turning off of UV irradiation devic...

Страница 68: ...2 30...

Страница 69: ...384 Washing liquid Order No SPC 0385 Table of contents Routine maintenance 3 2 In cace defective printing is not resolved 3 3 Cleaning flushing tray 3 5 When the waste ink tank becomes full 3 7 Replac...

Страница 70: ...becomes wet electric shock hazards and breakage of the device can result Conduct maintenance works after turning off the power switch and detach ing the power cable If not unexpected troubles can aris...

Страница 71: ...e to wear the supplied goggle and gloves since you may get ink in your eyes Do not move the carriage out of the capping station by hand Use the appropriate operation key to move the carriage STEPS 1 P...

Страница 72: ...les agency or Mimaki sales office Contact your nearest sales agency or Mimaki sales office to order the exclu sive cleaning swab 9 Wipe the adherent ink which got on the cap rubber or inside the sucti...

Страница 73: ...ake sure to remove the waste ink in the flushing tray frequently Other wise the waste ink dried out solidly under the UV light and may not remove STEPS 1 Press the FUNCTION key from the LO CAL mode 2...

Страница 74: ...ause head damage by the remaining caked ink The UV ink dried out solidly under the UV light In case unable to get rid of the caked ink the tray should be replaced with a new one Please contact your lo...

Страница 75: ...ownward When pulling out the waste ink tank hold the opening of the waste ink tank with paper and then slowly pull it out to prevent waste ink from spatter ing Before replacing ink put paper on the fl...

Страница 76: ...o the local regulations of the area this unit is used Precautions in handling the Anti freezing liquid Be sure to wear goggles and gloves for handling the Anti freezing liquid Use the exclusive Anti f...

Страница 77: ...r heater after pressing the ENTER key Do not touch the water heater until WASTE AF is displayed to avoid from burn injury In case using the device before the water heater replacement it may take appro...

Страница 78: ...h the hook When engaging the handle with the hook take care to avoid bending the cables or tubes or pulling them with excessive force or it may cause malfunction of the water heater 11 Remove the wate...

Страница 79: ...ations of the area this unit is used 13 Set the empty hot water tank into the water heater 14 Lock the catch clips and close the cover 15 Press the ENTER key Discharge of the antifreezing liquid in th...

Страница 80: ...antifreezing liquid in the water heater tank Supply 500 cc of antifreezing liquid followed by 1000 cc of soft water The optimum volume of soft water is 1000 cc Do not supply excessive water or water...

Страница 81: ...nance below before working once a week Regular maintenance must be done once in a week to avoid having white ink precipitate Shake the ink cartridge up and down about 10 times slowly STEPS 1 Press the...

Страница 82: ...u shake it too strong the pack inside may be damaged and it may cause ink leakage Therefore perform this carefully If the remaining amount of ink is less ink in the cartridge cannot be beaten enough T...

Страница 83: ...cleaner etc If the filter is clogged by ink adhesion replace the filter STEPS 1 Turn the vacuum switch OFF 2 Remove the filter holder from the filter unit 3 From the filter holder remove the filter an...

Страница 84: ...ing regularly the undersurface of the carriage For Cleaning Cleaning swab Maintenance cleaning fluid glove goggles Turn off the device before cleaning To avoid burn injury clean the undersurface of th...

Страница 85: ...e by the side surface of the exclusive cleaning swab which is containing maintenance cleaning liquid from under the table Do not touch the head and nozzle part to avoid the damage Contact your nearest...

Страница 86: ...ps STEPS 1 Press the FUNCTION key from the LO CAL mode 2 Select MAINTENANCE by pressing the or key 3 Press the ENTER key 4 Select WIPE HEAD by pressing the or key 5 Press the ENTER key 6 Select the he...

Страница 87: ...8 Press the ENTER key 9 Select the number of wiping 1 to 9 by pressing the jog key or 10 Press the ENTER key 11 Press the ENTER key 12 Wiping is started WIPE HEAD COLOR KCMYcmWS WIPE HEAD WIPE NUM 1 W...

Страница 88: ...3 20...

Страница 89: ...ts Application functions 4 2 Registering two or more printing conditions at a time Selecting a type 4 4 Setup functions 4 5 Setting the operation of the registration mark detection MARK SENSOR 4 8 Tur...

Страница 90: ...individual printing conditions in the function menu after performing the following three operations 1 Check that the menu mode is the LOCAL mode 2 Check that the language in which to display characte...

Страница 91: ...ESH ent FUNCTION DATA CLEAR ENT SET UP SELECT TYPE1 TYPE QUALITY ent TYPE UV LEVEL ent FUNCTION ENTER ENTER LOCAL FUNCTION SET UP ENT ENTER DATA CLEAR FUNCTION GAP CHECK ENT ENTER GAP CHECK CHECK STAR...

Страница 92: ...cating printing conditions to a particular type is explained STEPS 1 Make sure that the LOCAL mode is dis played 2 Press the FUNCTION key 3 Select SET UP by pressing the key 4 Press the ENTER key 5 Se...

Страница 93: ...pecifies whether the values set on the device print are given priority or the values set Ink Layers Sets the number of overprinting if ink coloring is poor Color pattern Print a color pattern on the l...

Страница 94: ...ng the head during printing If this function is executed in a dusty place or dry place ink in the head will be likely to solidify A larger level results in more number of refreshes Number of refreshes...

Страница 95: ...o scanning at 0 During drawing the media is warmed up by heat of the UV lamp Around the starting point of drawing the media may not be warmed up and adhesion of the UV ink may be low In this case a se...

Страница 96: ...et sheet and the printing origin The following types of the registration marks are to be read The initial setting for DETECT operation is OFF Therefore no messages are indicated when printing Once the...

Страница 97: ...4 9 TYPE1 TYPE2 60 mm or more from the sheet backend B 50 mm or more 60 mm or more from the sheet 60 mm or more from the sheet backend B 50 mm or more 60 mm or more from the sheet...

Страница 98: ...or copy printing checking the registration mark detection positions using the light pointer causes the registration marks to be automatically detected next time When setting this function place the m...

Страница 99: ...tion marks refer to the Page 4 10 7 Press the ENTER key 8 Enter a value for SIZE by pressing the or keys 9 Press the ENTER key 10 Select the FORM by pressing the or keys 11 Press the ENTER key 12 Ente...

Страница 100: ...the registration marks no stain or print image should be in between the marks STEPS 1 Make sure that the Local mode is dis played 2 Press the FUNCTION key 3 Select the Mark sensor by pressing the key...

Страница 101: ...no registration marks are detected an error is indicated 9 The registration mark detection com pletes MARK SENSOR MARK CHECK ent Scan to the A direction Minus direction Plus direction Start direction...

Страница 102: ...0 minutes When Setting value is ON in the UV Lamp OFF TIMER menu or no printing is to be carried out long time 30 minutes or more set the UV lamp OFF Once the UV lamp is set OFF it takes approximately...

Страница 103: ...e to Japanese Set Japanese display mode STEPS 1 Make sure that the mode is LOCAL mode 2 Press the FUNCTION key 3 Select DISPLAY by pressing the key 4 Press the ENTER key 5 Select the language by press...

Страница 104: ...4 16...

Страница 105: ...n CarriageOut 5 6 If nozzles are clogged even after the cleaning function is executed 5 7 Regular wiping function INT WIPING 5 8 Changing the ink set INK SET 5 9 Ink exchanging procedure 5 14 Select a...

Страница 106: ...perform P 5 28 refresh appropriate for white ink INFORMATION Display the firmware version and serial number for the device P 5 29 CAP RUBBER Set the type of the cap rubber P 5 30 Maintenance of the de...

Страница 107: ...service engineer for maintenance When this function is used to output data commands on a sheet of paper use 297mm x 210mm or larger size with the long side set horizontally Gap check is performed whe...

Страница 108: ...been checked P 2 13 When media thickness is changed Print Adjust When the head height is adjusted be sure to correct the dot positions This function corrects the dot positions to ensure that the accur...

Страница 109: ...d then correct it again with Print Adjust 6 Press the ENTER key 7 Repeat Steps 5 and 6 to correct the dot positions on Patterns 2 to 6 Select the correct dot positions on each of the patterns Enter th...

Страница 110: ...ey 3 Press the ENTER key The carriage moves above the table Sucion nozzle is moving to the front then the carriage moves from the station 4 Open the maintenance cover then perform the following mainte...

Страница 111: ...eys 4 Press the or keys to display the print head color must be filled Put symbol for colors to be filled with no ink 5 Press the ENTER key 6 Press the ENTER key again to start the ink filling 7 When...

Страница 112: ...NT PRINT COUNT cleans the nozzle surface at the end of printing if it exceeded the set number of scans 100 to 800 times PRINT COUNT cleans the nozzle surface per the set number of printings 1 to 4 tim...

Страница 113: ...oes not contain sufficient quantity of ink changing of the ink set could not be performed properly because of the ink fill up abnormality Check the capacity of waste ink tank If the tank is filled wit...

Страница 114: ...shoen remove the cleaner cartridge 11 Press the ENTER key The cleaner is discharged to the waste ink tank When the cleaner is discharged the screen returns to the local mode When the cleaner is discha...

Страница 115: ...ENTER key 3 Make sure that 8 color ink set is displayed and press ENTER key Select Uv 8 KCMYcmWS 4 Press the ENTER key 5 Set spot color cartridge Set the ink cartridge containing suffi cient quantity...

Страница 116: ...t Press the jog key or and select Uv 8 KCMYcmS 4 Press the ENTER key 5 Press the ENTER key 6 Remove the White ink cartridge 7 Press the ENTER key Unnecessary ink is cleaning 8 When the right is shown...

Страница 117: ...T S SET CARTRIDGE 10 When the right is shown remove the cleaner cartridge 11 Press the ENTER key The cleaner is discharged to the waste ink tank 12 When the right is shown set the spot ink cartridge 1...

Страница 118: ...ng fluid is suctioned up The washing liquid is separately available from your local distributor 9 When the display shown at right appears remove the cleaning cartridge The discharge of the cleaning fl...

Страница 119: ...e MAINTENANCE P 5 2 2 Press the ENTER key 3 Select a ink cartridge to execute a small amount cleaning by pressing the and keys 4 Select ON or OFFof small amount cleaning execution by pressing the and...

Страница 120: ...fer to the Displaying the informa tion P 2 4 3 Press the ENTER key to return to the local mode LOCAL UV LAMP UV LAMP CHANGE ent UV USED TIME 130h 05m Replacing UV lamp When the irradiation duration ha...

Страница 121: ...lect INIT TIMER by pressing the or keys 4 Press the ENTER key 5 Press the ENTER key again The irradiation duration is initialized When the operation completes the indication shown on the right is rest...

Страница 122: ...S 1 Select the UV LAMP from the MAINTE NANCE P 5 2 2 Press the ENTER key 3 Select OFF TIMER by pressing the or keys 4 Press the ENTER key 5 Select OFF for CONT IRR by pressing the or keys 6 Press the...

Страница 123: ...5 Press the ENTER key Checking UV ink curing level As the UV lamp is deteriorated the ink curing level may be lowered Check the UV ink curing level and adjust the UV lamp light intensity if necessary...

Страница 124: ...in the UV device has not reached the predetermined value a message is indicated In this case printing is disabled It is enabled when the error indication has disappeared 10 After the test printing ha...

Страница 125: ...ess the ENTER key 7 Select the light level by pressing the or key This display at the right indicates the LAYER When selecting the other one except for the LAYER follow the procedure from STEP11 8 Pre...

Страница 126: ...nd the layer 4 is printed by the light level of the layer 2 11 Press the ENTER key 12 Press the END key three times the de vice returns to the LOCAL mode 13 Check the UV ink curing level again Set the...

Страница 127: ...hen the mas sage for confirmation of the illumination has appeared Touchstone of UV illumination level check Indicator value for the changing UV lamp at factory setting and the value used after 1000 h...

Страница 128: ...ng the or keys 6 Press the ENTER key 7 Select the LEVEL CHECK then press the ENTER key 8 Move the carriage to the capping station by pressing ENTER key The carriage is moved 9 Open the left maintenanc...

Страница 129: ...that the bracket touches the device B Set the edge of the illumination sensor to the UV illuminator BKT 1 Turn up the sensor hole to pass through the bracket hole Insert the illumination sensor reliab...

Страница 130: ...the checking is started In case the check lamp lights off it takes time to light 15 After checking open the left maintenance cover When measuring the UV level press the ENTER key to back to STEP13 be...

Страница 131: ...ined by UV lamp heat 19 Remove the UV illuminometer and BKT1 Do not touch the BKT1 and sensor parts of the UV illuminometer on or right after checking to avoid from burn injury Make sure to remove the...

Страница 132: ...t the SP REFRESH from the MAINTENANCE P 5 2 2 Press the ENTER key All the initial value of SP REFRESH is set to OFF Indicated as 3 Select a head to spot color refresh by pressing the and keys 4 Select...

Страница 133: ...s the ENTER key again then select VERSION The firmware version is displayed 4 Press the ENTER key to return to the VERSION 5 Select the SERIAL NO by pressing the or keys 6 Press the ENTER key The seri...

Страница 134: ...PS 1 Select the CAP RUBBER from the MAIN TENANCE P 5 2 2 Press the ENTER key 3 Select the type of cap rubber by pressing the or keys 4 Press the ENTER key 5 Press the END key twice the device returns...

Страница 135: ...sures to be taken in the case where an abnormal phenomenon arises on the device and where an error message is given on the display Table of contents Before taking a phenomenon as a sign of failure 6 2...

Страница 136: ...le as a sign of failure If the measures fail restore the device to the normal state contact your local MIMAKI distributor or MIMAKI office to call for service The device cannot be energized More often...

Страница 137: ...e head cleaning P 2 20 Corrective measure Clean the interior of the station P 3 3 Corrective measure If slip of paper is present in the head path for example above the work plate remove it Large ink d...

Страница 138: ...INK TANK WASTE TANK FULL Waste ink tank is full Down the table by pressing the key on the sub panel until the LCD indicates OK and then start the jog operation again Or remove the media from the tabl...

Страница 139: ...type of the loaded ink cartridge is different from the previous one Use the ink specified by MIMAKI Check the type of the loaded ink cartridge Color of INK COLOR KCMYcmW The color of the loaded ink c...

Страница 140: ...ontact your local distribu tor to call for service Securely connect the interface cable in position Use an interface cable in conformance with the standard Error message Cause Corrective measure ERROR...

Страница 141: ...ngs for functions have been tried to be changed though there remains received data that has not yet been printed An error occurs on the interface between the I F board and the control board Initial op...

Страница 142: ...mal condition Flashing action time out error has been occurred Step motor origin could not be detected Table height sensor could not be detected Y origin could not be detected X origin could not be de...

Страница 143: ...s appendix describes the specifications and components the de vice function menu structure Table of contents Basic specifications A 2 Specification for ink A 3 Position of the warning label A 4 Functi...

Страница 144: ...ute accuracy 0 1 mm accuracy Reoroducibility 0 2 mm Perpendicularity 0 5 mm 1000 mm Head height adjustment Automatic head gap adjustment enabled The media surface is sensed with the area sensor moving...

Страница 145: ...to 35 C 59 to 95 F During shipping 0 to 60 C 0 to 140 F within 2 weeks permitted Item UJF 605C Weight Packing box Approx 420 kg Outside Width 2250 mm dimensions Depth 1570 mm or less Height 1370 mm o...

Страница 146: ...abel Be sure to fully understand the warning given on the labels In the case where any of the warning label has become so soiled that the warning message is illegible or has come off purchase a new on...

Страница 147: ...No Reorder No No ReorderNo Reorder No 8 M901607 9 M903747 10 M904131 11 M904148 12 M904130 11 M902396 WARNING ULTRAVIOLET RADIATION AVOID EXPOSURE emitted from this aperture Laser radiation is WARNIN...

Страница 148: ...A 6...

Страница 149: ...OFF COLOR SELECT ENTER TEST DRAW HARDEN CHK ENT ENTER HARDEN CHK DPI 300 X 300 Function flowchart HARD NORMAL v v TEST DRAW HARDEN CHK QUALITY STD ENTER ENTER 300 x 300 600 x 600 1200 x 1200 1200 x 24...

Страница 150: ...FALL PLEASE WAIT TYPE SETUP RESET ent TYPE RESET ent TYPE DRAWING LEVEL3 LEVEL 0 3 TYPE DRAWING ent ENTER TYPE WAITING LEVEL3 LEVEL 0 3 TYPE WAITING ent ENTER FUNCTION v FUNCTION v v v SENSE CONTINUE...

Страница 151: ...SET KCMYcm SET UP OK ent INK SET W REMOVE CARTRIDGE WASHING PLEASE WAIT WASHING PLEASE WAIT INK SET W REMOVE TOOL WASHING PLEASE WAIT INK SET KCMYcm PLEASE WAIT INK SET KCMYcmWS SET UP OK ent INK SET...

Страница 152: ...CLOSE THE LEFT COVER UV LEVEL CHECK SET THE TOOL ent ENTER OFF is set ON is set UV LAMP OFF TIMER ent MOVING PLEASE WAIT UV LEVEL CHECK CHECK START ent CHECKING PLEASE WAIT PLEASE OPEN THE LEFT COVER...

Страница 153: ......

Страница 154: ...Printed in Japan MIMAKI ENGINEERING CO LTD 2012 IT FW 3 2...

Отзывы:

Похожие инструкции для UJF-605C