(5)
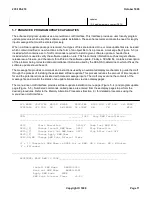
No other GENBKUP is running. Checks for the presence of /tmp/.genbkupLOCK file and, if found,
asks the user if they wish to terminate the other GENBKUP.
(6)
Change directory to /cft/shl.
(7)
Check sums (sum -r) of /no5text/bkup/*.ptn files against the values stored in /no5text/bkup/bkupsum
file.
(8)
****PTN FILES ARE OK**** (screen message, asterisks do not print on screen).
(9)
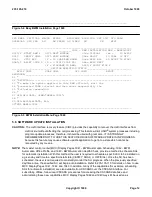
Check partitions and file systems listed in /no5text/bkup/parchk.list. Check to see if they are in the SG
data base, check some of their sizes against vtoc. Create /updtmp/.GBbboot.bf, /updtmp/.GBlboot.bf
and /updtmp/.GBprompat.o files to check bootfile sum values against those in /no5text/bkup/boot.sum.
Remove the .GB files when done.
(10) ****FOUND ALL PARTITIONS****
(11) Check if / (root), /etc, and /data base are mounted on primary (root, etc, and db), or on backup (broot,
betc, and bdb). If all are mounted on primary, no action is required. If all on backup or some on
primary and some backup, set a flag to offer limited menu options.
Check if other file systems are mounted: no5text, no5odd, updtmp, log, cdmp, rclog, bwm, tmp, unixa,
cft, dg, usrbin, smtext , no5sodd, no5codd, smlog, and unixabf. If some are found to be mounted on
nonstandard mount directory or not mounted, set a flag to offer limited menu options.
(12) ****MOUNT TABLE IS OK****
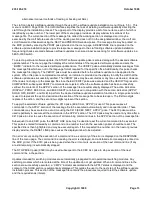
(13) Check if restart option may be offered. Offer restart option, if all of the following conditions are met:
(i)
/etc, /db, and / (root) are on primary partitions.
(ii)
The file /updtmp/.genbkupCHK exists and was created or last modified within past 24 hours.
(iii) The file (.genbkupCHK) indicates ODD time later than the last modification of cpodd.out and
/dev/no5aodd1 is currently mounted. In other words, no
BKUP:ODD
was run since the last time
GENBKUP ran
BKUP:ODD
input message and /no5odd/cpdata is mounted on /dev/no5aodd1
rather than on no5aodd2.
And/or
The file (.genbkupCHK) indicates TXT time later than the last modification of /no5text/.version,
/etc/.version, and /broot/.version. In other words, no software update was made official since the
last time GENBKUP ran
COPY:PTN,ALL
input message. (During this step, a temporary
directory /genbkupDIR is created to mount /broot in order to access /broot/.version. After
reading the time-stamp of /version, the partition is unmounted.)
(14) ****PROCEEDING...****
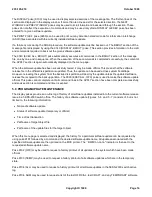
(15) Display on screen when last GENBKUP tasks were done. ``COPY PARTITION ALL CMD DONE ON
....'', ``AM TEXT TAPE SEQUENCE MADE ON ...'', etc.
(II)
Display main menu on screen. Items displayed on the menu will vary depending on the conditions found
during the initial checking. Perform the task selected by the user. When done, display the menu again. Exit
when the user selects ``q''.
235-105-210
October 1999
Copyright © 1999
Page 25
Содержание 5ESS-2000
Страница 96: ...235 105 210 October 1999 Copyright 1999 Page 2 ...
Страница 184: ...235 105 210 October 1999 Copyright 1999 Page 3 ...
Страница 300: ...13 STOP YOU HAVE COMPLETED THIS PROCEDURE 235 105 210 October 1999 Copyright 1999 Page 55 ...
Страница 339: ...7 STOP YOU HAVE COMPLETED THIS PROCEDURE 235 105 210 October 1999 Copyright 1999 Page 13 ...
Страница 342: ...235 105 210 October 1999 Copyright 1999 Page 2 ...
Страница 359: ...235 105 210 October 1999 Copyright 1999 Page 5 ...
Страница 516: ...Figure 10 24 1 KS 23483 L13 Disk Drive Cable Connection Rear View 235 105 210 October 1999 Copyright 1999 Page 2 ...
Страница 517: ...Figure 10 24 2 KS 23483 L21 Disk Drive Cable Connection Rear View 235 105 210 October 1999 Copyright 1999 Page 3 ...
Страница 518: ...Figure 10 24 3 KS 23841 L15 Disk Drive Cable Connection Rear View 235 105 210 October 1999 Copyright 1999 Page 4 ...
Страница 523: ...Figure 10 24 6 Top View of DUP Showing Internal Cabling 235 105 210 October 1999 Copyright 1999 Page 9 ...
Страница 609: ...2 STOP YOU HAVE COMPLETED THIS PROCEDURE 235 105 210 October 1999 Copyright 1999 Page 12 ...
Страница 628: ...a SM inhibited Response OK 2 STOP YOU HAVE COMPLETED THIS PROCEDURE 235 105 210 October 1999 Copyright 1999 Page 8 ...
Страница 653: ...Response OK 2 STOP YOU HAVE COMPLETED THIS PROCEDURE 235 105 210 October 1999 Copyright 1999 Page 16 ...
Страница 676: ...235 105 210 October 1999 Copyright 1999 Page 9 ...
Страница 792: ...3 STOP YOU HAVE COMPLETED THIS PROCEDURE 235 105 210 October 1999 Copyright 1999 Page 9 ...
Страница 799: ...Figure 11 36 3 1 Cleaning Points 235 105 210 October 1999 Copyright 1999 Page 7 ...
Страница 801: ...235 105 210 October 1999 Copyright 1999 Page 9 ...
Страница 839: ...2 STOP YOU HAVE COMPLETED THIS PROCEDURE 235 105 210 October 1999 Copyright 1999 Page 16 ...
Страница 999: ...2 STOP YOU HAVE COMPLETED THIS PROCEDURE 235 105 210 October 1999 Copyright 1999 Page 13 ...
Страница 1008: ...Figure 11 55 1 CTSNS DIP Switch Settings 235 105 210 October 1999 Copyright 1999 Page 2 ...
Страница 1011: ...235 105 210 October 1999 Copyright 1999 Page 5 ...
Страница 1053: ...235 105 210 October 1999 Copyright 1999 Page 15 ...
Страница 1165: ...Procedure 14 14 RESERVED FOR FUTURE USE PROCEDURE 1 Reserved For future use 235 105 210 October 1999 Copyright 1999 Page 1 ...
Страница 1186: ...Procedure 14 17 RESERVED FOR FUTURE USE PROCEDURE 1 Reserved For future use 235 105 210 October 1999 Copyright 1999 Page 1 ...
Страница 1187: ...Procedure 14 18 RESERVED FOR FUTURE USE PROCEDURE 1 Reserved For future use 235 105 210 October 1999 Copyright 1999 Page 1 ...
Страница 1284: ...Figure 15 15 1 PARADYNE Paradyne Corporation 3810 Modem Diagnostic Control Panel 235 105 210 October 1999 Copyright 1999 Page 6 ...
Страница 1287: ...Figure 15 16 1 153A Adapter Connection Figure 15 16 2 AMATPS Block Diagram 235 105 210 October 1999 Copyright 1999 Page 3 ...
Страница 1289: ...Figure 15 17 2 AMATPS Data Link 235 105 210 October 1999 Copyright 1999 Page 2 ...
Страница 1290: ...Figure 15 17 3 Single Housing B25A Cable Assembly 235 105 210 October 1999 Copyright 1999 Page 3 ...
Страница 1292: ...235 105 210 October 1999 Copyright 1999 Page 5 ...
Страница 1294: ...Figure 15 17 8 201C to TN82 Data Set Cable Drawing 235 105 210 October 1999 Copyright 1999 Page 7 ...
Страница 1303: ...9 STOP YOU HAVE COMPLETED THIS PROCEDURE 235 105 210 October 1999 Copyright 1999 Page 2 ...
Страница 1324: ...11 Type and enter q 12 STOP YOU HAVE COMPLETED THIS PROCEDURE 235 105 210 October 1999 Copyright 1999 Page 2 ...
Страница 1342: ...Figure 15 40 1 SCANS II Dial Up Data Set Installation Diagram 235 105 210 October 1999 Copyright 1999 Page 2 ...
Страница 1344: ...Figure 15 40 4 59A1 Mounting Front in Slot J3 Figure 15 40 5 2048A Data Set Front 235 105 210 October 1999 Copyright 1999 Page 4 ...
Страница 1345: ...Figure 15 40 6 Berg Connector Terminations and Layout 235 105 210 October 1999 Copyright 1999 Page 5 ...
Страница 1346: ...Figure 15 40 7 B25A Cable 4 STOP YOU HAVE COMPLETED THIS PROCEDURE 235 105 210 October 1999 Copyright 1999 Page 6 ...
Страница 1360: ...Figure 15 47 2 Typical SCANS III Link Diagram 235 105 210 October 1999 Copyright 1999 Page 2 ...
Страница 1368: ...Response FA or OK appears 17 STOP YOU HAVE COMPLETED THIS PROCEDURE 235 105 210 October 1999 Copyright 1999 Page 2 ...
Страница 1372: ...235 105 210 October 1999 Copyright 1999 Page 2 ...
Страница 1374: ...235 105 210 October 1999 Copyright 1999 Page 4 ...
Страница 1376: ...Figure 15 55 6 201C to TN83 Data Set Cable Drawing 235 105 210 October 1999 Copyright 1999 Page 6 ...
Страница 1418: ...Figure 15 56 1 PARADYNE 3810 Modem Diagnostic Control Panel 235 105 210 October 1999 Copyright 1999 Page 4 ...
Страница 1421: ...Table 1 1 O M Checklist 235 105 210 October 1999 Copyright 1999 Page 3 ...

