5 Installing the unit
38
4.
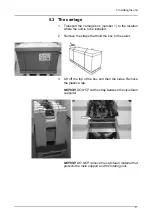
Fold down the edges of the box.
5.
Fold the side parts of the styrofoam away, so that the
end of the main support, that connects to the column, is
fully accessible.
6.
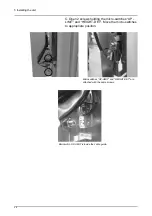
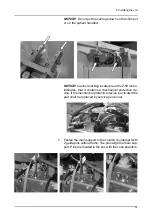
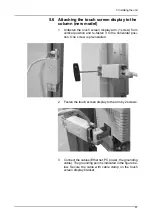
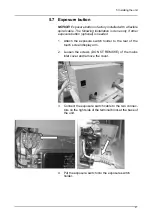
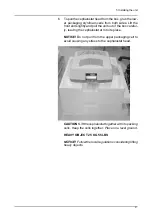
Lift the carriage and push it towards the column.
The lifting places are shown by arrows in the picture.
CAUTION - HEAVY OBJECT 83 KG 182.9 LBS
A minimum of two persons are required for
the following task.
NOTICE! Follow the local regulations considering lifting
heavy objects.
Содержание ORTHOPANTOMOGRAPH OP 3D Pro
Страница 1: ...ORTHOPANTOMOGRAPH OP 3D Pro 3D Dental X Ray System Installation Manual ENGLISH 216363 rev 1 0 805 5080...
Страница 2: ......
Страница 4: ......
Страница 8: ...iv rev...
Страница 18: ...1 Introduction 10...
Страница 22: ...2 Unit description 14 Panoramic lights 1 Midsagittal light 2 FH light 1 Image layer 2 TMJ light...
Страница 27: ...2 Unit description 19 2 6 Unit movements Panoramic unit movements R C J D...
Страница 29: ...2 Unit description 21...
Страница 30: ...2 Unit description 22...
Страница 38: ...4 PC requirements 30...
Страница 54: ...5 Installing the unit 46 4 Fasten the covers...
Страница 67: ...5 Installing the unit 59 C C D D Top cover of the column E E...
Страница 104: ...7 Cephalometric calibration and alignment 96...
Страница 111: ...7 Cephalometric calibration and alignment 103 3 Tighten the locking nut...
Страница 117: ...7 Cephalometric calibration and alignment 109...
Страница 128: ...8 Special procedures 120 6 Remove the arm from the column 4 nuts 7 Disassemble the arm...
Страница 132: ...8 Special procedures 124 right handed assembly Prism assembly for the left handed cephalostat...
Страница 158: ...8 Special procedures 150...
Страница 165: ...9 OP 3D Pro Pre sales check list 157 9 11 Notes comments...
Страница 166: ...9 OP 3D Pro Pre sales check list 158 9 12 Dimensions 463...
Страница 167: ...9 OP 3D Pro Pre sales check list 159 9 13 Dimensions with cephalostat...
Страница 168: ...9 OP 3D Pro Pre sales check list 160...


