3 Pre-installation requirements
26
3.3 Fixing hardware and Installation and
Setup tools
The following tools and hardware are required to install and
set up the unit. These are not included in the delivery of the
unit, unless otherwise stated.
Fixing hardware
NOTICE! Mounting bolts for floor and wall fastening are not
included in the delivery.
The type and length of hardware to be used depends on
the wall material and floor material to which the unit is to be
attached.
Installation tools
- Electric
drill
-
Spanners (wrenches) 10, 17 (x 2) mm AF
-
Allen keys (Hexagon socket wrenches) 1.5-8mm
- Flat
blade
screwdrivers
- Spirit
level
-
Pliers and wire cutters
- Scissors/Knife
-
Service tools set
Pan calibration and setup tools
-
Alignment cone assembly
-
Prüfkörper digital test tool for countries where this
test is required (optional, not supplied with the
unit), see chapter 6.5.14 Panoramic Quality Check
(optional).
3D calibration and setup tools
- 3D
calibration
phantom
- QC
phantom
Содержание ORTHOPANTOMOGRAPH OP 3D Pro
Страница 1: ...ORTHOPANTOMOGRAPH OP 3D Pro 3D Dental X Ray System Installation Manual ENGLISH 216363 rev 1 0 805 5080...
Страница 2: ......
Страница 4: ......
Страница 8: ...iv rev...
Страница 18: ...1 Introduction 10...
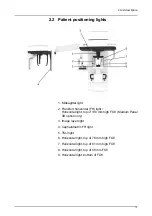
Страница 22: ...2 Unit description 14 Panoramic lights 1 Midsagittal light 2 FH light 1 Image layer 2 TMJ light...
Страница 27: ...2 Unit description 19 2 6 Unit movements Panoramic unit movements R C J D...
Страница 29: ...2 Unit description 21...
Страница 30: ...2 Unit description 22...
Страница 38: ...4 PC requirements 30...
Страница 54: ...5 Installing the unit 46 4 Fasten the covers...
Страница 67: ...5 Installing the unit 59 C C D D Top cover of the column E E...
Страница 104: ...7 Cephalometric calibration and alignment 96...
Страница 111: ...7 Cephalometric calibration and alignment 103 3 Tighten the locking nut...
Страница 117: ...7 Cephalometric calibration and alignment 109...
Страница 128: ...8 Special procedures 120 6 Remove the arm from the column 4 nuts 7 Disassemble the arm...
Страница 132: ...8 Special procedures 124 right handed assembly Prism assembly for the left handed cephalostat...
Страница 158: ...8 Special procedures 150...
Страница 165: ...9 OP 3D Pro Pre sales check list 157 9 11 Notes comments...
Страница 166: ...9 OP 3D Pro Pre sales check list 158 9 12 Dimensions 463...
Страница 167: ...9 OP 3D Pro Pre sales check list 159 9 13 Dimensions with cephalostat...
Страница 168: ...9 OP 3D Pro Pre sales check list 160...


