ORBIMAT CA
| Operating instructions
(09.03.15) OW_ORBIMAT_CA_BA_871060202_04_EN
orbitalum tools
GmbH, D-78224 Singen, www.orbitalum.com, Tel. +49 (0) 77 31 792-0
3
1.
About these instructions ......................................5
1.1
Warning messages .....................................5
1.2
Further symbols and displays .....................5
1.3 Abbreviations ............................................6
1.4
Warning symbols .......................................6
2.
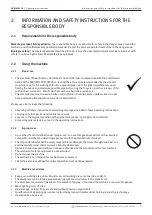
Information and safety instructions for the
responsible body .................................................7
2.1
Requirements for the responsible body .......7
2.2 Using the machine .....................................7
2.2.1 Proper use .......................................7
2.2.2 Improper use ...................................7
2.2.3 Machine constraints .........................7
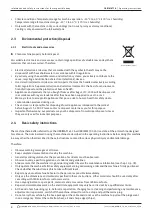
2.3 Environmental protection/disposal .............8
2.3.1 Electric tools and accessories ...........8
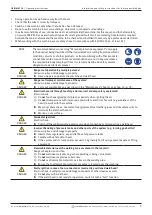
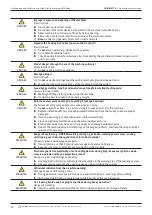
2.4 Basic safety instructions ............................8
3.
Product design ...................................................12
3.1
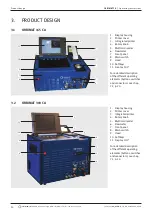
ORBIMAT 165 CA ......................................12
3.2
ORBIMAT 300 CA ......................................12
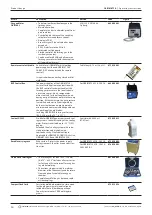
3.3 Accessories .............................................13
4.
Features and scope of application .......................16
4.1 Features ..................................................16
4.2 Additional characteristics .........................16
4.2.1 ORBIMAT 165 CA ............................16
4.2.2 ORBIMAT 300 CA AC/DC .................16
4.2.3 ORBIMAT 300 CA AVC/OSC .............17
4.3 Functional description ..............................17
5.
Technical specifications .....................................18
6.
Initial operation .................................................19
6.1
Checking the parts of delivery ..................19
6.2 Included with the machine ........................19
7.
Set-up and assembly ..........................................20
7.1
Control elements ......................................20
7.1.1 Overview of the main control
elements .......................................20
7.1.2 Connections and control elements
on the front panel ..........................20
7.2
Operating concept ....................................22
7.2.1 Operation via rotary knob...............22
7.2.2 Operation via push switches
(softkeys) ......................................22
7.2.3 Operation via an external keyboard ..22
7.3
Connection of the power source ................23
7.3.1 Setting up machine ........................23
7.3.2 Connecting a gas bottle .................23
7.3.3 Connecting weld head ....................23
7.3.4 Detaching water hoses ...................24
7.3.5 Pumping out coolant ......................24
7.3.6 Closing off gas hose .......................24
7.4
Initial operation .......................................25
7.4.1 Adding coolant ...............................25
7.4.2 Commissioning the power source ...26
8. Operation ..........................................................29
8.1
Auto programming ...................................29
8.1.1 Setting parameters ........................29
8.1.2 Configuring weld head ...................29
8.1.3 Configuring material ......................30
8.1.4 Configuring protective gas .............30
8.1.5 Configuring pipe diameter ..............31
8.1.6 Configuring wall thickness .............31
8.1.7 Configuring wire feed .....................31
8.1.8 Calculating procedure ....................31
8.2 Testing the procedure ...............................32
8.2.1 Preparing weld head ......................32
8.2.2 Preparing electrode .......................32
8.2.3 Turning weld head ..........................32
8.2.4 Connecting forming gas .................33
8.2.5 Welding .........................................34
8.2.6 Interrupting the welding process ....36
8.3 Adjusting the procedure ...........................36
8.3.1 Reasons and steps for adjusting
procedure ......................................36
8.3.2 Making percental changes ..............37
8.3.3 Adjusting individual parameters .....37
8.3.4 Adjusting gas times .......................37
8.3.5 Adjusting ignition current, end
current and current slope-off ..........38
8.3.6 Adjusting the pool formation time ..39
8.3.7 Adjusting welding current and
transition times ("Slope") ...............39
8.3.8 Adjusting pulse times ....................41
8.3.9 Adjusting weld speed and transition
time ("Slope") ................................41
8.3.10 Changing the sector .......................43
8.4 Saving and calling up a procedure ............45
8.4.1 Saving a procedure ........................45
8.4.2 Calling up a procedure .................. 46
8.5
Locking machine with key switch ............. 46
8.6 Tacking function .......................................47
8.7 Using the second gas pressure level
("flow force") .......................................... 48
8.8 Connecting supplementary devic ..............49
8.8.1 ORB Residual Oxygen Meter ...........49
8.8.2 Connecting and configuring the
BUP control unit .............................49
8.8.3 TIG manual welding torch ...............50
8.8.4 External remote control ..................51
8.8.5 External printer (A4) .......................51
8.8.6 External monitor/LCD (VGA) ............52
8.9 Monitoring functions ................................52
8.9.1 General information .......................52
8.9.2 Adjusting limit values .....................52
TABLE OF CONTENTS


