


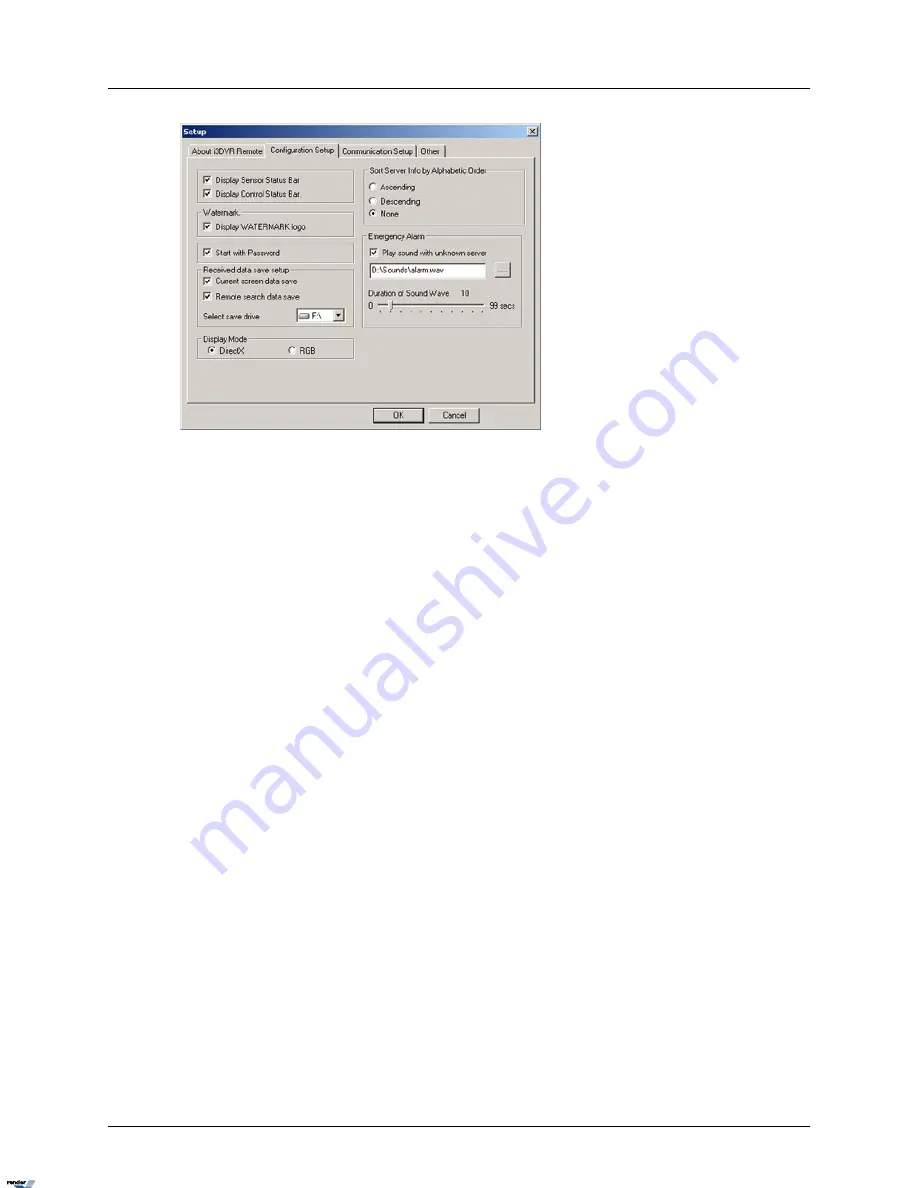
To setup the Configuration Setup, do the following:
1.
Check the Display Sensor Status Bar checkbox to display the Sensor panel on the
main screen when connected to the Remote site.
2.
Check the Display Control Status Bar checkbox to display the Control panel on the
main screen when connected to the Remote site.
3.
Check the Display WATERMARK logo checkbox to display the watermark logo in green
font on all watermarked video recordings during the playback.
4.
Check the Start with Password checkbox to request password on each startup
5.
Configure the Automatic Backup in the Received Data Save Setup menu:
a.
Check the Current Screen Data Save checkbox to save the live video recordings
on the selected local drive, as they are viewed in the I³Remote software.
b.
Check the Current Screen Data Save checkbox to save the live video recordings
on the selected local drive, as they are viewed in the I³Remote software.
c.
Choose the local drive in the Select Save Drive drop-down menu. The data from
the Automatic Backup will be saved to this local drive.
6.
In the Display Mode menu choose between DirectX and RGB display modes. If the
video card meets the minimum hardware requirement of 64MB, select DirectX. If the
video card does not meet the minimum hardware requirement, select RGB.
Note
i3DVR does not guarantee proper functioning of i3Remote if the system does
not meet minimum hardware requirements.
7.
Select the server sort order from Ascending, Descending, or None in the Sort Server
Info by Alphabetic Order menu
145
i³Remote
XML to PDF by RenderX XEP XSL-FO Formatter, visit us at
http://www.renderx.com/


