www.hygiena.com
84
Step 13.3: Position needles
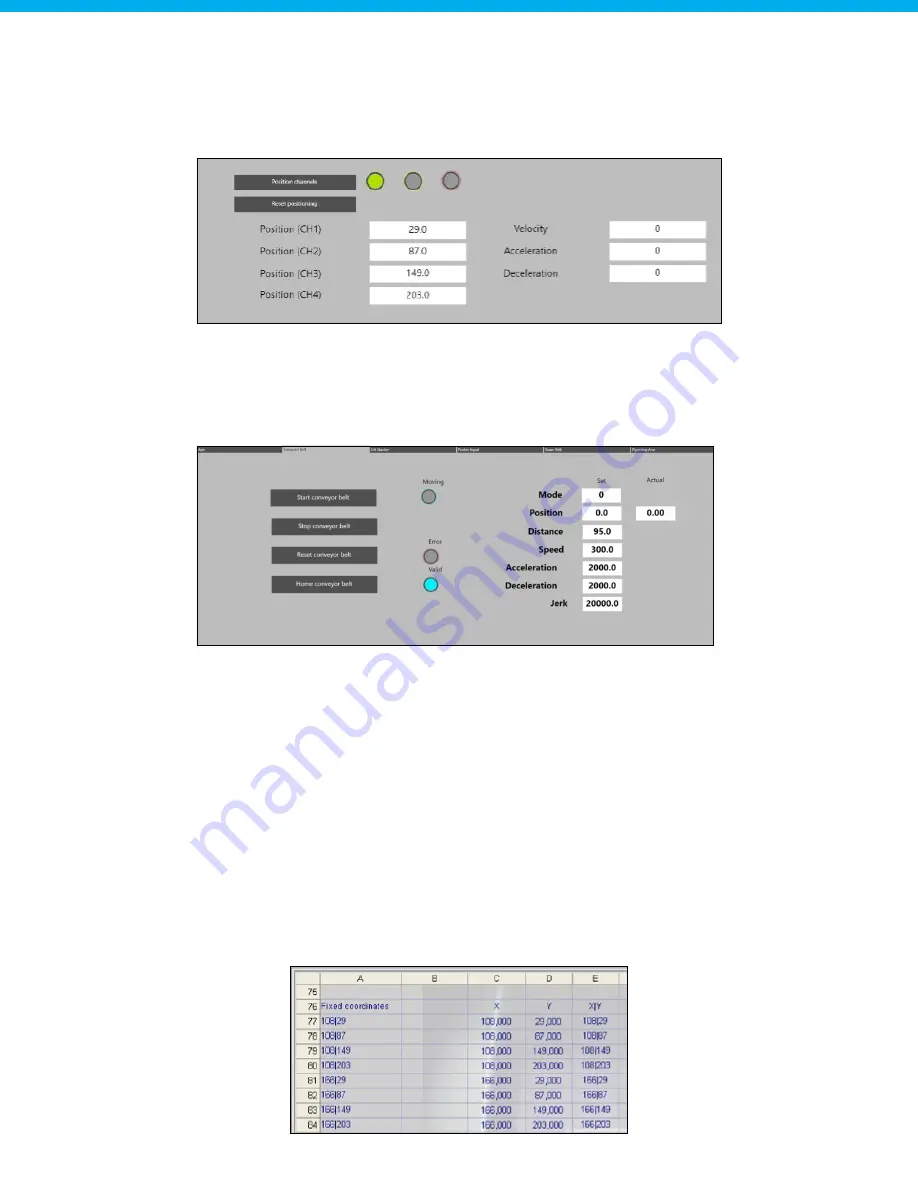
After that, position each needle above a sample using the PLC maintenance panel. If less than 4 samples are
available, position the other needles between the box and the washing bath. Make sure the arm can move
further down without crashing. In order to be able to position the needles, the Z-axis should be at a height of
at least 150 mm.
Step 13.4: Move the conveyor belt
If the needles are positioned correctly above the samples and the needles are above to highest part of the
box, the belt can be moved until the needles are above the pierce location. Use small steps to position the
conveyor belt below the needles. It is recommended to use absolute movement (Mode 0) during the conveyor
belt movement, to have optimal position accuracy.
Step 13.5: Lower the Z-axis
If both the belt and pipetting channels are positioned correctly above the samples to pierce, the Z-axis can be
lowered with small steps to verify the pierce positions. The aspiration height can also be determined.
Write this parameter down to later use it in the recipe.
If the positions are correct, the Y positions can be filled into the Microsoft
®
Excel
®
sheet, since they are equal
for each row. The positions can be added to the list of Y values in the Cognex (cell "D77"-"D106").
The X position for the first row can now also be added to the Cognex job, located in cell "C77" until cell
"C(77 + (SamplesPerRow-1)".
See the example below for the first 2 rows of a PBF200 4x6 box. Cells "C77" until "C80" contain the
X positions for the first row and cells "C81" until "C84" the X positions for the second row. Since the
samples are aligned per row and 4 samples are on each row, the X positions for each 4 samples are equal.
For the Y positions (needles) a repeating pattern with 4 Y-coordinates can be seen, since the 4 positions
om each row will be similar to the 4 positions on the next row. Only the belt distance (X position) will
change to move the box to the next row.


