www.hygiena.com
82
Step 10.4: Set find region
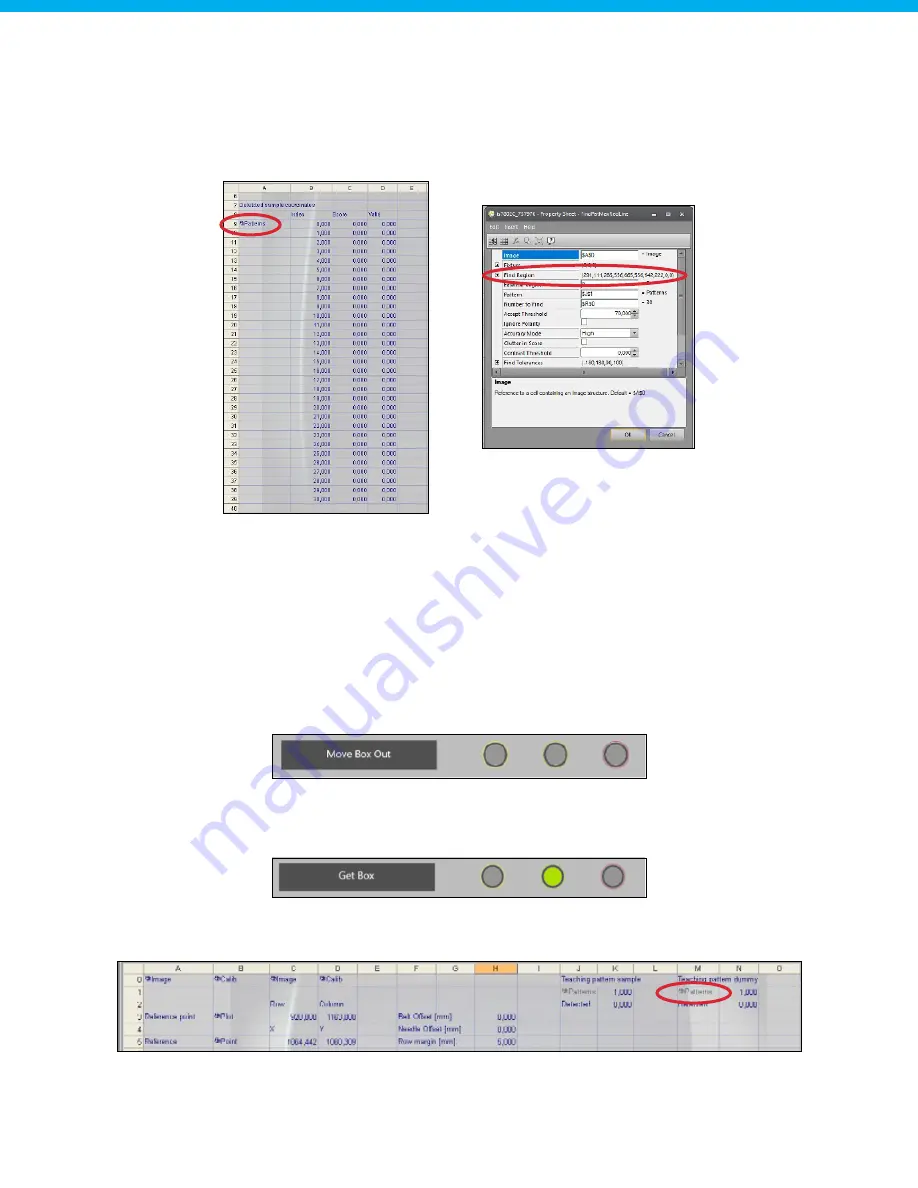
The last step is to set the "find region" of the sample detection. The find region for the sample detection can
be set by opening the "Patterns" menu located in cell "A9". For the dummy patterns, cell "A43" needs to be
selected. The find region should be slightly larger than the box size, for both sample and dummy detection, so
that all samples are detected. Using the whole camera field is not recommended, since the detection time will
be very high. Confirm the selected area by pressing "Ok".
The detected samples will be listed in cells "B9"-"D39" together with their detection scores. If the detection is
valid, the valid value will be set to 1. This value is used to count the number of valid patterns found during the
detection, which can be found in cell "K2".
The detected dummies will be listed in cells "B43"-"B73" together with their detection scores. If the detection
is valid, the valid value will be set to 1. This value is used to count the number of valid patterns found during
the detection, which can be found in cell "N2".
Step 11: Teach dummy to detect
Move the previous box out of the system using the "Move Box Out" routine in the web interface. Make sure
the Z-axis is positioned at its maximum position (290 mm) before starting the "Move Box Out" routine.
After moving the box out, add a dummy sticker on one of the samples, preferably somewhere in the middle
of the box. After placing the dummy sticker, reload the box using the "Get Box" routine. The box with the
dummy sticker will be loaded into the system.
Double click on the teaching pattern for the dummy (cell "M1") to open the pattern teaching menu for the
dummy detection.
Repeat Steps 10.1 until 10.4 to teach the dummy pattern. Use the cells that are listed for the dummy detection.


