1. GETTING STARTED
1-5
●
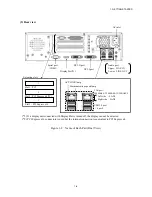
Display and User Input Sections
(1) Front view
(*1) Press the reset switch by inserting an eject pin. If an eject pin is not available, use a pin that
fits the hole of the reset switch instead.
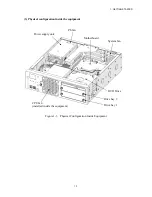
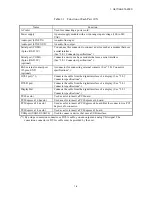
Figure 1-1 Name of Each Part (Front View)
The dimensions do not
include rubber feet.
Reset switch(*1)
Front USB2.0 port
Status lamp (STATUS)
Alarm lamp
Drive access lamp /
Standby lamp (STBY)
Power switch
HDD2 Status lamp
HDD1 Status lamp
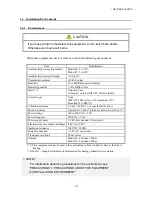
93mm
325mm
356mm
Front USB3.0 port
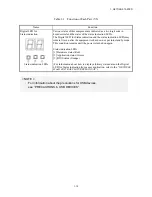
Status display digital LEDs
Содержание HF-W2000
Страница 44: ...This Page Intentionally Left Blank ...
Страница 72: ...This Page Intentionally Left Blank ...
Страница 84: ...2 OPERATION 2 12 4 Click ACPI x64 based PC Microsoft ACPI Compliant System PCI Express Root Complex ...
Страница 102: ...This Page Intentionally Left Blank ...
Страница 133: ......
Страница 134: ...This Page Intentionally Left Blank ...
Страница 176: ...This Page Intentionally Left Blank ...
Страница 204: ...This Page Intentionally Left Blank ...
Страница 245: ...This Page Intentionally Left Blank ...
Страница 279: ...This Page Intentionally Left Blank ...
Страница 323: ...This Page Intentionally Left Blank ...

