background image

10. SOFTWARE RAID1 

10-2


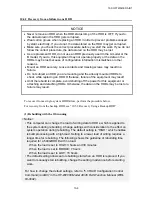
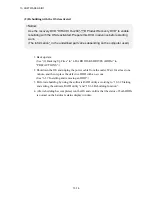
NOTICE 

 Maintenance of a RAID1 system requires a high level of expertise. Should any 

mistakes be made during the work, the data stored on the HDDs may be lost. 

 When HDD1 and HDD2 are installed, their capacities must be the same. 


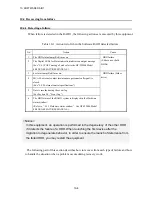
RAID1 (Redundant Array of Indepensive Disks Level 1) is a technology generally referred 

to as "Disk mirroring". The Software RAID1 is not the Disk mirroring by the RAID controller 

(Hardware). The Software RAID1 constructs the system that two HDDs are combined and 

managed as one RAID1 system (array) by software. Should one HDD fail, you can read 

correct data from the other HDD. RAID1 uses two HDDs but the capacity available is only 

equal to the capacity of one HDD. 


Содержание HF-W2000

Страница 1: ...NDUSTRIAL COMPUTER HF W2000 Model 48 45 INSTRUCTION MANUAL WIN 62 0066 01 Read and keep this manual Read safety instructions carefully and understand them before starting your operation Keep this manual at hand for reference ...

Страница 2: ... All Rights Reserved Copyright 2016 Hitachi Industry Control Solutions Ltd The contents of this publication may be revised without prior notice No part of this publication may be reproduced in any form or by any means without permission in writing from the publisher Printed in Japan TP IC FL MW2007 ...

Страница 3: ... VOLUME CONSTITUTION The manual of the HITACHI INDUSTRIAL COMPUTER HF W2000 MODEL 48 45 consists of the following SAFETY INSTRUMENTS INSTRUCTION MANUAL This manual RAS FEATURES MANUAL MANUAL CONSTITUTION This manual consists of the following PREFACE IMPORTANT NOTIFICATION SAFETY INSTRUCTIONS PRECAUTIONS CHAPTER 1 GETTING STARTED CHAPTER 2 OPERATION CHAPTER 3 SET UP CHAPTER 4 PRECAUTIONS while the ...

Страница 4: ...ered trademarks of Video Electronics Standards Association Magic Packetllectronics Standards Associationd oft Corporation in the United States an All other product names software and hardware not from Hitachi described in this manual are the registered trademarks the trademarks or the products of their respective owners Zlib is used as a compression and decompression engine built in a part of the ...

Страница 5: ...f the Voluntary Control Council for Interference by Information Technology Equipment VCCI If this equipment is used in a domestic environment radio noise disturbance may arise When such trouble occurs the user may be required to take corrective actions Note for storage capacity calculations Memory capacities and requirements file sizes and storage requirements etc must be calculated according to t...

Страница 6: ...energy and if not installed and used in accordance with the instruction manual may cause harmful interference to radio communications Operation of this equipment in a residential area is likely to cause harmful interference in which case the user will be required to correct the interference at his own expense 이 기기는 업무용 A급 전자파적합기기로서 판매자 또는 사용자는 이 점을 주의하시기 바라 며 가정외의 지역에서 사용하는 것을 목적으로 합니다 This equipm...

Страница 7: ...n the computer Virtual machine A virtual hardware environment provided by Virtual PC or Hyper V Host OS A base operating system that operates the virtual machine Guest OS An operating system that runs on the virtual machine Rereading terms This manual describes the Windows operating procedure Names of operations sign in and sign out are replaced with log on and log off respectively depending on Wi...

Страница 8: ... result in serious personal injury or death WARNING This symbol is used to indicate potential hazards that may result in serious personal injury or death CAUTION This symbol is used to indicate potential hazards that may result in minor or moderate personal injury NOTICE This symbol is used to indicate hazards that may result in equipment or property damage but not personal injury The heading NOTE...

Страница 9: ...lectric shock This equipment has built in hard disk drives Do not hit the equipment or give a shock or vibration to the equipment because that may cause the equipment to fail Should you drop the equipment or damage its chassis disconnect the power cord from the outlet and contact your maintenance personnel Using the faulty equipment without repair may result in a fire or an electric shock Do not g...

Страница 10: ...personal injury when unpacking or carrying the equipment Before you clean or replace the dust filter or the case fan of this equipment make sure you shut down the OS disconnect the plug of the power cord from the outlet and wait for at least one minute Otherwise the injury of hands and fingers may result Risk of explosion if battery is replaced by an incorrect type Dispose of used batteries accord...

Страница 11: ...a tapped hole without adding too much torque in order to avoid damaging the thread This equipment is evaluated with the hardware specified in this manual Accordingly use only the specified hardware when upgrading options or replacing components If any other hardware is used for such upgrade or replacement correct operation of the equipment will not be guaranteed Do not use the equipment in the env...

Страница 12: ...rm emergency shutdown unless you must stop the system immediately due to some kind of error Keep in mind that if the power supply is cut the system may not be able to recover automatically If you insert or access a disk CD or DVD the system load may increase and running applications may be affected Do not insert or access a disk during online operation system operation Once disk CD or DVD access i...

Страница 13: ...earth leakage circuit breaker If you do not take these measures that may result in a fire or an electric shock Do not use a two prong plug without a ground pole because that may result in an electric shock or failure of the equipment Page 1 14 If any of the air intake and exhaust holes of the equipment is blocked the temperature inside the equipment may rise and that may cause a fire or failure of...

Страница 14: ...r remove an external control board make sure you shut down the OS unplug the power cord from the outlet and wait for at least one minute If you install or remove an external control board without shutting down the power an electric shock or a fire may result Page 6 12 Before you install or remove main memory make sure you shut down the OS unplug the power cord from the outlet and wait for at least...

Страница 15: ...ake sure that the cord has proper rating and meets local safety requirements whatever applicable Otherwise an electric shock or machine failure may result Page 1 20 Before you clean or replace the dust filter or the case fan of this equipment make sure you shut down the OS disconnect the plug of the power cord from the outlet and wait for at least one minute Otherwise the injury of hands and finge...

Страница 16: ...battery make sure you replace it with one specified by the Manufacture Otherwise an explosion a fire a burst battery heat generation a liquid spill or gas generation may result Install the battery in correct polarity Installing it in wrong polarity may cause abnormal reaction such as charging or shorting resulting in a liquid spill heat generation or a burst battery Page 6 24 Do not directly touch...

Страница 17: ...e the equipment Due to the property of inrush current restraint method with this equipment inrush currents may increase than usual if the power is turned on before the power supply unit has sufficiently cooled off naturally after the power has been turned off Before you turn on the power again wait at least one minute after you have turned off the power Otherwise the inrush currents may affect the...

Страница 18: ...he equipment may result due to a short circuit between the power supply and the ground When an interface cable comes off while the power for the equipment is on shut down the OS and disconnect the power cord from the outlet Disconnecting the power cord from the outlet without shutting down the OS might destroy the internal files When you connect a cable for external contacts make sure you connect ...

Страница 19: ...c from the DVD drive If you leave the disc in the DVD drive failure may result If you keep the disc tray open failure may result When you do not intend to use the DVD drive keep the disc tray inside the DVD drive Do not use an unbalanced CD or DVD due to attached labels and so on a disc with cracks scratches or vertical deviation or a disc with a non standard shape If you do an abnormal sound or v...

Страница 20: ... wash a dust filter dry it completely before re attaching it to the equipment If you use the equipment while its dust filter is not completely dry the equipment may fail When you use a detergent to clean a dust filter make sure you use a neutral detergent If you use other types of detergent the dust filter may lose its function Page 6 2 Make sure you disconnect all external cables connected to the...

Страница 21: ...r SSDs If you do either of these failure of the equipment or the drive may result Before you replace an HDD or SSD make sure you shut down the OS unplug the power cord from the outlet and wait for at least one minute Install or remove an HDD or SSD only if necessary for example when you need to replace an HDD or SSD due to failure If you do it frequently failure of the equipment may result Fully i...

Страница 22: ... HDD models authorized by the Manufacturer Otherwise the existing data in the HDD may be lost Also always observe the recommended replacement interval for HDDs Refer to APPENDIX HANDLING REPLACEABLE COMPONENTS Since each Equipment has its own RAID1 configuration information e g serial number you cannot swap HDDs even between two units of this Equipment If you dare the stored data in the newly inst...

Страница 23: ...ing an HDD Otherwise failure of the drive may result Until the rebuild is complete avoid shutting off the power for this equipment or attaching and detaching HDDs Otherwise the data on the HDDs may be lost or a failure may result Page 10 9 If you apply the recovery method for an offline HDD to an HDD that was set to offline by something other than the RAS software the HDD may not be recovered or e...

Страница 24: ...e data stored on the HDD may be lost As a replacement HDD do not use an HDD previously used in the A model or the B model If you do this equipment may not operate properly or the data on the HDDs may be lost because of configuration information mismatches or other reasons Do not replace the two HDDs at the same time If you do the data gets corrupted When you replace an HDD make sure that you set t...

Страница 25: ...S 18 SAFETY INSTRUCTIONS Continued 3 WARNING LABELS The warning labels are attached to the following position on the equipment Label Label ...

Страница 26: ... look into the laser beam whether directly or indirectly because that may cause a visual impairment 5 NOTICE LABEL The notice label is attached to the following position on the equipment Label CLASS 3B VISIBLE AND INVISIBLE LASER RADIATION WHEN OPEN AND INTERLOCKS DEFEATED AVOID EXPOSURE TO THE BEAM Label ...

Страница 27: ... is valid in countries inside the European Union This symbol mark is specified in Article 20 Information for end users and Annex II of the EU directive 2006 66 EC This equipment is equipped with a lithium battery When you remove the battery follow the instructions in the 6 4 Removing the lithium battery In the European Union a separate collection system for used battery and accumulator has been in...

Страница 28: ... may affect the breaker connected to the equipment and also the life span of the equipment itself 1 TRANSPORTING THE EQUIPMENT Required actions When you transport or carry the equipment pack it in a dedicated container the container or packing materials used when the equipment was delivered When you transport or carry the equipment in a chassis protect the equipment so that any vibration and shock...

Страница 29: ... prepare the power cord fitting input voltage and inspect the safeness of this equipment enough Install D class grounding previously known as third class grounding defined in the Technical Standard for Electrical Facilities of Japan in order to maintain normal operation of electronic circuits containing highly integrated LSIs and protect device from abnormal voltage caused by lightning or the like...

Страница 30: ...trikes nearby or the AC power supply is not stable When this situation happens turn off the power to the equipment and then turn it back on 5 INSTALLATION ENVIRONMENT Precautions When you install a commercially extension slot the specifications for the required environment for both the commercially available device and this equipment must be met See 1 6 1 Environment When you install a device in a...

Страница 31: ...ease around the equipment needs to be taken into consideration The system clock and the like inside the equipment always operates using a backup battery even when the power is off Therefore if you store the equipment at a temperature outside the operating temperature range you may need to reconfigure system BIOS settings including the clock settings when you start using the equipment again When yo...

Страница 32: ...amp of the equipment is on If you send a Magic Packet frame when the power is about to be turned off after an OS shutdown the equipment may restart without being turned off or wake on lan WOL may not function at all See 2 7 2 Turning on the power using the LAN Specifications Depending on the status of the network Magic Packet frames can be lost In order to avoid this set up the system so that Magi...

Страница 33: ... for the displays reconfigure the screen settings accordingly Depending on application software the screen may flicker and video playback may not be smooth The multi stream function daisy chain of DisplayPort is not supported If a display unit connected with DisplayPort is turned off the display cannot be detected The display image assumes Windows 10 IoT but it is similar under other OS Required a...

Страница 34: ...heir degraded performance at high or low temperatures do not cause any problems to the user application Required actions Do not subject HDDs or SSDs to vibration or shock Take preventive action against static electricity due to human contact and due to other activities in the work place Hold the bracket or sides of an HDD or SSD Do not touch the printed circuit board and connector When you store a...

Страница 35: ... this case use another CD or DVD Depending on the condition of a CD or DVD whether it has scratches dust is deformed has copy protection enabled and so on you may not be able to read or write to the CD or DVD properly 2 Handling CD or DVD Precautions Do not apply benzene thinners water record cleaner anti static liquids or use a silicone cloth on a CD or DVD Do not use a dryer when you remove dust...

Страница 36: ...ormation about the cable length see 5 8 3 External interface cable length specifications Required actions When using a USB port check the orientation of the USB connector and then insert the connector slowly in order not to damage the USB port When a USB device is inserted removed or accessed the system load may be increased If you need to use a USB device during online operation system operation ...

Страница 37: ...rk properly If you use an optical mouse in an environment subject to those kinds of smears take appropriate measures to protect the equipment 10 BIOS SETTINGS Specifications When the main power is OFF while the power from the backup battery is not available or the battery is not connected the After AC Power ON setting is switched to Stay Off After pressing the power switch and starting the system ...

Страница 38: ...tion If you need to apply a hotfix Windows Update or the latest service pack do it on your own responsibility You must thoroughly check the system operation and evaluate how the system is affected by applying the hotfix Windows Update or service pack 2 Power Options Specification In case of Windows 7 even if you configured the system such that power for the display is not be turned off in the Powe...

Страница 39: ...y not operate in the optimum manner and the performance can be compromised Because of this you may need to trigger the Windows Experience Index manually Follow the procedure below to trigger the Windows Experience Index manually Procedure required to trigger the Windows Experience Index manually 1 Open Control Panel and click System and Security 2 Click Check the Windows Experience Index 3 Click R...

Страница 40: ...nt setting for power plan and Turn off hard disk after setting follow the procedure below The display image assumes Windows 7 but it is similar under Windows 10 Confirmation procedure of the current power plan settings 1 Open Control Panel and click System and Security 2 Click Power Options 3 Power Options window appears Confirm that HF W Power Settings radio button is selected under Preferred pla...

Страница 41: ...f Turn off hard disk after setting 1 Following the confirmation procedure of the current power plan settings click Change plan settings at HF W Power Settings 2 Edit Plan Settings window appears Click Change advanced power settings ...

Страница 42: ...hen you change the settings from factory default setting restore the factory default setting following the procedure below 1 Open Control Panel and click System and Security 2 Click Power Options 3 Power Options window appears Confirm that HF W Power Settings radio button is selected under Preferred plans ...

Страница 43: ...C 16 4 Edit Plan Settings window appears Click Restore default settings for this plan 5 Power Options window appears Click Yes ...

Страница 44: ...This Page Intentionally Left Blank ...

Страница 45: ...2 4 2 5 Emergency Shutdown 2 4 2 6 DVD drive 2 5 2 6 1 Inserting a CD or DVD 2 5 2 6 2 Ejecting a CD or DVD 2 6 2 6 3 Using the DVD drive when the equipment is installed vertically 2 6 2 7 Controlling the Power Using the LAN 2 7 2 7 1 Enabling the WOL Wake ON LAN function 2 7 2 7 2 Turning on the power using the LAN 2 8 2 8 Setting Up the LAN Interface 2 10 2 9 Setting Up the Screen 2 22 CHAPTER 3...

Страница 46: ...ns 5 17 5 8 2 External control specifications 5 23 5 8 3 External interface cable length specifications 5 27 CHAPTER 6 CHECKUP AND MAINTENANCE 6 1 6 1 Daily Checkup 6 1 6 2 Periodic Checkup 6 4 6 3 Installing and Removing Components 6 5 6 3 1 Types and locations of installed components 6 5 6 3 2 Before installing or removing components 6 6 6 3 3 Installing and removing the cover of the equipment 6...

Страница 47: ... Serious Failure Detection 8 11 8 4 Maintenance Operation Commands 8 12 8 4 1 Log information collection command logsave 8 13 8 4 2 Memory dump file copy command mdump 8 15 8 4 3 Disk area allocation command for saving a memory dump createdmp 8 17 8 4 4 RAS information display command getrasinfo 8 19 CHAPTER 9 TROUBLESHOOTING 9 1 9 1 List of Problems 9 1 9 1 1 Problems that occur before the OS sta...

Страница 48: ...tem 10 17 10 4 4 When a problem occurs during recovery work 10 18 10 4 5 Recovery from Failure in Both HDDs 10 19 10 4 6 Recovery a normal HDD that has been set to offline by mistake 10 19 10 5 Preventive Maintenance 10 20 10 5 1 Creating a Backup HDD 10 20 10 5 2 Recovery Using a Backup HDD 10 22 10 5 3 Performing Periodical HDD Replacement 10 23 10 5 4 Data matching procedure 10 25 10 6 Software...

Страница 49: ...1 DVD Drive Front View 2 5 Figure 6 1 Types and Locations of Installed Components 6 5 Figure 6 2 Removing the Cover of the Equipment 6 7 Figure 6 3 Removing the PCI Cover 6 9 Figure 6 4 Removing an extension board 6 10 Figure 6 5 Installing an extension board 6 11 Figure 6 6 Removing the FFC cable 6 13 Figure 6 7 Removing a main memory 6 16 Figure 6 8 Removing an HDD or SSD 6 19 Figure 6 9 Removin...

Страница 50: ...6 Error Messages of the createdmp Command 8 18 Table 8 7 Information Displayed by the getrasinfo Command 8 19 Table 8 8 Error Messages of the getrasinfo Command 8 27 Table 9 1 STOP Error Codes 9 19 Table 9 2 Action list for STOP Error Code 0x80 9 20 Table 9 3 Event Log Entries Unique to the Equipment 9 23 Table 9 4 Performance Counters Related to the Performance of the Equipment 9 29 Table 9 5 POS...

Страница 51: ...rmation about the installation procedure and the limitations of an extension board see 6 3 4 Installing and removing an extension board 1 3 Role of an Operator In order to use this equipment in good working order for a long period of time an operator must take care of the following items 1 Setting up consumable items a When you set up a consumable item such as an HDD or a dust filter follow the de...

Страница 52: ...g items a Backing up files See PRECAUTIONS 4 HARD DISKS DRIVES HDDs or SOLID STATE DRIVES SSDs 2 Backing Up Files b Power cord and shutting down the power See PRECAUTIONS 1 PRECAUTIONS ABOUT THE EQUIPMENT 4 POWER SUPPLY 4 Maintenance of this equipment a For information about maintenance see 6 1 Daily Checkup and 6 2 Periodic Checkup ...

Страница 53: ...ment is turned on See 1 6 Installation Environment See 1 7 Hardware connection See 2 1 Before Turning On the Power In case of installing an extension board see 6 3 4 Installing and removing an extension board Unpack Install this equipment Install extension boards Turn on the power Connect hardware ...

Страница 54: ...hot swap HDDs or SSDs because that may cause failure of the equipment and HDDs or SSDs Before you replace an HDD or SSD for the A model or the S model make sure you shut down the OS unplug the power cord from the outlet and wait for at least one minute When using a USB port check the orientation of the USB connector and then insert the connector slowly Otherwise the USB port may be damaged Do not ...

Страница 55: ...le use a pin that fits the hole of the reset switch instead Figure 1 1 Name of Each Part Front View The dimensions do not include rubber feet Reset switch 1 Front USB2 0 port Status lamp STATUS Alarm lamp Drive access lamp Standby lamp STBY Power switch HDD2 Status lamp HDD1 Status lamp 93mm 325mm 356mm Front USB3 0 port Status display digital LEDs ...

Страница 56: ...ection is equivalent to PCI Express x4 Figure 1 2 Name of Each Part Rear View AC inlet USB3 0 port 4 port Serial port COM1 Audio port Upper LINE IN Lower LINE OUT DVI I port DVI D port 1 Slot1 PCI ACT LINK lamp Communication speed lamp LAN port 1000BASE T 100BASE TX 10BASE T Extension slots DisplayPort 1 2 3 Slot2 PCI Express x4 2 Slot3 PCI Express x16 Left side LAN1 Right side LAN2 ...

Страница 57: ... 7 3 Physical configuration inside the equipment Figure 1 3 Physical Configuration Inside Equipment CPU fan installed inside the equipment Motherboard Power supply unit DVD Drive Drive bay 2 Drive bay 1 PS fan System fan ...

Страница 58: ... The equipment has stopped abnormally due to an error RAS software is not installed Off The main power is off The system is in standby mode Alarm lamp ALARM This lamp is lit in red if one of the following abnormalities is detected A fan inside the equipment stops Abnormal temperature inside the equipment Failure in one of the mirrored disks B model only Drive access lamp DRIVE This lamp is lit in ...

Страница 59: ...ctor specifications DVI I port 1 Connects the cable from the digital interface of a display See 5 8 1 Connector specifications DVI D port Connects the cable from the digital interface of a display See 5 8 1 Connector specifications DisplayPort Connects the cable from the digital interface of a display See 5 8 1 Connector specifications PCI bus slot Used as a slot to insert a PCI board PCI Express ...

Страница 60: ...No link is established The equipment is not physically connected to the network The switching hub is not powered up The connection over the twisted pair Ethernet cable is not stable The driver settings have some errors Blinking in green Network data is being transmitted or received The blink interval changes depending on the traffic on the network Communication speed lamp Lamp Status Lit in orange...

Страница 61: ... network The switching hub is not powered up The connection over the twisted pair Ethernet cable is not stable The driver settings have some errors Blinking in green Network data is being transmitted or received The blink interval changes depending on the traffic on the network Communication speed lamp Lamp Status Lit in orange The link is established at 1000 Mbps Lit in green The link is establis...

Страница 62: ...ain lit even after the equipment is shut down or put into standby mode This condition remains until the power is turned on again Status indication LEDs 1 Hardware status Red 2 Application status Green 3 BIOS status Orange For information about how to display arbitrary status data on the Digital LED for Status indication from a user application refer to the HF W2000 Model 48 45 RAS FEATURES MANUAL ...

Страница 63: ... Humidity 50 RH 2 Vibration resistance 5 9 m s2 10 Hz 5 s except the DVD drive Shock resistance Operation 19 6 m s2 while not powered on 98 m s2 Power voltage 100 to 240 VAC 10 Power frequency 50 60 Hz 3 Hz Power supply noise 2 0 kV fast transient burst wave Electrostatic noise contact discharge 4 kV Air 8 kV Insulation resistance 500 VDC 20 MΩ Dielectric strength 1 5 kVAC one minute Transient pow...

Страница 64: ... of the Equipment vertically placed on the desktop may cause injury Be sure to attach the vertical stand accompanying the Equipment and place the Equipment with the vertical stand on a level surface NOTICE Before you move this equipment make sure you shut down the OS disconnect the plug of the power cord from the outlet and wait for at least one minute If you do not the HDDs and other devices may ...

Страница 65: ...nt is air cooled by fans The intake holes are on the front and the exhaust holes are on the rear Make sure the air flow is not blocked Especially leave sufficient clearance in the front 50 mm and in the rear 100mm This includes clearance required for routing cable connectors for the rear side Figure 1 4 Operation and Service Clearance Top View Figure 1 5 Installation Clearance 200 mm 200 mm Front ...

Страница 66: ...1 GETTING STARTED 1 16 a Horizontal Installation Figure 1 6 Exterior View Horizontal Installation on the Desktop b Vertical Installation Figure 1 7 Exterior View Vertical Installation on the Desktop ...

Страница 67: ...nterface cable comes off while the power for the equipment is on shut down the OS and disconnect the power cord from the outlet Disconnecting the power cord from the outlet without shutting down the OS might destroy the internal files When you connect a cable for external contacts make sure you connect the cable to a connector for the external contacts EXT It is possible that a voltage as high as ...

Страница 68: ... them If you use extension cables the mouse or keyboard may not work properly 3 When you connect USB devices to the USB connectors pay attention to the orientation of the connector In addition in the USB port a USB cable may fall out from the connector by the unexpected contact because there is not the locking mechanism of the connector in a standard When you install this equipment fix USB cables ...

Страница 69: ...fy the proper functionality of the 3 pole to 2 pole conversion adapter before using it Make sure you use a power cord with a 2 pole plug with a grounding pole NOTE The power cord that comes with the equipment is rated at the input voltage of 125 VAC When using this equipment at over 125 VAC prepare the power cord fitting input voltage If you use a power cord clamp for preventing accidental disconn...

Страница 70: ... 125VAC When using this equipment at over 125VAC prepare the power cord fitting input voltage and inspect the safeness of this equipment enough Common power cords are shown in Table 1 3 1 ANSI American National Standards Institute 2 NEMA National Electrical Manufacture s Association 3 IEC International Electrotechnical Commission 4 CEE International Commission on Rules for the Approval of Electric...

Страница 71: ...a 1 ANSI C73 11 2 NEMA 6 15P 3 IEC 83 Three wire power cord with a two pole three terminal grounding type connector Universal Euro 4 CEE 7 II IV VII 3 IEC 83 UK 5 BS 1365 3 IEC 83 Australia 6 AS C112 220V 250V 中华人民共和国 7 GB T 5023 5 GB 1002 GB 2099 1 GB 17465 1 GB 15934 NOTE As an option this equipment offers a cable clamp to be used for attaching the power cord to the equipment Use that cable clam...

Страница 72: ...This Page Intentionally Left Blank ...
Страница 73: ...at may cause a fire or failure of the equipment Make sure sufficient clearance is provided around the equipment when you install See 1 6 2 Installation NOTE When you turn on the power see the following PRECAUTIONS 1 PRECAUTIONS ABOUT THE EQUIPMENT 2 INTERFACE CABLES PRECAUTIONS 1 PRECAUTIONS ABOUT THE EQUIPMENT 4 POWER SUPPLY PRECAUTIONS 1 PRECAUTIONS ABOUT THE EQUIPMENT 5 INSTALLATION ENVIRONMENT...

Страница 74: ...is turned on and turns green when the OS starts and the equipment is in operation 4 After the OS starts set up the equipment according to 3 1 Setup Procedure When You Turn On the Power for the First Time You need to follow this procedure only once for the first time when you start the equipment after you purchase the equipment After the above steps are complete the equipment automatically goes thr...

Страница 75: ... is on If the OS is Windows 7 Professional To shut down the OS click the Start button at the left bottom corner of the screen and click Shut down After the OS is shut down the power is automatically turned off and only the auxiliary power supply is on standby mode In this mode the status lamp STATUS is off and the standby lamp STBY is on If the normal shutdown process cannot be executed for exampl...

Страница 76: ...at the source of AC the power the system may not be able to recover automatically In the following cases turn off the power at the source of the AC power When the equipment shows an error condition and you have to shut down the power immediately for example when a burning smell is detected When you cannot shut down the equipment due to some error When the power is turned off repeatedly or only the...

Страница 77: ... keep the disc tray inside the DVD drive Do not use an unbalanced CD or DVD due to attached labels and so on a disc with cracks scratches or vertical deviation or a disc with a non standard shape If you do an abnormal sound or vibration may be generated and failure of the equipment may result 2 6 1 Inserting a CD or DVD 1 Press the eject button gently to open the disc tray 2 Set the CD or DVD on t...

Страница 78: ... DVD drive 2 While holding the disc tray with your left hand set a CD or DVD on the disc tray with your right hand 3 Remove your left hand from the disc tray 4 Push the disc tray to load the disc into the DVD drive 5 When you remove the CD or DVD pull out the disc without applying excessive force to the disc NOTE For information about the precautions for the DVD drive see PRECAUTIONS 5 DVDs NOTE W...

Страница 79: ...abling the WOL Wake ON LAN function to enable the WOL function and then follow the steps below 2 7 1 Enabling the WOL Wake ON LAN function By following the procedure below you can set up whether to start WOL when a Magic Packet frame is received In the initial factory settings the WOL function is disabled The display image assumes Windows 10 IoT but it is similar under other OS 1 Execute steps 1 t...

Страница 80: ... in LAN adapter A program for transmitting a Magic Packet frame does not come with the equipment Use a commercially available program for to transmit the Magic Packet frame 1 Wired for Management WfM is a guideline regarding the hardware specifications proposed by Intel Corporation for managing PCs on a network 2 The Magic Packet technology has been proposed by AMD Japan Ltd and can be starting a ...

Страница 81: ...f the MAC address of the node This sequence can be anywhere in the packet but it must follow a synchronization stream The synchronization stream is defined as 6 bytes of 0xFF As long as the MAC address that repeats itself 16 times targets the address of the equipment to be started the device can receive a BROADCAST frame A Magic Packet frame is shown in the following figure DA SA Arbitrary data FF...

Страница 82: ...OL function cannot be used If there is a compatibility issue with the connected hub the auto negotiation function may not work properly and that may affect the communication with other terminals If the auto negotiation function does not work properly configure the LAN interface as follows Specification of the hub Specification of the LAN setting Speed Duplex 10 Mbps Half duplex 10 Mbps Half Duplex...

Страница 83: ... under other OS 1 Log on to the computer using an administrator s account 2 Right click Start Then click Device Manager The Device Manager window appears In Windows 7 click Start Control Panel System and Security System Device Manager Then go to step 3 3 Click the View menu and select Devices by connection ...

Страница 84: ...2 OPERATION 2 12 4 Click ACPI x64 based PC Microsoft ACPI Compliant System PCI Express Root Complex ...

Страница 85: ...work adapter under it in the example in the figure below Intel R I210 Gigabit Network Connection When you configure the built in LAN LAN2 Click Intel R 8 Series C220 Series PCI Express Root Port 4 8C16 Then double click the network adapter under it in the example in the figure below Intel R I210 Gigabit Network Connection 2 Follow a similar procedure when you update the setting for the network ada...

Страница 86: ...om the Speed and Duplex list Auto Negotiation auto negotiation setting 10 Mbps Half Duplex 10 Mbps Half duplex setting 10 Mbps Full Duplex 10 Mbps Full duplex setting 100 Mbps Half Duplex 100 Mbps Half duplex setting 100 Mbps Full Duplex 100 Mbps Full duplex setting 1 0 Gbps Full Duplex 1 0 Gbps Full duplex setting ...

Страница 87: ... transfer speed and the transfer mode select Auto Negotiation at the top of the list to choose the auto negotiation setting 8 Click OK 9 Close the Device Manager window NOTE For information about the precautions for the network see PRECAUTIONS 2 NETWORK ...

Страница 88: ...eters long UTP Category 5e or better Fix the master slave mode setting to Master valid only in the 1000Mbps setting Follow the procedure below to fix the mater slave mode to Master The link may not function depending on the type of the hub In this case re set the setting to Auto Detect 1 Execute steps 1 though 5 in Setting the network transfer speed in 2 8 Setting Up the LAN Interface 2 Click the ...

Страница 89: ...CPU to process all interrupt requests from the LAN adapters If you mount and use multiple LAN adapters confirm that each built in LAN adapter and optional adapter can perform as expected If they do not adjust the network load or change the LAN adapter settings by following the procedure below For details about each configuration item see the description at the bottom of the corresponding setup win...

Страница 90: ...OS deadlock broadcast frames from other devices may not be able to be processed and the receive queue may get full If Rx Enabled or Rx Tx Enabled is specified for Flow Control flow control frames are continuously sent from this equipment under such a condition If this happens that may affect the whole network connected to the equipment Specify Disabled for Flow Control at this equipment or at the ...

Страница 91: ... or delays the generation of interrupts Receive Buffers This sets the number of Receive Buffers used by the driver when copying data to protocol memory Transmit Buffers This sets the number of Transmit Buffers data segments used by the adapter when recording transmission packets in system memory ...

Страница 92: ...ERATION 2 20 Low Latency Interrupt Enables adapters to bypass interrupt moderation and immediately generate an interrupt when certain TCP packets arrive allowing the system to handle the packet more quickly ...

Страница 93: ...isplayed differs depending on the LAN adapter 2 How the contents are displayed differs depending on the OS You can keep these warnings from being displayed in the event log by changing the LAN adapter settings as follows Note that if you change the settings shown below log entries such as LAN connection and disconnection during system operation are also not recorded and that may make failure analy...

Страница 94: ...t it is similar under other OS 1 Configuring screen settings for a single display When one display is connected follow the procedure below to configure the screen settings 1 Right click on the desktop to display a menu From the menu click Graphics Properties to start HD Graphics Control Panel NOTE For information about the precautions for the screen see PRECAUTIONS 3 DISPLAY SCREEN When you want t...

Страница 95: ...ontrol Panel window click Display 3 Configure the screen setting items displayed on the middle of the window Setting Item Description Resolution This allows you to select the resolution Refresh Rate This allows you to select the refresh rate ...

Страница 96: ...ate you must choose from the options described in 4 1 Equipment Specification 7 Supported resolutions NOTE The resolution options may include resolutions larger than the resolutions supported by the connected display If you select a resolution larger than the maximum resolution supported by the display the display will black out After the driver is installed the resolution is automatically set to ...

Страница 97: ...et up the multiple display output 1 As described in 1 Configuring screen settings for a single display start Intel HD Graphics Control Panel Display 2 Click Display at the upper left corner in the window and then click Multiple Displays Then configure the settings for multiple displays The following shows how to set up Clone Extended and Collage NOTE The multi stream function daisy chain of Displa...

Страница 98: ... check the capabilities of the displays maximum resolution highest refresh rate and so on 1 Select HD Graphics Control Panel Display Multiple Displays 2 Select Select Display Mode Clone 3 When you finish configuring the settings click Apply If you change the resolution or refresh rate the following confirmation screen for the setting change will be displayed Click Yes ...

Страница 99: ...ayed in display 2 Which resolution color depth and refresh rate can be selected depends on the capabilities of the display connected 1 Select HD Graphics Control Panel Display Multiple Displays 2 Select Select Display Mode Extended 3 When you finish configuring the settings click Apply If you change the resolution or refresh rate the following confirmation screen for the setting change will be dis...

Страница 100: ...ntal resolution becomes the sum of the horizontal resolutions of the two displays The resolution color depth and refresh rate settings are the same for all displays The task bar is displayed only in the main display Which resolution color depth and refresh rate can be selected depends on the capabilities of the connected displays 1 Start HD Graphics Control Panel Display Multiple Displays 2 Under ...

Страница 101: ...2 OPERATION 2 29 4 When you finish configuring the settings click Apply If you change the resolution or refresh rate the following confirmation screen for the setting change will be displayed Click Yes ...

Страница 102: ...This Page Intentionally Left Blank ...
Страница 103: ...S function is automatically set up This setup procedure takes about 20 minutes Preparation for setup The following items are required during the setup procedure Prepare check them in advance before starting the setup procedure Item Description License certificate Confirm that the license certificate is attached to the body of this computer Administrator s password Password of the administrator Thi...

Страница 104: ...Check the contents and then click the Accept button 3 The Get going fast window opens Click Customize settings Select ON or OFF for settings as needed and then click the Next button 4 The Create an account for this PC window opens Type a user name in Who s going to use this PC Type a password in Enter password in Make it secure Retype the password in Re enter password Type a hint of password in Pa...

Страница 105: ...o change the display language after setup is complete use a recovery DVD to restore the contents of the system drive back to the factory shipped condition and then restart OS setup For information about how to use a recovery DVD to restore the contents of the system drive back to the factory shipped condition see CHAPTER 3 RESTORING THE FACTORY SHIPPED CONDITION USING A RECOVERY DVD Country or reg...

Страница 106: ...s in the list Display language Notation in the list English My language is English Portuguese O meu idioma é português Portugal Thai Korean 내 언어 한국어 Chinese Traditional 我的語言是中文 繁體 Chinese Traditional ROC 我的語言是中文 繁體 中華民國 Chinese Simplified 我的语言是中文 简体 NOTE After this point Windows 7 Professional uses the language specified here as the language used on the screen In this manual and other manuals of t...

Страница 107: ...al ROC 中文 繁體 台灣 Chinese Simplified 中文 简体 中国 NOTE The time and currency format setting can be changed after OS setup is complete Select Control Panel Clock Language and Region and then click Region and Language The Regional and Language Option window opens Configure the time and currency format setting on the Formats tab 4 The user name input window is displayed Enter the user name and the computer...

Страница 108: ... the actual location where this equipment is used Click Next 9 After the setup is completed this equipment is automatically logged on to the Windows and then this equipment automatically restart 10 After the log on window is displayed enter the password and log on to the Windows This completes Windows 7 Professional setup From this point on follow the instruction in 3 2 Configuring Basic Settings ...

Страница 109: ...ter the setup of OS according to 3 1 Setup Procedure Required after the First Power on 3 2 1 1 Outline of basic settings procedure Only MUI version See 2 8 Setting Up the LAN Interface See 2 9 Setting Up the Screen See 3 2 1 2 Setting Up Auto update The procedure takes about 5 minutes Setting up the network environment Setting up the screen See 3 2 1 3 Setting Up display language Setting up displa...

Страница 110: ... Update programs are automatically downloaded and installed and Windows 10 IoT Enterprise restarts Automatic is selected by default 2 Notify to schedule restart Update programs are automatically downloaded and installed and a notice to specify the restarting date time is given Perform the following procedure to set auto update 1 Click the Start button and then click Settings from the displayed men...

Страница 111: ...dows Update to manual update 1 Sign in the computer with a computer s administrator account 2 Right click the Start button and then click Run 3 On the Run window type gpedit msc to activate the Local Group Policy Editor 4 On the Local Group Policy Editor window click Computer Configuration Administrative Templates Windows components Windows Update Configure Automatic Updates 5 On the Configure Aut...

Страница 112: ...J 204 WEM Product Recovery DVD to the DVD drive The underlined part is an example The information of varies from model to model because the model of the purchased computer is indicated Replace the model described in the subsequent procedure with the model of the purchased equipment 2 Execute the following command from the Command Prompt as administrator dism online Add package Packagepath d langua...

Страница 113: ...ick the Administrative tab 9 Click Copy settings in Welcome screen and new user accounts settings 10 The Welcome screen and new user accounts settings window opens On this window select the Welcome screen and system accounts checkbox and New user accounts checkbox and then click the OK button 11 The Change Display Language dialog box appears In this dialog box click the Restart now button 12 After...

Страница 114: ...hen you turn on the power for the first time 3 2 1 1 Outline of basic settings procedure Only when using the Internet Exp1orer 11 See 2 8 Setting Up the LAN Interface See 2 9 Setting Up the Screen See 3 2 2 2 Setting Up Auto update The procedure takes about 5 minutes Setting up the network environment Setting up the screen Setting up auto update See 3 2 2 3 Internet Explorer 11 setup procedure Int...

Страница 115: ...xecuted The modules updated by this function can also affect currently running programs Because of all this this function must be turned off The following procedure shows how to turn off automatic updating 1 If you are not logged on to the computer as an administrator account log on to the computer as an administrator account 2 Click Start and then click Control Panel 3 The Control Panel window op...

Страница 116: ...14 5 The Choose how Windows can install updates window is displayed Select Never check for updates not recommended and click OK 6 Click the Close button at the upper right corner of the System and Security window ...

Страница 117: ... Run as administrator If the administrator account you used for log on is a built in administrator account simply click Command Prompt If you see the User Account Control window click Yes 4 Type the following character string in the command prompt and then press the Enter key C HITACHI IE11 Preparation bat 5 The following message appears and installation of the update program necessary for install...

Страница 118: ...ow Language Culture name English EN US Chinese China ZH CN Chinese Hong Kong ZH hk Chinese Taiwan ZH tw Korean KO Kr Portuguese PT PT Thai TH th Notes 2 Type X86 for 32 bit OS or X64 for 64 bit OS in X86 8 The following window opens On this window click Install 9 The following window opens On this window click Continue Installation of Internet Explorer 11 starts ...

Страница 119: ...ernet Explorer setting following the instruction in the window NOTE If the installation failed visit the following site to solve the problem Microsoft technical information document number 2872074 Troubleshooting a failed installation of Internet Explorer 11 https support microsoft com en us kb 2872074 ...

Страница 120: ...sed for log on is a built in administrator account simply click Command Prompt If you see the User Account Control window click Yes 3 At the command prompt type the following and press Enter rmdir s C HITACHI XP_Mode 4 A confirmation message for the deleting directory is output Type y and then press Enter NOTE A virtual environment with license authenticated Windows XP installed is contained in th...

Страница 121: ...g Windows XP Mode setup This shows a list of the items you need to decide or check before you start setup work See 3 2 3 5 Setting up Windows XP Mode Basic settings of Windows XP Mode are configured The procedure takes about 10 minutes Installing Windows XP Mode Installing Windows Virtual PC Setting up Windows XP Mode Setup completes NOTE Windows XP Mode requires Windows Virtual PC to be installed...

Страница 122: ...a menu On the menu click Run as administrator If the administrator account you used for log on is a built in administrator account simply click Command Prompt If you see the User Account Control window click Yes 3 At the command prompt type the following and press Enter cd C HITACHI XP_Mode 4 And then type the following and press Enter Installation starts WXPMode_install bat 5 When the installatio...

Страница 123: ...he following and then press Enter C HITACHI XP_Mode Virtual PC The Windows Explorer window is displayed Double click a setup program under the directory Note that a setup program is different depending on whether the OS is a 32 bit or 64 bit version If the OS is a 32 bit version Windows6 1 KB958559 x86 msu If the OS is a 64 bit version Windows6 1 KB958559 x64 msu 3 The Windows Update Standalone In...

Страница 124: ...estart begins 3 2 3 4 Preparing Windows XP Mode setup The following items are necessary for the setup work for Windows XP Mode Before you start the setup work decide or check those items beforehand Item Description Password for XPMUser A password for XPMUser administrator account of the computer You can change the setting after the setup ...

Страница 125: ...dure below to set up Windows XP Mode 1 Click Start and point to All Programs 2 Click Windows Virtual PC Windows XP Mode 3 The Windows XP Mode License Agreement is displayed Read the license agreement carefully and select the I accept the license terms check box Click Next ...

Страница 126: ...stallation folder and credentials window opens In the Password and Confirm password boxes type a password for XPMUser Click Next 5 A window for configuring Automatic Updates is displayed Select Not right now and click Next ...

Страница 127: ...3 SETUP 3 25 6 A window is displayed to indicate setup will share the drives Click Start Setup 7 A window is displayed to show the Windows XP Mode setup is progressing ...

Страница 128: ... first logon The operation of the system will not be affected Source Service Control Manager Event ID 7005 Type Error NOTE When Windows XP Mode is started for the first time after the setup you may find the time zone of Windows XP Mode is not the same as the time zone of Windows 7 If this happens you need to manually change the time zone of Windows XP Mode so that they are the same ...

Страница 129: ... Start Command Prompt to launch an uninstallation program Click Start and point to All Programs Click Accessories Right click Command Prompt to show a menu On the menu click Run as administrator If the administrator account you used for log on is a built in administrator account simply click Command Prompt If you see the User Account Control window click Yes 3 At the command prompt type the follow...

Страница 130: ...ess Enter If you do not want to uninstall press n and press Enter The uninstallation will be aborted 6 When the uninstallation finishes the following message is displayed to indicate the uninstallation is complete Uninstallation completed This completes the uninstallation procedure for Windows XP Mode Close the command prompt and then uninstall Windows Virtual PC ...

Страница 131: ...d on to the computer as an administrator account log on to the computer as an administrator account 2 Click Start and then click Control Panel 3 Click Programs 4 Under Programs and Features click View installed updates 5 The Installed Updates window opens From the list select Windows Virtual PC KB958559 and then click Uninstall ...

Страница 132: ... system Click Restart Now to restart This completes the uninstallation procedure for Windows Virtual PC NOTE When you want to reinstall Windows XP Mode follow 3 2 3 2 Installing Windows XP Mode and 3 2 3 5 Setting up Windows XP Mode You may see the following dialog box during Windows XP Mode setup In this case click Create New to continue the setup process ...

Страница 133: ......

Страница 134: ...This Page Intentionally Left Blank ...

Страница 135: ...ts do not affect the operation of the system Source Event ID Type Search ProfileNotify 2 Error volmgr 49 Error Service Control Manager 7022 7023 7000 7009 7043 Error Search 1008 Warning e1rexpress 27 Warning Kernel PnP 219 Warning User Profiles Service 1534 Warning Event ID 7009 and 7023 may be recorded in the event log during the OS setup and other situation but does not have any problem if not r...

Страница 136: ...nt log when a USB device is connected or disconnected or when the system starts for the first time after a storage device is added even though the USB device or the storage device works without any problems Those events are recorded due to the specifications of the OS and do not affect the operation of the system Source Event ID Type Disk 11 Error For detail see the following web site Microsoft te...

Страница 137: ... equipment does not have any problems Source Event ID Type Security SPP 1014 8198 8200 Error The following event log is recorded when you log off or shut down Source Event ID Type Service Control Manager 7031 7034 Error Apps 5973 Error Finish all application before you log off shut down or restart For detail see following web site Microsoft technical information Document number 3116667 Event ID 70...

Страница 138: ... this equipment scheduled defragmentation by Disk Defragmenter is turned off If you want to defragment disks using Disk Defragmenter you can do that by using either one of the methods below a Turn on scheduled defragmentation by Disk Defragmenter b Run Disk Defragmenter manually The procedure of each method is described below a Turn on scheduled defragmentation by Disk Defragmenter 1 If you are no...

Страница 139: ... the Run on a schedule recommended check box 7 As required configure the frequency day of the week and start time of defragmentation We recommend the scheduled times of defragmentation you configure do not conflict with the schedule of the applications for business use The initial schedule of defragmentation is as follows Frequency Weekly Day of the week Wednesday Start time 1 00 ...

Страница 140: ...indow appears As required select the drives you want to defragment Click OK Notes 1 SSD is not appeared on Select Disks For Schedule window 10 The Disk Defragmenter Modify Schedule window appears Click OK 11 The configured schedules are displayed under Schedule Check the contents and click Close to close the window ...

Страница 141: ...el 3 The Control Panel window appears Click System and Security 4 Under Administrative Tools click Defragment your hard drive 5 The Disk Defragmenter window appears Under Current status select the drive you want to defragment and click Defragment disk When the defragmentation process is complete the date and time of the defragmentation is displayed in the Last Run column 6 Click Close to close the...

Страница 142: ...t by using either one of the methods below a Turn on the drive optimization schedule b Run the drive optimization manually The procedure of each method is described below a Turn on the drive optimization schedule 1 Sign in to the computer as an administrator and display the Control Panel windows 2 Click System and Security 3 Under Administrative Tools click Defragment and optimize your drives ...

Страница 143: ... Under Scheduled optimization click Turn on 5 The Optimization schedule window appears Select the Run on a schedule recommended check box 6 As required configure the frequency of defragmentation The initial schedule of defragmentation is as follows Frequency Weekly 7 Click Choose ...

Страница 144: ...timize on a regular schedule window appears As required select the drives you want to defragment Click OK 9 The Optimization schedule window appears Click OK 10 The configured schedules are displayed under Scheduled optimization Check the contents and click Close to close the window ...

Страница 145: ... in a Turn on the drive optimization schedule 2 The Optimize Drives window appears Under Status select the drive you want to defragment and click Optimize When the disk optimization process is complete the date and time of the optimization is displayed in the Last Run column 3 Click Close to close the window ...

Страница 146: ...ed time as needed so as not to overlap with the operation schedule of job applications The initial schedule settings are shown below Frequency Every day Approximate time 2 00 Windows 10 In Windows 10 a spyware preventive function Windows Defender has been enabled The Windows Defender also includes a virus preventive function This virus preventive function may adversely impact application performan...

Страница 147: ...res TCP Chimney Offload Receive Side Scaling RSS Network Direct Memory Access NetDMA Unfortunately if the system in Windows is used with SNP turned on processing the network may become unstable or the network performance may be reduced when you use the network in specific ways This is why SNP is disabled in this equipment In Windows 10 TCP Chimney Offload and Network Direct Memory Access are not s...

Страница 148: ...e command prompt frequently executing a batch file repeatedly for example reboot the OS regularly to avoid this phenomenon 4 7 STOP Error 0x7e While Using File Sharing A STOP error 0x7e may occur while file sharing over a network is used if the file server uses Windows 7 When you use file sharing visit the following URL of Microsoft for the details and corrective actions Microsoft technical inform...

Страница 149: ...BASE T 100BASE TX 10BASE T by auto negotiation 2 RJ45 Wake on LAN supported Audio LINE IN 1 LINE OUT 1 External control Option 1 External Dimensions Width Depth Height 93 356 325 mm rubber feet and vertical stand not included RAS features Hardware status monitoring fan failure temperature failure SMART drive operating time and others OS deadlock monitoring watchdog monitoring alarm notification wh...

Страница 150: ...conversion connector or DVI A cable you can output an analog VGA signal The conversion connector or DVI A cable must be provided by the users 3 The xx denotes the OS type For details about OS types see 3 Pre installed OS model specifications If xx is NO an OS is not installed Depending on the language of the OS y is either J Japanese or M MUI Multilingual User Interface A language supporting in MU...

Страница 151: ...ersion Only HF W2000 model 45 support 4 Accessories Item Specifications Power cord 7 A 125 V two prong plug with ground pole Manual SAFETY INSTRUMENTS Manual number WIN B 0001 5 Option specifications Item Specifications LAN adapter 1000BASE T 100BASE TX 10BASE T by auto negotiation 1 For details see 8 Optional LAN adapter specifications HJ F2040 20 BASE T 100BASE TX 10BASE T by auto negotiation 2 ...

Страница 152: ... 60Hz 60Hz 2560 1440 60Hz 2560 1600 60Hz 3840 2160 60Hz 1 It has been confirmed that all refresh rate settings indicated in the table actually work in the test environment provided by Hitachi It should be noted that supported resolutions and refresh rates are different depending on the display Consequently some settings may not be used for a specific display 2 By using a conversion connector or DV...

Страница 153: ...pecifications Interface 1000BASE T 100BASE TX 10BASE T by auto negotiation 1 RJ45 Wake on LAN not supported Installed slot PCI Express x1 Dimensions 120 7mm 67mm Include full height bracket Weight About 40g 9 Optional LAN adapter specifications HJ F2040 21 Item Specifications Interface 1000BASE T 100BASE TX 10BASE T by auto negotiation 2 RJ45 Wake on LAN not supported Installed slot PCI Express x4...

Страница 154: ...ion for each of the USB ports extension slots PCI Express PCI and DisplayPort Make sure that the inrush current when a device is connected does not exceed the specified maximum current If the inrush current exceeds the specified maximum current the surge protection circuit may be activated and the connected device may not be recognized Item Voltage Maximum current USB2 0 1 1 port 5V 0 5A port USB3...

Страница 155: ... size of the video BIOS may change in future versions 2 The extended BIOS space is a narrow space between D0000 and DFFFF and may already be in use by other devices In addition the size of the BIOS of standard built in adapters may change in future versions It is advisable that you do not use the extended BIOS space if at all possible when you design a new device If you do a contention may occur b...

Страница 156: ...0A0 00B1 Interrupt controller 2 00B2 00B3 Power management controller 00B4 00BD Interrupt controller 2 00C0 00DF DMA controller 2 00F0 Coprocessor 0000 00FF Reserved Domain except the above 0240 025F RAS LSI register 02F8 02FF Serial port 2 COM2 03F8 03FF Serial port 1 COM1 04D0 04D1 Interrupt controller 0A00 0A3F Super I O 0CF8 0CFB PCI configuration address 0CF9 Reset controller 0CFC 0CFF PCI co...

Страница 157: ... PCI Express slot3 EHCI2 Onboard Video xHCI IRQ17 Not used IRQ18 Onboard LAN 1 IRQ19 SATA controller Onboard LAN2 IRQ20 Not used IRQ21 Not used IRQ22 HD Audio LINE IN LINE OUT IRQ23 EHCI1 NOTE The above list is valid when the APIC is enabled default settings The IRQ numbers of PCI slots are valid when the INT A terminal is used The IRQ numbers are fixed and you cannot change the settings shown abo...

Страница 158: ...ices IRQ10 Not used IRQ11 Not used IRQ12 Not used IRQ13 Coprocessor IRQ14 Not used IRQ15 Not used 5 5 Serial Port Settings The factory default settings for the serial ports are as follows Do not change those settings If you do the equipment may not work properly Name recognized by the BIOS I O address IRQ assignment Name recognized by the OS Note Serial port A 3F8h IRQ 4 COM1 Standard feature Seri...

Страница 159: ... press the key Tab When you configure the date and time by pressing this key the focus moves between setting items for example from month to day and from hour to minute Enter Used for moving from a higher menu to a lower menu exiting the setup saving data to the SPI ROM or other purposes 3 Overview of the setup menu The setup menu consists of the following items Main This is the screen displayed w...

Страница 160: ...an change the reset switch to an NMI switch 2 Quick Boot Mode Disabled If you change the setting to Enabled you can skip the memory check and the startup time will be shortened In normal operation specify Disabled for the setting Correctable ECC Error Pass Specifies whether to display a message and pause the startup or to ignore the error and proceed with the startup when a Correctable ECC Error i...

Страница 161: ... I O Address 2F8h Interrupt IRQ3 Core Multi Processing Enabled Hyper Threading Enabled If the CPU does not support the function this item is not shown Do not change this setting EIST Enabled Do not change this setting Turbo Boost Disabled If the CPU does not support the function this item is not shown Do not change this setting No Execute Mode Mem Protection Enabled Do not change this setting MMIO...

Страница 162: ...failure when the power is turned on Do not change this setting FAN speed control Auto Set the rotational speed of the fan Auto The fan speed changes automatically according to the CPU temperature Full Fan speed is always maximum Power saving mode Disabled Specifies whether to launch the CPU in the power saving mode Do not change this setting Boot Boot Priority Order 1 USB FDD 2 SATA CD DVD 3 USB C...

Страница 163: ...See 1 Starting the setup menu 2 Open Exit in the top menu Move the cursor to Load Setup Defaults and press Enter The message Load Optimized Defaults is displayed 3 Select Yes and press Enter 4 Open Exit in the top menu again Move the cursor to Exit Saving Changes Press Enter The message Save configuration and reset is displayed 5 Select Yes and press Enter This completes the procedure ...

Страница 164: ... System Clock Specification Item Specifications Time function Hour Minute Second 24 hours clock Date function Year Month Date Precision 4 seconds per day Battery backup Lithium battery Rough estimates when the ambient temperature is 25 C For your information the system program normally updates the internal clock by using a periodic timer The internal clock is adjusted by reading the time and date ...

Страница 165: ...ion of Each Part 1 Motherboard Standard USB2 0 1 1 port front Pin No Signal name U1 5V U2 USBD1 U3 USBD1 U4 GND L1 5V L2 USBD0 L3 USBD0 L4 GND USB3 0 2 0 1 1 port front and rear Pin No Signal name Pin No Signal name L1 1 5V U1 10 5V L2 2 USBD0 U2 11 USBD1 L3 3 USBD0 U3 12 USBD1 L4 4 GND U4 13 GND L5 5 SSRX1 U5 14 SSRX2 L6 6 SSRX1 U6 15 SSRX2 L7 7 GND U7 16 GND L8 8 SSTX1 U8 17 SSTX2 L9 9 SSTX1 U9 ...

Страница 166: ... DSR 2 RD 7 RTS 3 TD 8 CTS 4 DTR 9 RI 5 GND Built in LAN port RJ 45 modular port 8 pins Pin No Signal name 1 TRD0 2 TRD0 3 TRD1 4 TRD2 5 TRD2 6 TRD1 7 TRD3 8 TRD3 For network connection use a cable specified as follows Cable specification UTP cable twisted pair cable without shield category 5e or 6 1 8 5 9 1 6 ...

Страница 167: ...22 SGND 7 DDCDAT2 15 PGND 23 TXCP 8 V Sync 16 HP SENSE 24 TXCM Pin No Signal name C1 R C2 G C3 B C4 H Sync C5 RGB GND Video port DVI D 24 pins inch screws Pin No Signal name Pin No Signal name Pin No Signal name 1 TX2M 9 TX1M 17 TX0M 2 TX2P 10 TX1P 18 TX0P 3 SGND 11 SGND 19 SGND 4 NC TX4M 12 NC TX3M 20 NC TX5M 5 NC TX4P 13 NC TX3P 21 NC TX5P 6 DDCCLK2 14 P5DFP 22 SGND 7 DDCDAT2 15 PGND 23 TXCP 8 N...

Страница 168: ...0 pins Pin No Signal name Pin No Signal name 1 MainLane0 11 GND 2 GND 12 MainLane3 3 MainLane0 13 CONFIG1 4 MainLane1 14 CONFIG2 5 GND 15 Aux 6 MainLane1 16 GND 7 MainLane2 17 Aux 8 GND 18 HotPlug 9 MainLane2 19 GND 10 MainLane3 20 3 3V 1 2 19 20 ...

Страница 169: ... 1 AGND 2 LIN_L 2 LOUT_L 3 LIN_R 3 LOUT_R 1 2 3 NOTE The diameter of the mold of the cable must be 10 mm or less If the diameter of the mold is larger than 10 mm when you try to connect cables to both LINE IN and LINE OUT the two molds get in the way of each other and you cannot insert the connectors Audio cable Plug Mold ...

Страница 170: ...5 GND External control I O port male connector inch screws Pin No Signal name Pin No Signal name 1 MCALL_1 14 MCALL_2 2 GENDO0_1 15 GENDO0_2 3 GENDO1_1 16 GENDO1_2 4 WDTTO_1 17 WDTTO_2 5 PSDOWN_1 18 PSDOWN_2 6 GENDI0_1 19 RMTPWRON_2 GENDI2_2 7 RMTSTDN_1 GENDI_1 20 RMTSTDN_2 GENDI_2 8 RMTRESET_2 21 GENDI1_2 9 CPUSTOP_2 22 GENDI0_2 10 GENDO2_2 23 CPUSTOP_1 11 RMTRESET_1 24 GENDO2_1 12 GENDI1_1 25 GN...

Страница 171: ...d Load current Steady state Up to 0 1 A point Inrush Up to 0 6 A point 100 ms Dielectric strength 250 VAC one minute Applicable load Relay clamp diode required Buzzer Indicator Semiconductor device 1 RMTSHTDN and GENDI use the same contact switched by the RAS software setting RMTPWRON and GENDI2 use the same contact switched by the jumper pin setting For details see 6 6 Enabling the Remote Power O...

Страница 172: ...requested Contact closed GENDO0_1 GENDO0_2 These are general purpose contact output signals A user can assign a function to each one of the contacts GENDO0 through GENDO2 When the power is off Contact open A contact When the power is off Contact open A contact User defined User defined GENDO1_1 GENDO1_2 When the power is off Contact open A contact When the power is off Contact open A contact User ...

Страница 173: ...2_2 RMTPWRON_2 This is a general purpose input signal A user can assign a task to contact GENDI2 This input can also be used for the remote power on function 2 1 You can use a pulse input for the RMTSHTDN contact and the RMTRESET contact When you use a pulse the contact must be closed for at least 500 ms Note that these two signals should not be closed at the same time 2 Use a pulse input for the ...

Страница 174: ...xternal Controlt Cable and Connector The shielded grounding of the cable must firmly contact the conductor of the plug case frame ground Do not connect a GND pin of the EXT port to the shielded grounding because all GND pins are signal ground If you do so the equipment may malfunction Cable specification recommended cable Item Specifications Note Maximum cable length 30 m Electric shield of the ca...

Страница 175: ...ns see 5 8 2 3 6 Serial port COM1 15 Use a shielded cable 7 Serial port COM2 Optional 8 Front USB2 0 1 1 2 ports 3 Use a USB 2 0 compliant shielded cable If you use an extension cable connected USB devices may not work properly 9 Front USB3 0 2 0 1 1 2 ports 2 Depending on a device to connect use a USB 3 0 compliant shielded cable or a USB 2 0 compliant shielded cable If you use an extension cable...

Страница 176: ...This Page Intentionally Left Blank ...

Страница 177: ... one minute Otherwise the injury of hands and fingers may result NOTICE Before you move this equipment make sure you shut down the OS disconnect the plug of the power cord from the outlet and wait for at least one minute If you do not the HDDs and other devices may fail When you transport or carry the equipment pack it in the dedicated container container and packing materials used when the equipm...

Страница 178: ... dust filter may lose its function a Frequency Clean a dust filter between once per month and once per three months depending on the amount of dust in the environment b Procedure 1 Shut down the OS 2 Unplug the power cord from the outlet Wait for at least one minute before you start cleaning 3 Take out the dust filter located on the front panel Then dust or wash the filter If you wash the filter w...

Страница 179: ...en you use detergent spray a minimum amount of detergent on a cloth Before wiping the keyboard with a wet cloth wring out the cloth well Use a soft cloth such as gauze Before using detergent carefully read the instructions on use of the detergent Cover the whole keyboard with gauze spray detergent all over it leave it for a couple of minutes and wipe off the keyboard HITACHI Detergent Detergent HI...

Страница 180: ...tion of fan rotation dust removal Removal of foreign objects that have entered the equipment Other general inspection items Once per year Replacing dust filters Once per year Measuring the power voltage Once per year Operation check Operation check of switches and indicators Operation check by using test programs Once per year Periodic replacement of replacement components As required Routine chec...

Страница 181: ... in this equipment 1 A PCI Express x16 connector is used but the internal connection is equivalent to PCI Express x4 Figure 6 1 Types and Locations of Installed Components Main memory slot from left to right A1 and B1 DVD Drive System fan HDD or SSD Fan duct Power Supply Unit Slot 3 PCI Expressx16 Slot 2 PCI Expressx4 1 Slot 1 PCI CPU fan The cover of the equipment Dust filter Lithium battery ...

Страница 182: ...ard Those parts are hot and if you touch them you may get burned In addition if you touch them they may get damaged and that may result in failure of the equipment Allocate sufficient clearance for maintenance work Carry out the work on a flat surface See 1 6 2 Installation Wear cotton gloves when you install or remove components When you tighten or remove a screw use a Phillips screwdriver JIS 1 ...

Страница 183: ...ove the three screws on the rear of the equipment 2 Slide the cover to the rear of the equipment 3 Slightly pull the sides of the cover apart from the body of the equipment and then lift the cover up and away Figure 6 2 Removing the Cover of the Equipment 2 Installing the cover of the equipment When installing the cover of the equipment reverse the procedure described in 1 Removing the cover of th...

Страница 184: ...talling or removing an extension board Before starting to work see 6 3 2 Before installing or removing components When extension boards have been already installed to the slots install or remove the extension board from a big number slot after removing a small number slot When you install some extension boards at a time install extension boards in the order that the slot number is larger For infor...

Страница 185: ...xpress x16 Full height Short size 1 A PCI Express x16 connector is used but the internal connection is equivalent to PCI Express x4 b Size of extension boards The board sizes length height in the PCI Express PCI specifications are as follows the height includes the connector PCI Express specification Short size 167 65 111 15 mm PCI specification Short size 174 63 106 68 mm 3 Removing an extension ...

Страница 186: ...r terminal of an extension board Figure 6 4 Removing an extension board 5 Fix a slot cover to the extension slot which became empty with a screw 6 Attach a PCI cover in the procedure that is reverse to procedure step 2 7 Attach the cover of the equipment NOTICE Always attach a slot cover to each unused extension slot Otherwise failure of the equipment may result The connector of the extension slot...

Страница 187: ...you want to install an extension board and remove the slot cover 4 Insert an extension board for the connector of the extension slot horizontally while pushing the both ends of an extension board 5 Push a part right above the connector terminal of an extension board and insert an extension board completely 6 Fix an extension board to the extension slot with a screw 7 Attach the cover of the equipm...

Страница 188: ...pment before you install or remove an external control board Otherwise failure of the equipment may result 1 Before installing or removing an external control board Before starting to work see 6 3 2 Before installing or removing components When extension boards have been already installed to the slots install or remove the extension board from a big number slot after removing a small number slot W...

Страница 189: ...nsion slot 3 Lift slowly the nail of the FFC connector on motherboard and pull up FFC cable from the connector Figure 6 6 Removing the FFC cable 4 Remove an external control board from the extension slot 5 Fix a slot cover to the extension slot which became empty with a screw 6 Attach the cover of the equipment and the PCI cover FFC cable The nail of the FFC connector FFC connector 3 Lift 3 Lift 3...

Страница 190: ...stalling an external control board NOTE When you install or remove the FFC cable treat carefully the nail of the FFC connector so that it is not broken When you install the FFC cable to the FFC connector be careful about the directions so that the terminal of the FFC cable touches the terminal of the FFC connector Refer to Figure 6 6 Removing the FFC cable ...

Страница 191: ... to the equipment before you install or remove main memory Otherwise failure of the equipment may result 1 Before installing or removing a main memory Before starting to work see 6 3 2 Before installing or removing components For information about the location of the main memory slots see Figure 6 7 Installing a main memory Before installing or after removing the main memory module place the tip o...

Страница 192: ... If you do the modules may not be recognized 1 Follow the instructions in 6 3 3 Installing and removing the cover of the equipment to remove the cover of the equipment 2 Insert the main memory module into the connector from right above the connector When the module is fully inserted you will hear a click Figure 6 7 Installing a main memory On this equipment only the following combinations are allo...

Страница 193: ... main memory in reverse to remove main memory 4 Reconfiguring the memory dump file settings When you change the capacity of main memory you must reconfigure the memory dump collection settings When you reconfigure the memory dump collection setting see 8 2 1 Memory Dump Confirmation Message for details ...

Страница 194: ...the drive may result Before you replace an HDD or SSD make sure you shut down the OS unplug the power cord from the outlet and wait for at least one minute Install or remove an HDD or SSD only if necessary for example when you need to replace an HDD or SSD due to failure If you do it frequently failure of the equipment may result Fully mount an HDD or SSD Loose contact and missing screws may resul...

Страница 195: ... set screws for the Drive case 2 Hold two set screws for the Drive case and pull out the case Figure 6 8 Removing an HDD or SSD Set screws for the Drive case 2 Drive bay 1 Drive bay 2 NOTE When you pull out an HDD or SSD make sure you do not apply too much force to the connector Slowly pull out the hard disk in order not to subject the HDD or SSD When you connect an HDD or SSD to a connector do no...

Страница 196: ...AINTENANCE 6 20 3 Mounting an HDD or SSD Follow the procedure described in 2 Removing an HDD or SSD in reverse to mount an HDD or SSD NOTE When mounting Drive bay 1 be careful not to roll up an internal ground spring ...

Страница 197: ...ing or removing components 2 Removing a DVD drive 1 Follow the instructions in 6 3 3 Installing and removing the cover of the equipment to remove the cover of the equipment Figure 6 9 Removing a DVD drive 3 Installing a DVD drive Follow the procedure described in 2 Removing a DVD drive in reverse to installing a DVD drive DVD Drive 3 DVD drive cable 2 Screw 2 In front of the equipment 4 2 Remove t...

Страница 198: ...from the dust filter cover Figure 6 10 Removing a dust filter 3 Installing a dust filter Follow the procedure described in 2 Removing a dust filter in reverse to installing a dust filter As shown in the following figure insert the nail of the dust filter cover in the slit Figure 6 11 Installing a dust filter WARNING Make sure to install a dust filter to equipment If you do not dusts enter into the...

Страница 199: ...taching or detaching the vertical stand Before starting to work see 6 3 2 Before installing or removing components Disconnect all the cables connected to the equipment Do not apply shock to the equipment 2 Attaching the vertical stand Attach the vertical stand to the equipment securely with the screws provided as part of the vertical stand Figure 6 12 Attaching the vertical stand 3 Detaching the v...

Страница 200: ...ving the lithium battery Before starting to work see 6 3 2 Before installing or removing components 2 Removing the lithium battery 1 Follow the instructions in 6 3 3 Installing and removing the cover of the equipment to remove the cover of the equipment 2 When removing the lithium battery follow the instructions in 6 3 4 Installing and removing an extension board to remove an extension board if th...

Страница 201: ...e lithium battery and remove it from the battery connector Figure 6 13 2 Removing the lithium battery 4 Lift the another edge of the battery cover which you lifted in step 3 and remove the battery cover 5 Pick up the lithium battery Lithium battery Battery cover Battery connector NOTE When you dispose of the battery observe local laws and regulations whatever applicable ...

Страница 202: ... whether the function of the external contact GENDI2 is a general purpose digital input signal or the remote power on signal See 5 8 2 External control specification Whether a jumper socket is attached GENDI2 setting Attached General purpose digital input signal Not attached Remote power on signal 1 Before attaching or removing the JP socket Before starting to work see 6 3 2 Before installing or r...

Страница 203: ...in Figure 6 14 Removing a Jumper Socket 3 Attaching the JP socket Follow the procedure described in 2 Removing the JP socket in reverse to attaching the JP socket JP2 NOTE Save the jumper socket in a safe place for later use when you want to restore the original setting ...

Страница 204: ...This Page Intentionally Left Blank ...
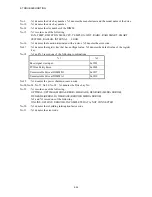
Страница 205: ...uilt After you restore the contents of the system drive back to the factory condition follow the procedure described in CHAPTER 3 SETUP to set up the OS The following is a rough flow chart of the procedure Restoring the factory condition Preparation For details see 7 2 Preparation This shows a list of the items you need to prepare and the items you need to decide or check before you start restorat...

Страница 206: ...ve all external storage devices to resume the hardware configuration at the factory shipment before you perform restoration work using a recovery DVD When a recovery DVD is used all data in the system drive is deleted Back up the data beforehand as required 7 2 Preparation Before you start restoration work using recovery DVDs have the following recovery DVDs ready Recovery DVD for HF W HITACHI HJ ...

Страница 207: ...number 1 2 Note The underlined part is the model number of the equipment you purchased and therefore the part indicated as is different depending on the model In the following description of the procedure replace the HJ 204 with the actual model number of the equipment you purchased 2 When you boot from the recovery DVD the confirmation message is displayed Note If you cannot boot from the recover...

Страница 208: ... click Yes When the model name displayed in the confirmation message is different from the model name of the equipment you use click No When you click No the following message box is displayed Click OK The recovery DVD is automatically ejected and then the computer is automatically shut down If you want to go back to the confirmation window for the attention message click Cancel ...

Страница 209: ...tention message is displayed If you are OK with the attention message click Yes If you are not OK with the message click No When you click No the following message box is displayed Click OK The recovery DVD is automatically ejected and then the computer is automatically shut down If you want to go back to the confirmation window for the attention message click Cancel ...

Страница 210: ...ou replace the system drive If you select this option and click Next proceed to step 5 Only the system and boot partition Select this option if the system drive has partitions other than the boot partition the partition on which Windows is installed for data storage or other purposes and you want to restore the system drive back to the factory shipped condition while keeping these partitions If yo...

Страница 211: ...aximum capacity of SSD Therefore Entire drive is selected If you click Next proceed to step 6 When you click Cancel the following message is displayed Click OK The recovery DVD is automatically ejected and then the computer is automatically shut down If you want to go back to the selection window for the drive restore option click Cancel ...

Страница 212: ...w is displayed The window shows the factory default setting for the partition size and the minimum MIN and maximum MAX of the range of partition size values that can be entered Enter the partition size in GB 1 GB 1 073 741 824 bytes and click Next If you want to go back to the selection window for the drive restore option click Back If the entered value is out of range when you click Next the foll...

Страница 213: ...size to be restored click Yes Proceed to step 8 If you are not OK with the displayed partition size to be restored click No The selection window for the drive restore option returns When you select Only the system and boot partition in the selection window for the drive restore option 7 If you select Only the system and boot partition in the selection window for the drive restore option the confir...

Страница 214: ...following picture is a example that the number of recovery DVDs is two Note If you select Only the system and boot partition in the selection window for the drive restore option the boot partition is formatted before the restoration process Formatting the partition may take up to a couple of minutes The time required for formatting depends on the size of the boot partition During the format proces...

Страница 215: ...ery DVD is automatically ejected Remove the recovery DVD from the DVD drive and insert the next recovery DVD The following picture is a example that the number of recovery DVDs is two 10 When you click Continue it is displayed Preparing Recovery Please wait a few minutes in the Status box Then the restoration process back to the factory shipped condition resumes and the progress is displayed in th...

Страница 216: ...Complete is displayed in the Status box and the recovery DVD is automatically ejected Remove the recovery DVD from the DVD drive and then click Exit The computer will be shut down The system drive of the HF W2000 Model 48 45 is now successfully restored to the factory condition by using a recovery DVD After you finish the procedure above follow the instruction in CHAPTER 3 SETUP to set up the OS ...

Страница 217: ... Check if the DVD drive works properly Read tests and so on 3 Drive failed or not connected Please refer to the SETUP GUIDE Check if the system drive is connected correctly Check the integrity of the system drive Read write tests and so on 4 Failed to access the drive Please refer to the SETUP GUIDE 5 Failed to assign drive letter Please refer to the SETUP GUIDE Check that any devices unnecessary ...

Страница 218: ... display Hardware status window Notification Event notification Pop up notification Digital LEDs for Status indication Remote notification Status acquisition by using library functions Control Shutdown Startup suppression Automatic shutdown Shutdown by Library functions Startup suppression when severe failure occurs Controlling general purpose external contacts Controlling the Digital LEDs for Sta...

Страница 219: ... as a process with the highest priority real time priority class can run properly the status lamp on the front of this equipment is lit in green 3 Watchdog timer monitoring This feature monitors whether processes are scheduled properly using the watchdog timer implemented on this equipment This feature also offers a library to use the watchdog timer GUI feature settings 4 RAS setting window This w...

Страница 220: ...n the taskbar and set this icon to be displayed in the notification area of the taskbar 6 Event notification This feature enables a user application to check the hardware status of this equipment by monitoring the status of event objects 7 Pop up notification This feature notifies a user that an error has occurred in the hardware of this equipment by displaying pop up messages 8 Digital LEDs for S...

Страница 221: ... display digital LEDs with the RAS library Four input and three output general purpose external contacts are available If you use those contacts signals can be input from an external device to this equipment and signals can be output from this equipment to an external device Library functions 15 RAS library interface This interface offers library functions for recording log information in addition...

Страница 222: ...the chassis This feature periodically measures the temperature inside the chassis of this equipment and records the data in a file Simulation 21 Hardware status simulation This feature simulates the hardware status of this equipment including the status of the fans and drives as well as the temperature inside the chassis By using this feature you can test a user application without an actual hardw...

Страница 223: ...e of Windows 7 you can select from the three types except Automatic memory dump and Active memory dump Because the memory dump file type determines how far you can analyze the failure by using the dump file we recommend selecting Complete memory dump whenever you can The factory default is Complete memory dump Complete memory dump The entire contents of system memory is recorded The boot volume 2 ...

Страница 224: ...0MB When an incident occurs that triggers a memory dump or the reset switch is pressed the process that triggers a memory dump is started after the window called blue screen is displayed NOTE The time required for collecting a memory dump depends on the type of dump file collected the configuration of the mounted drives and the memory capacity It should be noted that if you keep the factory settin...

Страница 225: ...ing recommended for this equipment click Yes to close the message box The memory dump and virtual memory settings are updated and the area for saving a memory dump is allocated automatically as required If the following message is displayed afterward to prompt you to restart the system click OK to close the message box and then restart the system NOTE If you do not want to use the system with the ...

Страница 226: ...Advanced tab 5 Click Change which is under Virtual memory 6 Clear the Automatically manage paging file size for all drives check box 7 In the Drive list select the drive that stores the paging file you want to change For the sake of explanation assume C system drive is clicked here 8 Select Custom size In the Initial size MB or Maximum size MB box type the new size of the paging file in megabytes ...

Страница 227: ...ave to enter a name 5 Select the Overwrite any existing file check box 6 Click OK In order to enable a Complete memory dump as recommended for this equipment follow the procedure below 1 Double click the SetCrashDump reg file under C Program Files HFWRAS init 2 The following message box will open Click Yes 3 A message box will appear indicating that information has been added successfully Click OK...

Страница 228: ... a remote shutdown signal input startup is suppressed only when Enable automatic shutdown at remote shutdown input is selected in the RAS setting window If a automatic shutdown is not selected startup is not suppressed For information about how to use the RAS setting window refer to HF W2000 Model 48 45 RAS FEATURES MANUAL When a remote shutdown signal input is detected the equipment displays a bl...

Страница 229: ...maintenance or data for post failure analysis during preventive maintenance or when problems occur mdump Used for copying a memory dump file to a portable medium when a memory dump is collected due to a STOP error createdmp Used for reserving a disc area for a memory dump file when a message is displayed indicating the capacity of the memory dump file is insufficient getrasinfo Used for checking t...

Страница 230: ...under the system drive usually C and the data is saved under that directory When the e option is used specify the directory where you want to store the decompressed data If this option is not used the data is decompressed under the current directory Table 8 3 shows the information collected by the logsave command Table 8 3 Information Saved by logsave Item Description Windows event log file Backup...

Страница 231: ...vileges Log on to the computer by using an administrator account and run the command again If User Account Control UAC is enabled start the command prompt with administrator privileges and run the command NOTE When you run the logsave command log on to the computer by using an administrator account registered on computer as a member of the Administrators group You cannot run multiple instances of ...

Страница 232: ... e option the compressed file will be decompressed The following options are available for this command n Files will be copied without compression e file name A file compressed by the mdump command will be decompressed You must specify the file name Copy destination path name When the e option is not specified specify the drive name of the copy destination If you want to copy files to a directory ...

Страница 233: ...en you run the mdump command log on to the computer by using an administrator account registered on the computer as a member of the Administrators group You cannot run multiple instances of the mdump command simultaneously Start the command prompt with administrator privileges and run the command If there is not enough free space on the copy destination the Compressed Folders Error occurs when you...

Страница 234: ...ropriate and then retry this command For information about how to set up the memory dump settings see 8 2 2 Configuring settings related to a memory dump A Complete memory dump is specified to be collected The file name of the memory dump must be correctly input The memory dump file must be able to be overwritten After the area for the memory dump file is allocated the partition used for allocatio...

Страница 235: ...ct a Complete memory dump option Error Free disk space is too low The free space on the disk is too low Increase the free space on the disk and retry Error Systemcall failed s x s Name of the Windows API function where the error occurred x Error code from the Windows API An internal error has occurred You do not have the privilege to run this command Please run this command again on Administrator ...

Страница 236: ...and displays both the information about the equipment and the settings of the RAS software status Displays the status of the current equipment including the status of the fan and the temperature inside the chassis setting The command displays the configuration information of the RAS software e File name The output is not displayed at the command prompt but instead stored in the file specified by t...

Страница 237: ...ondition PS fan status Normal System fan status Normal CPU fan status Normal Temperature condition Internal temperature status Normal Internal temperature value 28 deg C RAID condition 1 Array1 Status Optimal RAID level 1 Drive condition Drive bay1 Status Healthy Used hours 2000 hours Drive bay2 Status Smart Detected Used hours 5 hours Memory condition DIMM A1 status Normal DIMM B1 status Not Moun...

Страница 238: ...failure prediction setting Function is available Enable Drive used hours monitoring setting Function is available Enable Advanced Time limit of drive bay1 20000 hours Time limit of drive bay2 20000 hours Digital LED setting Show Hardware status ON Popup setting Function is available Disable Advanced Fan Enable Temperature Disable SMART Disable Used hours Enable RAID Enable 1 Memory Disable Hardwar...

Страница 239: ...ns Output item Description xx fan status yy xx Shows the name of the fan PS Power fan System System fan CPU CPU fan yy Shows the status Normal The fan is operating normally Error The fan is not operating normally Temperature condition section Shows the various statuses related to temperature The following table shows the list of items in this subsection and their respective descriptions Output ite...

Страница 240: ...tarted Media Error Shown only when a media error is detected during the task RAID level vv vv RAID level in the representation below 1 RAID1 Drive condition section Shows the status of a drive The following table shows the list of items in this subsection and their respective descriptions Display item Description Drive bayxx xx Shows the drive bay number Status yy yy Shows the status of the drive ...

Страница 241: ...the following subsections Automatic shutdown setting section Shows the automatic shutdown setting The following table shows the list of items in this subsection and their respective descriptions Output item Description Fan xx xx Shows whether the system is automatically shut down when a fan failure occurs ON Automatically shut down OFF Not automatically shut down Temperature yy yy Shows whether th...

Страница 242: ...he following table shows the list of items in this subsection and their respective descriptions Output item Description Function is available xx xx Shows whether the Self Monitoring Analysis and Reporting Technology SMART is enabled or disabled Enable Enabled In the case of the HJ 204x this setting is fixed to Enable Drive used hours monitoring setting section Shows the drive power on used hours m...

Страница 243: ...d Enable Enabled Disable Disabled Advanced Shows the advanced settings Fan yy yy Shows whether a pop up is displayed for a fan failure Enable Displayed Disable Not displayed Temperature zz zz Shows whether a pop up is displayed when the temperature is abnormal Enable Displayed Disable Not displayed SMART aa aa Shows whether a pop up is displayed when SMART is detected Enable Displayed Disable Not ...

Страница 244: ...f User Account Control UAC is enabled start the command prompt with administrator privileges and run the command NOTE When you run the getrasinfo command log on to the computer by using an administrator account registered on the computer as a member of the Administrators group You cannot run multiple instances of the getrasinfo command simultaneously Start the command prompt with administrator pri...

Страница 245: ...This Page Intentionally Left Blank ...
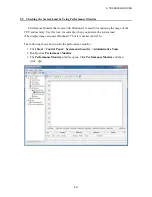
Страница 246: ... the lamps on the front panel see 1 5 Name and Function of Each Part 1 The equipment does not start Check the operation of the equipment after the plug of the power cord is connected to the outlet in the order of the following steps 1 through 7 If there is an applicable item follow the link If there are multiple applicable items the first one has precedence 1 When the plug of the power cord is con...

Страница 247: ...re displayed again after blackout in some cases See page 9 12 8 A blue screen is was displayed See page 9 11 9 The equipment cannot connect to the network See page 9 12 10 The network connection is unstable or the connection speed is slow See page 9 12 11 A CD or DVD cannot be recognized or cannot be read or written to See page 9 13 12 Writing to a CD or DVD fails See page 9 13 13 A CD or DVD cann...

Страница 248: ...tal LEDs for Status indication show alphanumeric characters and the system stops Possible cause An error was detected during POST 1 Make sure that the plug of the power cord is connected to the outlet 2 Make sure that the circuit breaker on the power distribution panel is on 3 If the standby lamp is turned on after steps 1 and 2 turn on the power switch When the equipment starts fans rotate and th...

Страница 249: ...n Action 1 If one of the following error messages is displayed take a corresponding action Error Remove Battery or Clear CMOS Load default value If this message is displayed each time the equipment starts the battery is dead Contact your system administrator or maintenance personnel Operating System not found There is an error in an HDD SSD or the OS Check the following items i Check if a USB CD U...

Страница 250: ... the equipment See 6 3 4 Installing and removing an extension board about removing an extension board 2 If the symptom persists after step 1 the OS may be corrupted If you have a recovery DVD restore the system drive back to the factory default using the recovery DVD Action NOTE Do not connect a USB device during the OS startup because the OS may not start normally When you change screens during t...

Страница 251: ... Disconnect the keyboard cable and securely reconnect it to ensure stable connection 2 Connect the keyboard cable to another port 1 Enable the remote power on function according to 6 5 Enabling the Remote Power On Function Action Action 1 Check which OS is used If the OS s specification is not support the WOL function the WOL function is not available 2 Enable the WOL function according to 2 7 1 E...

Страница 252: ...eign objects ii Make sure that the power cord for the fan is connected to a power connector A loose connection may have caused the symptom Remove the power cord for the fan from the power connector and then reconnect them When 21 is displayed on the Digital LEDs for Status indication The temperature is abnormal Check the following items i Make sure that the dust filter at the front of the equipmen...

Страница 253: ...overing from HDD failure in one side and replace an HDD When 4C is displayed on the Digital LEDs for Status indication RAID status is unknown RAS software cannot get RAID status Contact your system administrator or maintenance personnel When 4D is displayed on the Digital LEDs for Status indication Media error is occurred on RAID Read the description of RAS FEATURES MANUAL 2 8 2 and take action ac...

Страница 254: ...ication To start Task Manager press Ctrl Alt Delete The Windows Security window will open Click Task Manager iii Restart the equipment 2 Press the reset switch to collect a memory dump Then restart the equipment When you request an analysis of the memory dump a service provided for a fee save the log after you restart the equipment see 8 4 Maintenance Operation Commands and contact our sales repre...

Страница 255: ...tus indication If one of the status indication LEDs is lit in red this is a hardware error notification from the RAS software See 9 6 1 POST messages and take appropriate action If one of the status indication LEDs is lit in green a user application is using the LEDs to display characters Contact your system administrator or maintenance personnel Action 1 Check the description of the messages in t...

Страница 256: ...e correct For information about how to set up the video card refer to the manual of the video card ii Turn off the main power switch Replace the video card with another one and check whether it works 6 When you use the display which supports MST Multi Stream Transport of the DisplayPort make sure the following items Refer to the manual attached to the display for the setting i If the Display can c...

Страница 257: ...t ID4101 is recorded in the event log reduce the system load and use the system with a load that does not cause this kind of indication or recording Action 1 If the blue screen is still displayed record the STOP error code 0x00000080 and so on or distinguished name NMI_HARDWARE_FAILURE and so on 2 If you cannot record the STOP error code search the System category in the event log for the STOP err...

Страница 258: ...place the LAN cable with another LAN cable 5 When you use network device check the following items i Make sure that the power of the network device is on ii Turn on the power of the network device first and then turn on the power of this equipment iii Replace the network device with other one to check whether the latter works Action 1 Re examine the network settings according to the instructions i...

Страница 259: ...the DVD drive is recognized If the DVD drive is not recognized restart the equipment 4 Use another CD or DVD Action NOTE If you use a USB DVD drive depending on the DVD drive it may take around 10 minutes to read a disc CD or DVD at the startup of the equipment If this situation occurs you may be able to resolve this problem by selecting disable for Legacy USB Support on the Advance tab in the BIO...

Страница 260: ... eject hole Do not insert an eject pin at an angle or apply too much force An eject pin does not come with the equipment If an eject pin is not available use instead a pin that fits the hole of the eject hole Action 1 Keyboard input may not be accepted temporarily due to a frozen application If the equipment responds to Alt Tab or Ctrl Alt Delete try the following procedure i Switch applications b...

Страница 261: ...tter works 5 When you use a USB KVM switch read the user s manual that comes with the USB KVM switch The problem may be alleviated if you change settings such as emulation settings 6 If the OS starts while a serial port is receiving data use the serial port after the OS starts instead and see whether the problem goes away Action 1 Disconnect the cable for the USB device and securely reconnect it t...

Страница 262: ...the outlet iii Turn on the power of the speakers iv Make sure that the volume level of the speakers is adequately adjusted v Make sure that the cable from the speakers is connected to LINE OUT vi When you record an audio signal from an audio device connect LINE OUT of the audio device to LINE IN of the equipment by using a cable LINE IN cannot be used as a MIC input vii Disconnect the cable from t...

Страница 263: ...he equipment When you request an analysis of the memory dump a service provided for a fee save the log after you restart the equipment see 8 4 Maintenance Operation Commands and contact our sales representatives 2 If you cannot restart the equipment at step 1 turn off the power of the equipment according to the instructions in Forcibly terminating the equipment below 3 If executing step 1 does not...

Страница 264: ...80 and take action If the error cause was not logged in event log contact the system administrator or maintenance personnel 2 0x00009221 The remote shutdown input signal was detected during Windows startup For information about the cause of the remote shutdown ask the system administrator or maintenance personnel 3 0x00009501 1 Occur the unmatched RAID1 configuration information Contact the system...

Страница 265: ...led code 0x9202 Hardware NMI Remove the extension board and replace it with another board and recheck operation For the replacement work see 6 4 Installing and Removing Components Uncorrectable Error at DIMM B1 Detailed code 0x9217 Uncorrectable memory error Check whether the main memory is mounted correctly If this error still occurs with the main memory mounted correctly it may be due to a main ...

Страница 266: ...ipment collects logs by using the Windows event log service The following procedure shows how to check the event log The display image assumes Windows 7 but it is similar other OS 1 Open Control Panel and click System and Security View event logs 2 The Event Viewer window opens Select Windows Logs and then select System or Application to check the system log or application log ...

Страница 267: ...n the CD ROM during the paging operation but as long as you can access the DVD drive there is no problem The system log may contain an error log entry of the event ID56 The entry may show a message Driver PCI returned invalid for a child device xxxxxxxxxxxxxxxxxx but there is no problem with the running this equipment The system log may contain a warning log entry of the event ID19 The entry may s...

Страница 268: ...arning A failure may be imminent on the drive of the drive bay 1 2 We recommend you back up the data and replace the drive 7 266 HFWRAS_SYS Error Revolutions of CPU fan deteriorated remarkably Read the description of fan failure in 9 2 2 1 and take action accordingly 8 267 HFWRAS_SYS Information Revolutions of CPU fan returned to normal value No handling 9 268 HFWRAS_SYS Error The computer was shu...

Страница 269: ... set up in registry value 1 default value 2 is set up If restarting the equipment does not resolve the error contact the system administrator or maintenance personnel 18 800 HFWRAS_SYS Information 1 Detailed code 2 A STOP error has occurred Check the error and contact your system administrator or maintenance personnel 19 900 HFWRAS_SYS Information Power shutdown factor code is 1 A power shutdown o...

Страница 270: ...Information Media error is occurred on RAID Read the description of RAS FEATURES MANUAL 2 8 2 and take action accordingly 28 2021 HFWRAS_SYS Error The drive on the drive bay 1 is OFFLINE because of unmatching Data Read the description of 10 4 3 and take action 29 3000 HTsfRAID_SYS Information RAID status changed ARRAY 1 DRIVE1 2 DRIVE2 3 No handling 30 3001 HTsfRAID_SYS Information Rebuild process...

Страница 271: ...lue 2 denotes the default value of the registry key No 18 1 and 2 record one of the following combinations 1 2 Reset signal was input 0x9201 PCI Bus Parity Error 0x9202 Uncorrectable Error at DIMM B1 0x9217 Uncorrectable Error at DIMM A1 0x9218 No 19 1 denotes the power shutdown reason code No 20 No 24 No 25 No 26 No 28 1 denotes the Drive bay No No 29 1 records one of the following OPTIMAL OPTIMA...

Страница 272: ...nd memory Use this tool for example when you analyze the system load The display image assumes Windows 7 but it is similar other OS The following shows how to start the performance monitor 1 Click Start Control Panel System and Security Administrative Tools 2 Double click Performance Monitor 3 The Performance Monitor window opens Click Performance Monitor and then click ...

Страница 273: ... opens If you select items such as Processor Memory PhysicalDisk or Network Interface and click Add the performance of those items will be monitored Click OK 5 In the Performance Monitor window you can check the performance of the items you selected ...

Страница 274: ...es Indicates the size of physical memory available for processes If this value indicates a decreasing trend it is likely that there is a memory leak 4 Pool Nonpaged Bytes Indicates the size of the memory area that will never be paged out to the disk and stays in the physical memory as long as it is allocated If this value indicates an increasing trend it is likely that there is a memory leak 5 Phy...

Страница 275: ...peatedly start and stop collecting performance counter data sometimes you cannot start or stop collecting performance counter data If this situation happens terminate Performance Monitor wait for a while restart Performance Monitor and then start collecting the data Performance Counter data cannot be collected If you cannot start collecting performance counter data even after you have restarted Pe...

Страница 276: ...ges Power On Self Test POST is a function whereby the system BIOS makes routine checks for hardware failure when the power of the computer system is turned on If any failure is found the POST code corresponding to the location of the failure is displayed on the Digital LEDs for Status indication situated on the front of the equipment When a POST code is displayed the BIOS status lamp orange in the...

Страница 277: ...rly the boot device may not be working properly 99 There may be a problem with a serial device Check if serial devices are connected correctly and the connected devices work properly 9C A2 There may be a problem with a storage medium HDD SSD USB memory or the like Check if they are installed properly If they are mounted properly the storage medium may be out of order 9B 9C 9D B4 There may be a pro...

Страница 278: ...ly 31 Failure is predicted for the drive in drive bay 1 We recommend you back up the data and replace the drive 32 Failure is predicted for the drive in drive bay 2 41 1 The drive bay1 is abnormal Read the description of 10 4 2 and replace an HDD 42 1 The drive bay2 is abnormal 4C RAID status is unknown RAS software could not get the RAID status Contact your system administrator or maintenance per...

Страница 279: ...This Page Intentionally Left Blank ...
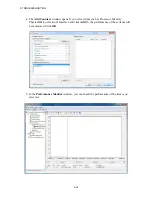
Страница 280: ...so protect the power source from undesirable interruptions by such means as UPS This Equipment is evaluated based on the specific HDD models authorized by the Manufacturer Replace only with specific HDD models authorized by the Manufacturer Otherwise the existing data in the HDD may be lost Also always observe the recommended replacement interval for HDDs Refer to APPENDIX HANDLING REPLACEABLE COM...

Страница 281: ...D1 Redundant Array of Indepensive Disks Level 1 is a technology generally referred to as Disk mirroring The Software RAID1 is not the Disk mirroring by the RAID controller Hardware The Software RAID1 constructs the system that two HDDs are combined and managed as one RAID1 system array by software Should one HDD fail you can read correct data from the other HDD RAID1 uses two HDDs but the capacity...

Страница 282: ...n Manual WIN 63 0092 Data mismatch detection function When a data mismatch between HDDs may have occurred due to unexpected power interruption or other reason this computer can be set to isolate or continue to operate the HDD in drive bay 2 This setting can be modified by the RAS software For how to modify this setting refer to 5 3 RAID Configuration Control Command raidctrl in the HF W2000 Model ...

Страница 283: ... processing associated with mirroring The software RAID1 device driver has been already installed when the product is shipped and you do not need to install it when you set up RAID1 10 2 2 Newly setting up RAID1 To newly set up RAID1 it is necessary to restore the shipping status of the system by using the recovery DVD Restore the shipping status according to CHAPTER 7 RESTORING THE FACTORY SHIPPE...

Страница 284: ...me Corresponding drive bay number HDD1 STATUS 1 HDD2 STATUS 2 Meaning of the HDD status lamps HDD status Lamp status Red Status of the HDDs OFF Both Both HDDs are working properly ON Either one One HDD has an error The power of the HDD with an error is OFF Flashing Either one Rebuild copy is ongoing Only the lamp of the copy destination HDD flashes Flashing Both Both HDDs have errors Including err...

Страница 285: ...king the arrow next to the notification area Clicking Customize allows you to make settings to show the icon in the notification area of the task bar For Windows 10 make settings to right click the arrow next to the notification area click Properties in the displayed menu and then click Select the icon to be shown on the task bar so that the icon is shown in the notification area of the task bar W...

Страница 286: ...10 7 10 3 3 Checking by the Software RAID1 utility You can check the RAID status with the Software RAID utility which is attached this equipment 10 6 Software RAID utility shows about how to use the software RAID utility ...

Страница 287: ...enance personnel call signal is closed See 5 8 2 External control specifications 5 Data is recorded using the event log See Section 9 4 Event Log 6 The HDD status of the RAID1 system is displayed in the Hardware status window Refer to 4 1 3 Hardware status window the HF W2000 Model 48 45 RAS FEATURES MANUAL The following part of this section describes how to recover from each type of failure and h...

Страница 288: ...g off the power for this equipment or attaching and detaching HDDs Otherwise the data on the HDDs may be lost or a failure may result To recover from a single system HDD failure perform the procedure below For recovery from the backup HDD see 10 5 2 Recovery Using a Backup HDD 1 Rebuilding with the OS running Notice This computer can change the load of writing data to HDDs which is applied to the ...

Страница 289: ...ons 3 Double click the hardware status icon shown in the notification area of the task bar to open the hardware status display window Check defective HDDs on the hardware status display window Hardware Status Window Note This window shows that the HDD in drive bay 2 is defective 4 Remove the defective HDD from the computer See 6 3 7 Installing and removing HDD Hardware Status Icon ...

Страница 290: ...on and confirm that the status of the HDD of the drive bay removed from the computer is shown as Not mounted If Not mounted is not shown wait for a while and then click the Refresh button again and confirm that the message Not mounted appears Hardware Status Window Click Refresh ...

Страница 291: ... rebuilding starts Notice If rebuilding does not start after about three minutes the HDD or the computer may be defective or an HDD that was used as a RAID1 array of another computer may be mounted See 10 4 4 When a problem occurs during recovery work After the HDD has been mounted on the computer the drive bay status is shown on the hardware status display window until rebuilding is completed How...

Страница 292: ...tus indicator turns off and RAID1 is restored On the hardware status display window click the Refresh button and confirm that the RAID status is shown as Optimal and the HDD status of the drive bay where the HDD was replaced is shown as Healthy Hardware Status Window Normal ...

Страница 293: ...source HDD with a new one For the replacement procedure see 6 3 7 Installing and removing an HDD After both HDDs have been replaced set up the computer again and restore data from the backup file For how to set up the computer again see 10 2 2 Newly setting up RAID1 Or recover the computer by using the backup HDD See 10 5 2 Recovery Using Backup HDD Hardware Status Window Media Error ...

Страница 294: ...state on the hardware status display window enter the following command from the command prompt as administrator C raidctrl REBUILD The HDD status indicator blinks after a while and RAID1 rebuilding starts 4 When the HDD status indicator turns off rebuilding has completed On the hardware status display window confirm that the status of both HDDs is normal Notice If the RAID status is shown as Opti...

Страница 295: ... 3 Perform rebuilding by using the software RAID utility according to 10 6 2 Starting and exiting the software RAID utility and 10 6 4 Rebuilding function 4 After rebuilding has completed run the OS and confirm that the status of both HDDs is normal on the hardware status display window Notice Use the recovery DVD HITACHI HJ 204 B Product Recovery DVD to enable rebuilding with the OS deactivated P...

Страница 296: ...s in 4 HARD DISKS DRIVES HDDs in PRECAUTIONS 2 Execute the following command from the command prompt as administrator C raidctrl REBUILD 3 The HDD status indicator blinks after a while and RAID1 rebuilding starts 4 When the HDD status indicator turns off rebuilding has completed On the hardware status display window confirm that the status of both HDDs is normal Notice Rebuilding is also enabled b...

Страница 297: ...lowing command to start rebuilding C raidctrl REBUILD 3 Check whether the event log event ID 3001 source HTsfRaid_SYS of the software RAID is recorded referring to the system category of the event log When the event log is recorded take the following actions according to error codes shown in the description of the event log Error code 0x0504310 an arbitrary value An HDD that was used as a software...

Страница 298: ... Use the recovery method for an offline HDD only for the purpose of evaluating the equipment If you apply the recovery method for an offline HDD to equipment actually used in the field for example a system in normal operation malfunctions may result including data loss If an HDD is automatically set to offline by the equipment the HDD may possibly be out of order Do not apply the recovery method f...

Страница 299: ... it to back up the data periodically Follow the procedure below and create a backup HDD 1 Shut down the OS Unplug the plug of the power cord from the outlet and wait for at least one minute Then replace the HDD mounted in drive bay 1 with a replacement HDD See 6 3 7 Installing and removing an HDD 2 Store the removed HDD in a safety place as a backup HDD 3 Turn on the power to the equipment Then th...

Страница 300: ...for the rebuild process depends on what applications are executed during this period If you do not want to start the OS rebuild using the Software RAID Utility 5 When the HDD1 status lamp turns off the rebuild process is complete Also in the Hardware status window confirm that both HDDs are healthy ...

Страница 301: ...t a brand new HDD or an appropriately prepared HDD in drive bay 2 3 Turn on the power to the equipment The Software RAID automatically detects a brand new HDD or another appropriately prepared HDD and starts to rebuild the system When the rebuild starts the HDD2 status lamp flashes 4 The OS starts while the rebuild process is continuing The time required for the rebuild process depends on what app...

Страница 302: ...ormation about the recommended replacement cycle see APPENDIX HANDLING REPLACEABLE COMPONENTS Follow the procedure below for periodic replacement Note The following is the procedure for replacing the HDD mounted in drive bay 1 When you replace the HDD mounted in drive bay 2 interpret drive bay 1 as drive bay 2 and the HDD1 status lamp as the HDD2 status lamp when following the procedure 1 If you r...

Страница 303: ... status window Confirm that the HDD1 status lamp is on It may take a few tens of seconds for the HDD1 status lamp to turn on Hardware status icon NOTICE You need to have administrator privileges to execute step 3 Log on to the computer using an administrator account and click OFFLINE If User Account Control UAC is enabled in a confirmation message click Yes The User Account Control window is displ...

Страница 304: ...ation over time or other reason defective blocks are generated that might cause some data to become unreadable The possibility of failure in rebuild processing when recovering the system from degradation can be reduced by regularly performing HDD matching HDD data consistency checks Use the software RAID utility for HDD matching Perform HDD matching according to 10 6 5 Consistency check function ...

Страница 305: ...n rebuilding with the OS running Use this function when you do not want to run the OS or reduce the maintenance time 3 Consistency check function This function checks consistency of data of all areas of HDDs in drive bay 1 and drive bay 2 Use this function for periodic inspection to enhance the availability of the computer 4 Array creation function This function edits RAID1 management information ...

Страница 306: ...HITACHI HJ 204 B Product Recovery DVD to the DVD drive before the OS starts running The information in the underlined part varies depending on the computer used 2 After the software RAID utility runs from the recovery DVD the following window opens Note If this utility fails to run from the recovery DVD turn off the computer and then turn it on again 3 Select the Soft RAID Utility radio button and...

Страница 307: ...iting procedure 1 Display the Soft RAID Utility menu window 2 Click the Shut Down button The following confirmation dialog box appears 3 Click the OK button The disc is ejected from the DVD drive and then the computer is shut down ...

Страница 308: ...the OPTIMAL state DEGRADE The array does not have redundancy and is in degraded operation Either drive is working in the ONLINE state DEGRADE MEDIA ERROR A media error is present in the DEGRADE state UNKNOWN The array status is unknown The drive status is unknown or no array has been created Drive1 Status Drive2 Status ONLINE Drives are working normally OFFLINE Disconnection occurred due to an HDD...

Страница 309: ...ssary work such as replacing defective HDDs Rebuilding is enabled only in a combination of ONLINE drive and NEW or INCOMPLETE DATA or REBUILD drive In other states rebuilding is disabled and this function cannot be selected on the menu window If rebuilding is suspended for any reason after rebuilding has started reuse the HDDs that are being rebuilt as new HDDs by using the drive initialization fu...

Страница 310: ...n The execution confirmation window opens To start rebuilding click the Yes button To not rebuild click the No button Clicking the No button redisplays the menu window 3 Click the Yes button on the execution confirmation window Rebuilding starts and the rebuilding progress status appears ...

Страница 311: ...sage below appears To abort rebuilding click the Yes button To continue rebuilding click the No button Clicking the Yes button aborts rebuilding and displays the following message Clicking the Close button redisplays the menu window Clicking the No button redisplays the progress status display window ...

Страница 312: ...s completed a rebuilding completion message appears Clicking the Close button redisplays the menu window If an error message appears during the rebuilding process take remedial action for the relevant error shown in 10 6 8 List of error message ...

Страница 313: ...vailability Use the consistency check function as follows 1 Display the Soft RAID Utility menu window Notice The consistency check function is enabled only while both drives are in the ONLINE state In other states this function is disabled and cannot be selected on the menu window The consistency check takes about 90 minutes However the checking time increases when many mismatches of data are foun...

Страница 314: ... check radio button and then click the Next button The execution confirmation window opens To start the consistency check click the Yes button To not perform the consistency check click the No button Clicking the No button redisplays the menu window ...

Страница 315: ...rts the consistency check and displays the progress status To abort a consistency check click the Abort button The following message appears asking whether to abort the consistency check To abort the consistency check click the Yes button To continue the consistency check click the No button ...

Страница 316: ...splays the progress status display window 4 When the consistency check is completed the number of corrected sectors is shown as reference information and a consistency check completion message appears Clicking the Close button redisplays the menu window If an error message appears during the consistency check take remedial action for the relevant error shown in 10 6 8 List of error messages ...

Страница 317: ...ction This computer supports 32 bit Windows PE 3 0 and 64 bit Windows PE 5 0 as RAID1 device drivers for offline environments These RAID1 device drivers are stored in the following folders Apply these drivers according to the usage procedure of the backup software 32 bit Windows PE 3 0 C Drivers SoftwareRAID1 x86 PE3 64 bit Windows PE 5 0 C Drivers SoftwareRAID1 x64 PE5 Use the array creation func...

Страница 318: ...rmation window opens To create an array click the Yes button To not create an array click the No button Clicking the No button redisplays the menu window 3 Clicking the Yes button on the execution confirmation window displays an array creation completion message Clicking the Close button redisplays the menu window ...

Страница 319: ...D that was made offline by mistake Reusing an HDD that was made offline by the RAS software for evaluating the computer 1 Display the Soft RAID Utility menu window Notice If an HDD is reused by using the drive initialization function in a state that is not described in this manual the system may not be recovered or may not operate correctly even after it is recovered An HDD that was automatically ...

Страница 320: ...ized opens To cancel initializing the drive click the Back button The menu window reopens 3 Select an HDD to be initialized and then click the Next button The initialization confirmation window opens To initialize the drive click the Yes button To not initialize the drive click the No button Clicking the No button redisplays the menu window ...

Страница 321: ...10 SOFTWARE RAID1 10 42 4 Clicking the Yes button on the initialization confirmation window displays a drive initialization completion message Clicking the Close button redisplays the menu window ...

Страница 322: ...ble sector was detected in both drives during the consistency check This is a media error Back up data and replace one drive and then rebuild the RAID After that also replace the other drive and rebuild the RAID and then restore the backup data 3 Unwritable sector was detected on the Master Operation aborted Mirrored An unwritable sector was detected on the Master or Mirrored Operation was aborted...

Страница 323: ...This Page Intentionally Left Blank ...
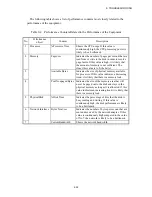
Страница 324: ...ars If the equipment is running 24 hours 7 days a week the replacement cycle is two years If the equipment is not running 24 hours 7 days a week the HDD should be replaced every four years or when the power on hours count exceeds 20000 hours whichever comes first In order to ensure quick recovery of corrupted files routinely back up your files SSD 7 years or the limitation of Program Erase Count w...

Страница 325: ...n order to for example repair equipment you may need to replace the component with a functionally compatible one If you repair a component in a manner not recommended by the Manufacturer proper operation of the component is not guaranteed ...

Отзывы: