121
u
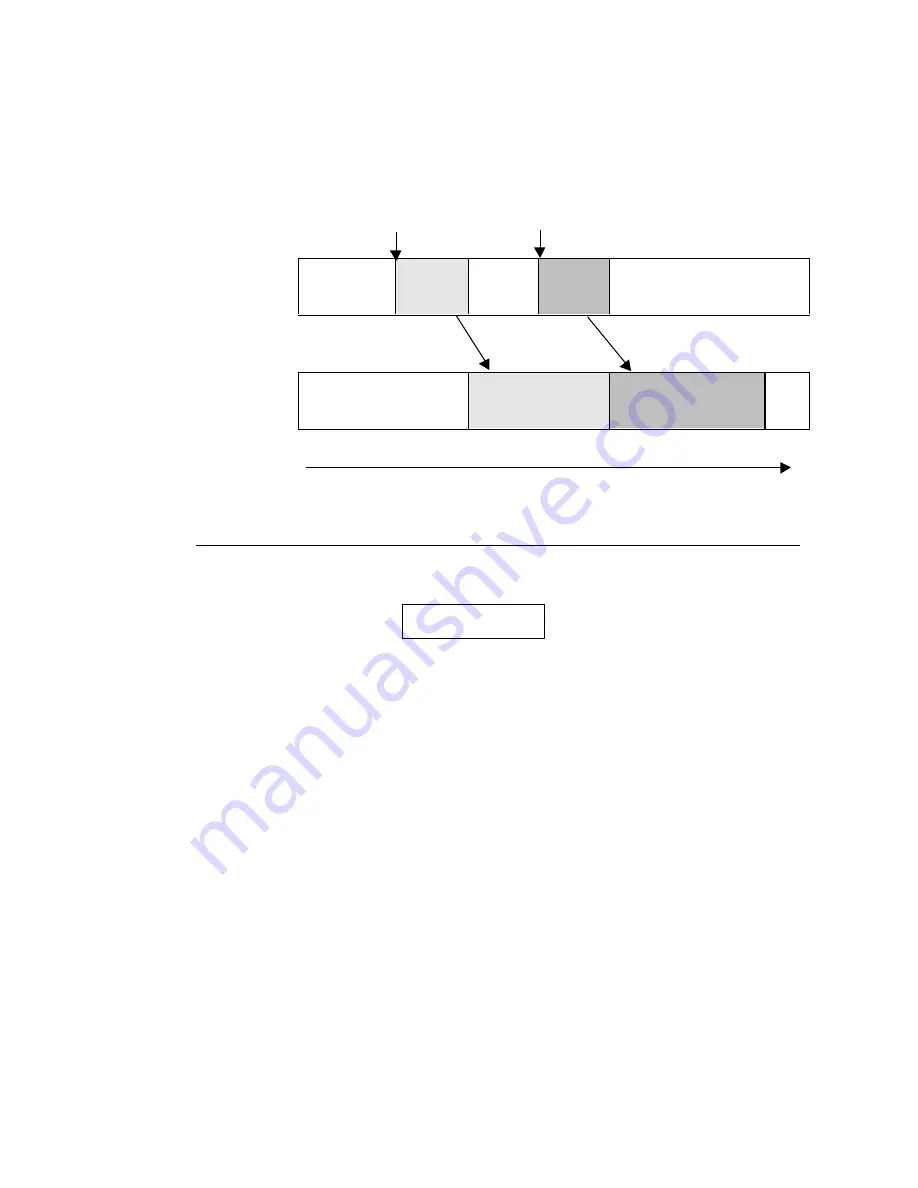
REC MODE to ONE SHOT
In this case, material is recorded immediately after record of all programmed one shot
backup alarms taken within one alarm period are complete. Start of another alarm will not
stop backup record.
Alarm #1
begins
Alarm #2
begins
Hard
disk
Alarm recording
standby
Alarm #1
(10 takes)
Alarm
recording
standby
Alarm #2
(10 takes)
Record standby
Alarm
image #1
Alarm
image #2
DVD-
RAM
(No record)
Record Alarm #1+ pre
Record Alarm #2 + pre
Backup
stopped
Alarm image #1
Alarm image #2
Time line
9-6-3. Changing Auto Backup Disk
If backup recording is started under this condition, the message below will be displayed when
the max. capacity of the current disk is reached.
When the above message is displayed, the user has the option of either changing the DVD-
RAM disk to continue backup recording or canceling the recording and stopping the backup
recording.
u
To Continue Backup
①
When ‘CHANGE DVD’ message is displayed, backup record is paused at last record
point.
②
To change disk, turn thumbscrew on access panel counter-clockwise to access disk in
drive unit.
③
Push DVD drive EJECT button to open drive tray.
④
The disk used in the DVD option is double sided. The CHANGE DVD message indicates
the side currently being written to is full. Check label to verify if current side only or both
sides are full.
⑤
If current side only is full, turn over the disk and continue record on the other side,
or
, if
disk is completely full, remove current disk and install a new disk.
⑥
Push DVD drive EJECT button again to close tray.
CHANGE DVD
(Continued following page.)


