Chapter 2 Setup
121
2
Use EPSON Status Monitor 3
Whe
n
[Use EPSON S
t
a
tu
s Mo
nit
or 3]
i
s se
t
,
t
he follow
ing
opera
ti
o
n
s w
i
ll be performed:
• Whe
n
pr
inting
, a w
in
dow a
ut
oma
ti
cally appears, allow
ing
yo
u
t
o check
t
he pr
int
er s
t
a
tu
s a
n
d
t
he
in
k level.
• Error
in
forma
ti
o
n
i
s d
i
splayed whe
n
a
n
error occ
u
rs d
u
r
ing
pr
inting
.
The EPSON S
t
a
tu
s Mo
nit
or 3 w
i
ll
n
o
t
be ac
ti
va
t
ed
i
f a
n
error occ
u
rs whe
n
n
o
t
pr
inting
.
• Cl
i
ck
ing
t
he
i
co
n
for [EPSON S
t
a
tu
s Mo
nit
or 3] o
n
t
he
t
ask
t
ray allows yo
u
t
o d
i
splay [EPSON
S
t
a
tu
s Mo
nit
or 3] a
t
a
n
y
ti
me.
(See
D
i
splay
ing
t
he
i
co
n
o
n
pa
g
e 124
for how
t
o d
i
splay
t
he
i
co
n
.)
• The follow
ing
it
ems ca
n
be se
t
in
[Mo
nit
or
ing
prefere
n
ces].
Selec
ting
error
in
d
i
ca
ti
o
n
s:
(See
Error
n
o
ti
f
i
ca
ti
o
n
se
tting
for [No
t
u
se EPSON S
t
a
tu
s Mo
nit
or 3] o
n
pa
g
e 122
.)
D
i
splay
ing
t
he [EPSON S
t
a
tu
s Mo
nit
or 3]
i
co
n
o
n
t
he
t
ask bar:
(See
D
i
splay
ing
t
he
i
co
n
o
n
pa
g
e 124
.)
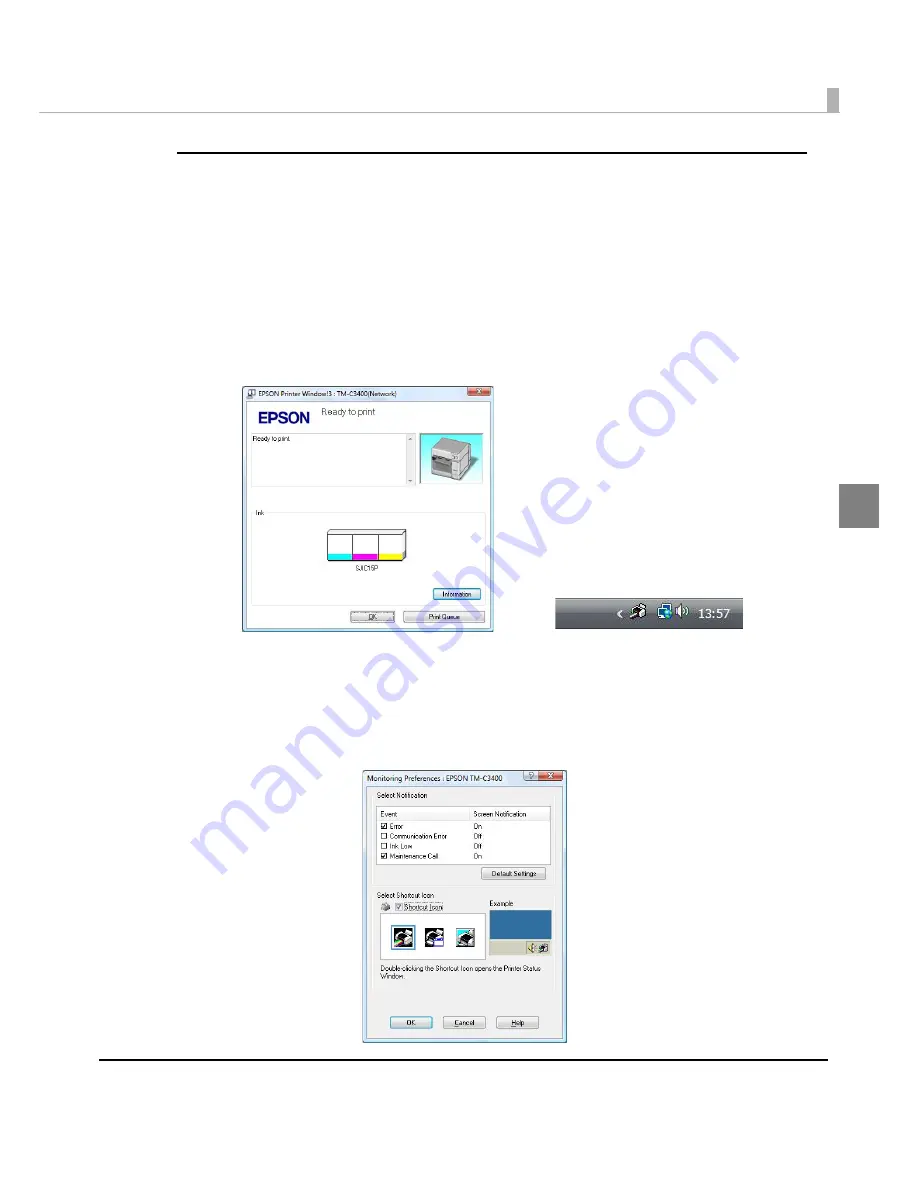
Display window for EPSON Status Monitor 3
Icon on task tray
Содержание SecurColor TM-C3400
Страница 81: ...Chapter 2 Setup 81 2 For fanfold paper 1 Open the fanfold paper cover 2 Remove the remaining paper ...
Страница 86: ...86 7 Lock the paper ejection guide 8 Close the roll paper cover ...
Страница 91: ...Chapter 2 Setup 91 2 For fanfold paper 1 Open the fanfold paper cover 2 Remove the paper left ...
Страница 98: ...98 4 Close the fanfold paper cover This is the end of loading of the fanfold paper ...
Страница 100: ...100 3 Slide the bottom tray to align it with the paper length 4 Lock the paper ejection tray ...
Страница 130: ...130 ...
Страница 155: ...Chapter 4 Handling 155 4 6 Close the fanfold paper cover This is the end of replacing the fanfold paper ...


