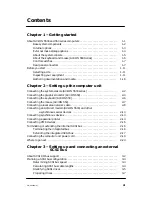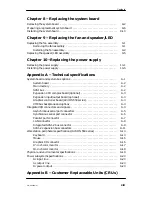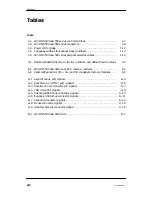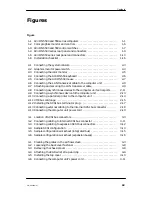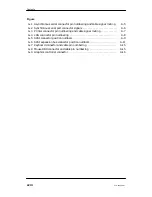
Contents
xv
014–002250–01
Figures
Figure
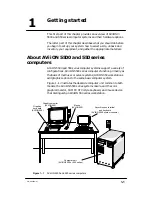
1–1 AViiON 5500 and 550 series computers
. . . . . . . . . . . . . . . . . . . . . . . . . . . . . .
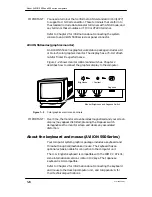
1–2 Color graphics monitor and controls
. . . . . . . . . . . . . . . . . . . . . . . . . . . . . . . . .
1–3 AViiON 5500 and 550 control switches
. . . . . . . . . . . . . . . . . . . . . . . . . . . . . . .
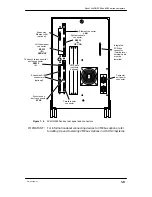
1–4 AViiON 5500 series rear panel and connectors
. . . . . . . . . . . . . . . . . . . . . . . .
1–5 AViiON 550 series rear panel and connectors
. . . . . . . . . . . . . . . . . . . . . . . . .
1–6 Installation checklist
. . . . . . . . . . . . . . . . . . . . . . . . . . . . . . . . . . . . . . . . . . . . . . .
2–1 Connecting the system console
. . . . . . . . . . . . . . . . . . . . . . . . . . . . . . . . . . . . . .
2–2 Graphics monitor power switch
. . . . . . . . . . . . . . . . . . . . . . . . . . . . . . . . . . . . .
2–3 Connecting the color monitor
. . . . . . . . . . . . . . . . . . . . . . . . . . . . . . . . . . . . . . .
2–4 Connecting the AViiON 550 keyboard
. . . . . . . . . . . . . . . . . . . . . . . . . . . . . . . .
2–5 Connecting the AViiON 550 mouse
. . . . . . . . . . . . . . . . . . . . . . . . . . . . . . . . . .
2–6 Connecting the LAN transceiver cable to the computer unit
. . . . . . . . . . .
2–7 Attaching and securing the LAN transceiver cable
. . . . . . . . . . . . . . . . . . . .
2–8 Connecting asynchronous devices to the computer unit serial ports
. . . . .
2–9 Connecting a synchronous device to the computer unit
. . . . . . . . . . . . . . . .
2–10 Connecting a parallel printer to the computer unit
. . . . . . . . . . . . . . . . . . . .
2–11 VMEbus card cage
. . . . . . . . . . . . . . . . . . . . . . . . . . . . . . . . . . . . . . . . . . . . . . . . .
2–12 Installing the SCSI bus terminator plug
. . . . . . . . . . . . . . . . . . . . . . . . . . . . .
2–13 Connecting external cabling to the internal SCSI bus connector
. . . . . . . .
2–14 Connecting the computer unit power cord
. . . . . . . . . . . . . . . . . . . . . . . . . . . .
3–1 Location of SCSI bus connectors
. . . . . . . . . . . . . . . . . . . . . . . . . . . . . . . . . . . . .
3–2 Connecting cabling to internal SCSI bus connector
. . . . . . . . . . . . . . . . . . . .
3–3 Connecting cabling to expansion SCSI bus connectors
. . . . . . . . . . . . . . . . .
3–4 Sample SCSI configuration
. . . . . . . . . . . . . . . . . . . . . . . . . . . . . . . . . . . . . . . . .
3–5 Sample configuration worksheet (integrated bus)
. . . . . . . . . . . . . . . . . . . . .
3–6 Sample configuration worksheet (expansion buses)
. . . . . . . . . . . . . . . . . . .
4–1 Cleaning the grates in the airflow screen
. . . . . . . . . . . . . . . . . . . . . . . . . . . . .
4–2 Loosening the back cover fastener
. . . . . . . . . . . . . . . . . . . . . . . . . . . . . . . . . . .
4–3 Removing the chassis cover
. . . . . . . . . . . . . . . . . . . . . . . . . . . . . . . . . . . . . . . . .
4–4 Attaching the ESD wrist strap and clip
. . . . . . . . . . . . . . . . . . . . . . . . . . . . . .
4–5 Installing the top cover
. . . . . . . . . . . . . . . . . . . . . . . . . . . . . . . . . . . . . . . . . . . . .
4–6 Connecting the computer unit’s power cord
. . . . . . . . . . . . . . . . . . . . . . . . . . .
Содержание AViiON 550 Series
Страница 2: ......
Страница 6: ......
Страница 12: ...Joining our users group x 014 002250 01 ...
Страница 86: ...Opening and closing the computer unit 4 12 014 002250 01 ...
Страница 96: ...Installing a drive assembly 5 10 014 002250 01 ...
Страница 188: ......
Страница 191: ......


