Adding or replacing an I/O expansion board
7-7
014–002250–01
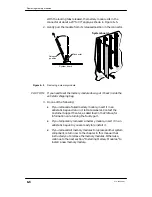
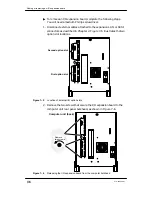
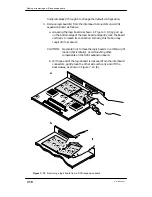
3. Remove the two screws that secure the I/O expansion board to the
system board, as shown in Figure 7–7.
ÉÉÉ
ÉÉÉ
ÉÉÉ
ÉÉÉ
ÉÉÉ
ÉÉÉ
ÉÉÉ
ÉÉÉ
ÉÉÉ
ÉÉÉ
ÉÉÉ
ÉÉÉÉ
ÉÉÉÉ
Interboard
connectors
Interboard
connectors
Figure 7–7
Removing an I/O expansion board
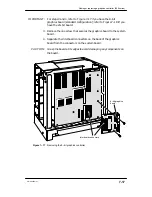
4. Separate the interboard connectors on the back of the board from
the connectors on the system board, as shown in Figure 7–7.
CAUTION:
Grasp the board at its edges to avoid damaging any components on
the board.
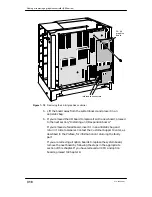
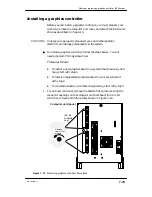
5. Lift the board away from the system board, and place it in an
antistatic bag.
6. If you removed the I/O board to replace it with a new board, proceed
to the next section, “Installing an I/O expansion board.”
If you removed a failed board, insert it in an antistatic bag and
return it to Data General. Contact the Customer Support Center, as
described in the Preface, for information on returning the faulty
part.
If you are removing all option boards to replace the system board,
remove the next board by following the steps in the appropriate
section of this chapter. If you have removed all CPU and option
boards, proceed to Chapter 8.
Содержание AViiON 550 Series
Страница 2: ......
Страница 6: ......
Страница 12: ...Joining our users group x 014 002250 01 ...
Страница 86: ...Opening and closing the computer unit 4 12 014 002250 01 ...
Страница 96: ...Installing a drive assembly 5 10 014 002250 01 ...
Страница 188: ......
Страница 191: ......


