52
Chapter 2
Printing
Printing with the Color Correction Method Changed
1
Open the printer driver setup window.
2
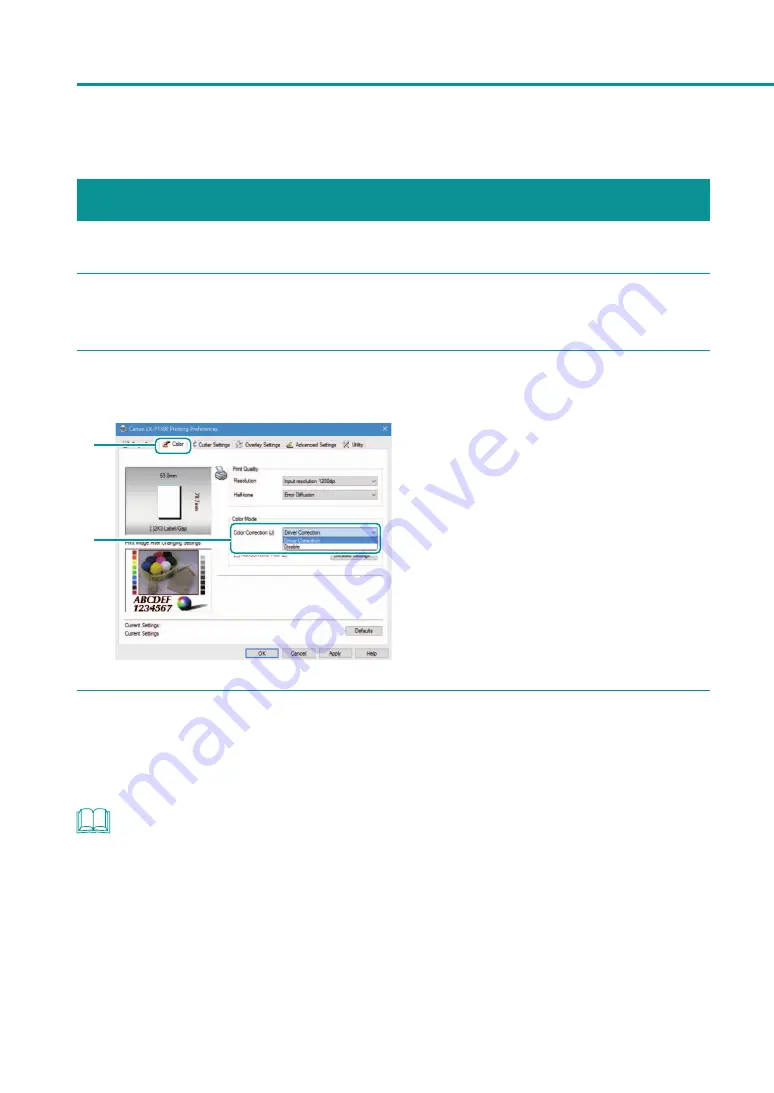
Select a color correction method.
1
2
1. Click the [Color] tab.
2. Select “Driver Correction” or “Disable.”
[Driver Correction]
The optimum color adjustment is made for this
printer.
[Disable]
Image processing is performed at the highest
speed without color correction. Select this
method to give priority to the printing speed.
3
Complete the setting procedure.
Click [OK] in the printer driver setup window.
When printing begins, the document will be printed using the selected color correction method.
NOTE
• [Color correction] can not be selected when a paper type associated with Profile (the start character is "*") is
selected.
Содержание LX-P1300
Страница 1: ...User s Guide COLOR LABEL PRINTER LX P1300 LX D1300 CANON FINETECH NISCA INC 2018 4Y1 8615 030...
Страница 98: ...92 Chapter 2 Printing 4 Finish updating the special settings 1 1 Click Close...
Страница 138: ...132 Chapter 3 Maintenance...
Страница 155: ...Chapter 4 Troubleshooting For Troubleshooting Operations 150 List of Error Messages Warning Messages 164...
Страница 179: ...Chapter 5 Appendix Moving the Printer 174 Uninstall Printer Driver 184 About Network Utility 186...
Страница 189: ...183 Moving the Printer...
Страница 206: ...200 Chapter 5 Appendix 2 Configure Time Out Value Extension 1 2 1 Check the Extend Time Out value check box 2 Click OK...


