105
Replacing the Ink Tank
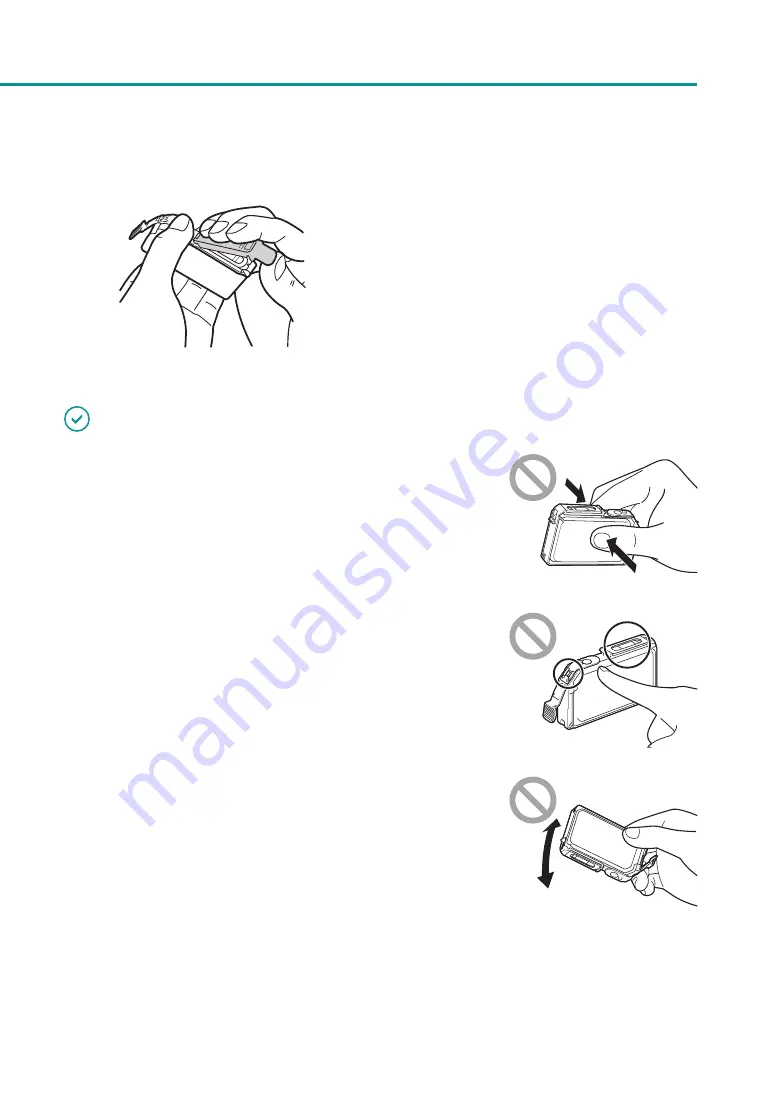
4. Remove the orange protective cap as
shown in the figure.
When removing the protective cap, be sure to
hold the ink tank as illustrated to avoid getting
ink on your fingers.
Dispose the removed protective cap according
to local regulations.
IMPORTANT
• Do not press on the sides of the ink tank as ink could come out.
• Do not touch the ink tank electric contacts. The printer could fail in
operation/printing.
• After removing the protective cap, do not touch the ink supply opening.
Ink could not be supplied properly.
• After removing the protective cap, do not shake the ink tank with the ink
supply opening down. Ink leaking from the ink supply opening could stain
your clothes or the area around the printer.
• Be careful to ensure that ink adhered on the removed protective cap does not get on your clothes or the area
surrounding the printer.
Содержание LX-P1300
Страница 1: ...User s Guide COLOR LABEL PRINTER LX P1300 LX D1300 CANON FINETECH NISCA INC 2018 4Y1 8615 030...
Страница 98: ...92 Chapter 2 Printing 4 Finish updating the special settings 1 1 Click Close...
Страница 138: ...132 Chapter 3 Maintenance...
Страница 155: ...Chapter 4 Troubleshooting For Troubleshooting Operations 150 List of Error Messages Warning Messages 164...
Страница 179: ...Chapter 5 Appendix Moving the Printer 174 Uninstall Printer Driver 184 About Network Utility 186...
Страница 189: ...183 Moving the Printer...
Страница 206: ...200 Chapter 5 Appendix 2 Configure Time Out Value Extension 1 2 1 Check the Extend Time Out value check box 2 Click OK...


