Appendices
83
Chapter 3
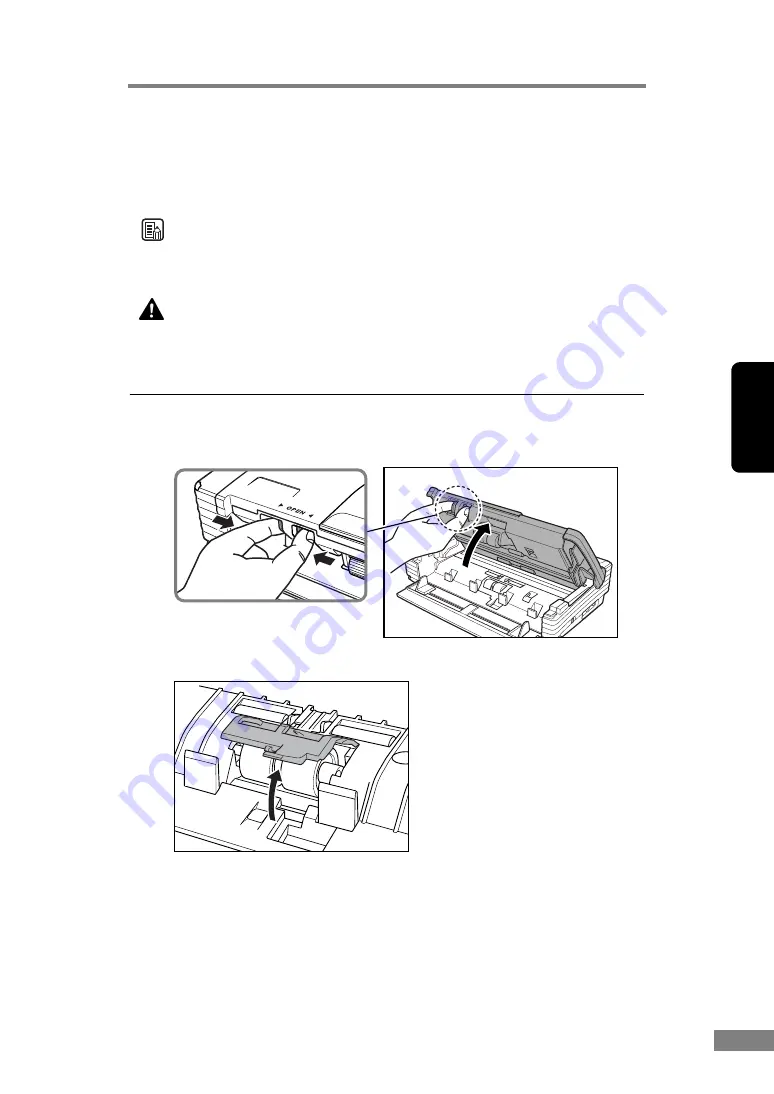
Removing and Attaching the Retard Roller
Follow the procedure below to remove and attach the retard roller for cleaning
or replacement.
Note
When attaching the retard roller during installation, operate the roller fastening
lever according to the removal procedure and then attach the roller unit.
CAUTION
Do not use excessive force when removing or attaching the
rollers. Doing so may damage them.
Removing the Retard Roller
1.
Pressing the OPEN knob from both sides, raise the upper unit.
2.
Remove the roller cover.
Содержание 0080B002
Страница 46: ...42 Using the Scanner 3 Double click Scanners and Cameras 4 Select CANON DR 2580C USB and then click Properties ...
Страница 47: ...Using the Scanner 43 Chapter 2 Canon DR 2580C USB Properties is displayed 5 Click the Events tab ...
Страница 56: ...52 Using the Scanner 3 Double click Scanners and Cameras 4 Select CANON DR 2580C USB and then click Properties ...
Страница 57: ...Using the Scanner 53 Chapter 2 CANON DR 2580C USB Properties is displayed 2 Click the Maintenance tab ...
Страница 72: ...68 Using the Scanner ...
Страница 80: ...76 Appendices 3 Double click Scanners and Cameras 4 Select CANON DR 2580C USB and then click Properties ...
Страница 81: ...Appendices 77 Chapter 3 Canon DR 2580C USB Properties is displayed 2 Click the Maintenance tab ...
Страница 103: ...Appendices 99 Chapter 3 3 After uninstallation is complete click the Finish button to exit the uninstaller ...


