9-52 Upgrading Your Server
8.
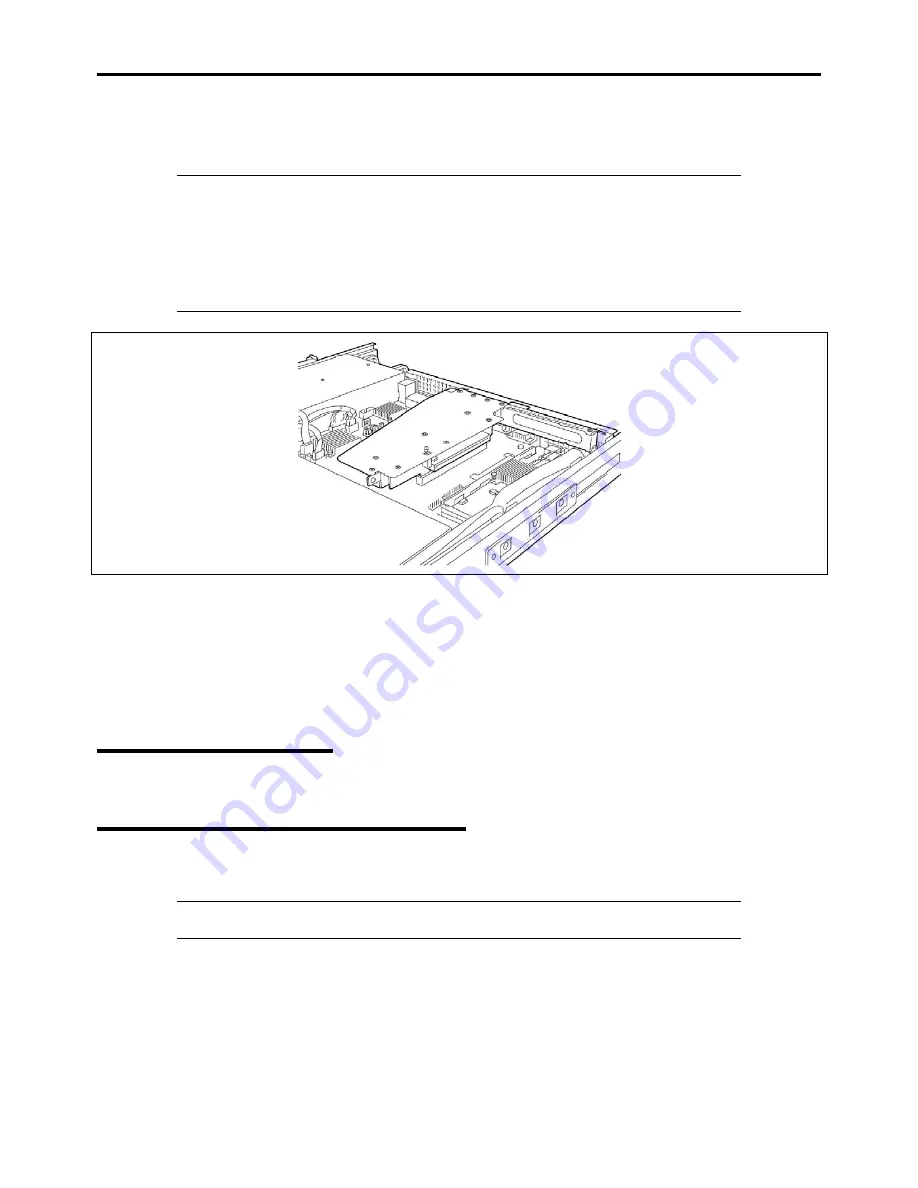
Insert the riser module assembly into the slot on the mother board.
Align the riser card terminal section with the slot on the mother board, and firmly push the riser module until it is
fully seated.
NOTES:
There are catches on the riser card frame that are used to secure the riser card to the cabinet.
When inserting the riser card, confirm that the catches are correctly fit into the holes on the
rear of the cabinet. After the insertion, push the riser card with your fingers until you cannot
see any part of the riser card terminal section. The riser card is now fully seated in the slot.
Pay attention not to damage the components on mother board with the riser card when inserting
it into the slot.
9.
Install the components you removed previously.
10.
Verify that POST does not display error messages.
If POST displays an error message, take a note on the message and see the POST error messages listed in Chapter 8.
11.
Run the BIOS SETUP utility and select "Yes" for [Advanced]
→
[Reset Configuration Data].
This setting is required to change the hardware configuration data. See Chapter 4 for details.
Removal
Remove a PCI board in reverse order of the installation steps.
Installing RAID Controller
Take the following steps to install the optional RAID Controller in the RAID Controller slot.
IMPORTANT:
With 2.5-inch disk model server, first remove the Internal RAID Controller , then
install the optional RAID Controller.
1.
See the section "Preparing for Installation and Removal" described earlier.
2.
Pull out the server from the rack.
3.
Remove the top cover.
4.
Remove the riser card.
Содержание NovaScale R440 E2
Страница 1: ...NovaScale R440 E2 User s Guide NOVASCALE REFERENCE 86 A1 46FB 00...
Страница 2: ......
Страница 32: ...1 16 Notes on Using Your Server...
Страница 70: ...2 38 General Description...
Страница 94: ...3 24 Setting Up Your Server This page is intentionally left blank...
Страница 147: ...Configuring Your Server 4 53 Property of Physical Device in the Universal RAID Utility...
Страница 187: ...Configuring Your Server 4 93 6 Click Home at the lower left of the screen to go back to the WebBIOS Top Menu...
Страница 272: ...5 74 Installing the Operating System with Express Setup This page is intentionally left blank...
Страница 281: ...Installing and Using Utilities 6 9 4 Click Parameter File Creator Parameter File Creator appears...
Страница 308: ...7 12 Maintenance This page is intentionally left blank...
Страница 349: ...Troubleshooting 8 41 When you use a local console When you use a remote console 6 Each tool is selected and it starts...
Страница 408: ...9 54 Upgrading Your Server Screws...
Страница 415: ...Upgrading Your Server 9 61 When connecting to the optional RAID controller installed in the low profile slot...
Страница 416: ...9 62 Upgrading Your Server When connecting to the optional RAID controller installed in the full height slot...
Страница 446: ...9 92 Upgrading Your Server This page is intentionally left blank...
Страница 456: ......
Страница 458: ...C 2 IRQ This page is intentionally left blank...
Страница 490: ...D 32 Installing Windows Server 2008 4 Activate Windows The Windows activation is complete...
Страница 494: ......
Страница 544: ...G 2 Using a Client Computer with a CD Drive This page is intentionally left blank...
Страница 548: ...H 4 Product Configuration Record Table This page is intentionally left blank...
Страница 551: ......
Страница 552: ...BULL CEDOC 357 AVENUE PATTON B P 20845 49008 ANGERS CEDEX 01 FRANCE REFERENCE 86 A1 46FB 00...


