15
it is tight and FirMly seated. beFore checKing, Follow all
choKe tube reMoval and installation saFety guidelines
Previously outlined.
A d j u s t i n G l e n G t h o F p u l l
The buttstock can be adjusted for length of pull by adding or
removing spacers (available separately) to the rear of the stock. Each
spacer extends length of pull ¼” and a maximum of three spacers can
be added with the screws provided to extend length of pull ¾”. With
longer screws (not provided), more than three spacers can be added to
further extend length of pull.
Spacers can be ordered through your Browning dealer or by calling
our Customer Service Department.
beFore PerForMing adjustMent Procedures, Place the ˝saFety”
in the on saFe Position. oPen the action and MaKe certain your
shotgun is coMPletely unloaded. KeeP the MuZZle Pointed in a
saFe direction. Failure to Follow these warnings could result
in serious injury or death.
i n s tA l l i n G A s pA c e r
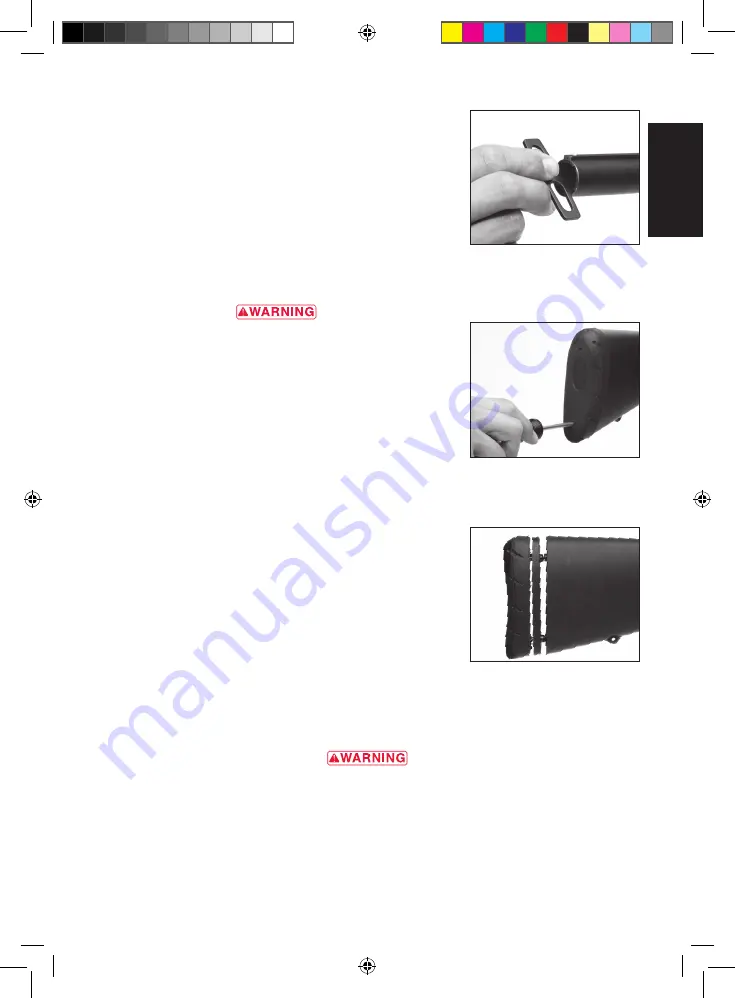
1 Use a #2 cross tip or Phillips screwdriver to remove the recoil pad
at the end of the buttstock (Figure 20). Place a small amount of
petroleum jelly on the screw access slits on the top and bottom of
the rear of the buttstock to prevent damaging the recoil pad. Insert
the screwdriver into each of the two access holes. Make certain the
tip of the screwdriver engages the head of the screw. Turn the
screw counterclockwise until the screw is completely loose from
the stock. When both screws are free, remove the recoil pad.
2 Add or subtract spacers to fit your firearm to your specifications
(Figure 21). After making an adjustment hold the shotgun to your
shoulder to determine if the new length feels comfortable.
Remember to always keep the muzzle pointed in a safe direction,
with the ˝safety” in the on safe position and make certain the
shotgun is completely unloaded.
3 When you are satisfied with the length of pull, start the screws
through the pad and spacer(s) into the holes in the stock.
4 Attach the recoil pad to the stock using the screwdriver. Turn the
screws clockwise to tighten. Do not overtighten the screws.
A d j u s t i n G c A s t A n d d r o p A t c o m b
beFore PerForMing adjustMent Procedures, Place the ˝saFety” in the on saFe Position. oPen the
action and MaKe certain your shotgun is coMPletely unloaded. KeeP the MuZZle Pointed in a
saFe direction. Failure to Follow these warnings could result in serious injury or death.
Six shims are included with your new shotgun (Figure 22). The shims fit between the buttstock and
receiver, allowing customized adjustments to the comb and heel. Each shim is labeled/stamped for a
specific amount of adjustment. The neutral shim, No. 2, is already installed on your shotgun.
Drop at comb is defined as the place on the comb that your cheek rests when taking aim. If drop at comb
is correct, your eye naturally falls in line with the sight. Shims marked 1, 2 and 3 do not give any cast on
Figure 20
insert a screwdriver into the holes in the
recoil pad.
Figure 21
install or remove stock spacers to achieve
correct length of pull.
Figure 19
use the choke tube wrench to change
choke tubes.
E
N
BRO5180_Maxus A5_v7.indd 15
02/03/10 13:30
Содержание MAXUS
Страница 6: ...4 E N BRO5180_Maxus A5_v7 indd 4 02 03 10 13 30 ...
Страница 26: ...24 E N BRO5180_Maxus A5_v7 indd 24 02 03 10 13 30 ...
Страница 27: ...25 Browning maxus Fusils semi automatiques F R BRO5180_Maxus A5_v7 indd 25 02 03 10 13 30 ...
Страница 52: ...50 F R BRO5180_Maxus A5_v7 indd 50 02 03 10 13 30 ...
Страница 53: ...51 Browning maxus HALBAUTOMATISCHE FLINTE D E BRO5180_Maxus A5_v7 indd 51 02 03 10 13 30 ...
Страница 78: ...76 D E BRO5180_Maxus A5_v7 indd 76 02 03 10 13 31 ...
Страница 79: ...77 Browning Maxus fucilE semiautomaticO I T BRO5180_Maxus A5_v7 indd 77 02 03 10 13 31 ...
Страница 104: ...102 I T BRO5180_Maxus A5_v7 indd 102 02 03 10 13 31 ...
Страница 105: ...103 Browning Maxus Escopeta SEMIautomática E S BRO5180_Maxus A5_v7 indd 103 02 03 10 13 31 ...
Страница 130: ...128 NOTES E S BRO5180_Maxus A5_v7 indd 128 02 03 10 13 31 ...


