Label Design
¡
3-13
Changing the look of the label
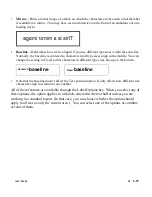
You can change the look of a label by changing the length or condensing the contents, by
adding frames, and by setting options such as justification, text position and direction, line
spacing, and so on.
Setting label length
You use the Label Length key to set length. (The lengths you may choose depend on your
system memory and the ribbon type you have installed. Information on those subjects
follows below.)
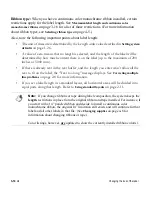
The Label Length key shows you two options that help you to automatically create labels
in just the size you need:
•
Length—The Length option lets you specify the exact length of the labels you want to create.
This is useful when you need labels to fit in a fixed space, such as a slot on a shelf. If no label
length is entered, the system uses as much tape as it needs to print the contents of a label.
•
Condense to fit—If you enter a label length, you can also choose to have the system
automatically condense the content to fit in that length. If you enter more content for a label
than will fit in the selected length, the content is condensed. If you do not use the condense to
fit option and you enter more content than will fit in the selected length, an error message
displays.
When you set a label length, that length is used for each label in the text buffer.
As mentioned above, the maximum length you can designate for a label depends on your
system memory and the type of ribbon you have installed.
System memory. Your system must be updated with additional memory to support the
longer multi-color length (shown in the table in
Maximum label length and system memory
on
page 3-15.) You can find out whether your system has additional memory by checking the
Status. See
Checking system status
on page 1-29 for instructions.
Note:
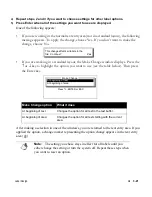
The Length option can be changed at any time, whether or not there is
text in the text buffer, as long as the Condense to fit option is off. However,
the Condense to fit option cannot be changed once you’ve typed text in the
text buffer.
Содержание POWERMark
Страница 1: ...User s Guide Manuel d utilisation Manual de usauario...
Страница 10: ...x Specifications...
Страница 56: ...2 16 Using specialty applications...
Страница 90: ...3 34 Working with bar codes...
Страница 124: ...7 4 Maintaining the system...
Страница 125: ...1 Signs Application 0...
Страница 126: ...2 Signs Application Differences from standard operating system 1 2 2 2 2 3 4 5 6 1 7 8...
Страница 129: ...Exiting the application 5 Exiting the application 2 2 1 Note 1 Quitting application Are you sure No...
Страница 141: ...Printing signs 17 2 If the Print Range window is displayed specify which signs you want to print 72 9 8 2...
Страница 148: ...1 Hazardous Waste Labels Application 0 1 2...
Страница 149: ...2 Hazardous Waste Labels Application Differences from standard operating system 3 4 5 6 7 8 0 9...
Страница 152: ...Exiting the application 5 Exiting the application 3 8 Note 8 Quitting application Are you sure No...
Страница 168: ...1 Pipe Markers Application 0...
Страница 169: ...2 Pipe Markers Application Differences from standard operating system 1 2 3 40 5 6 7 8 9...
Страница 172: ...Exiting the application 5 Exiting the application 1 2 1 8 Note 8 Quitting application Are you sure No...
Страница 192: ......


