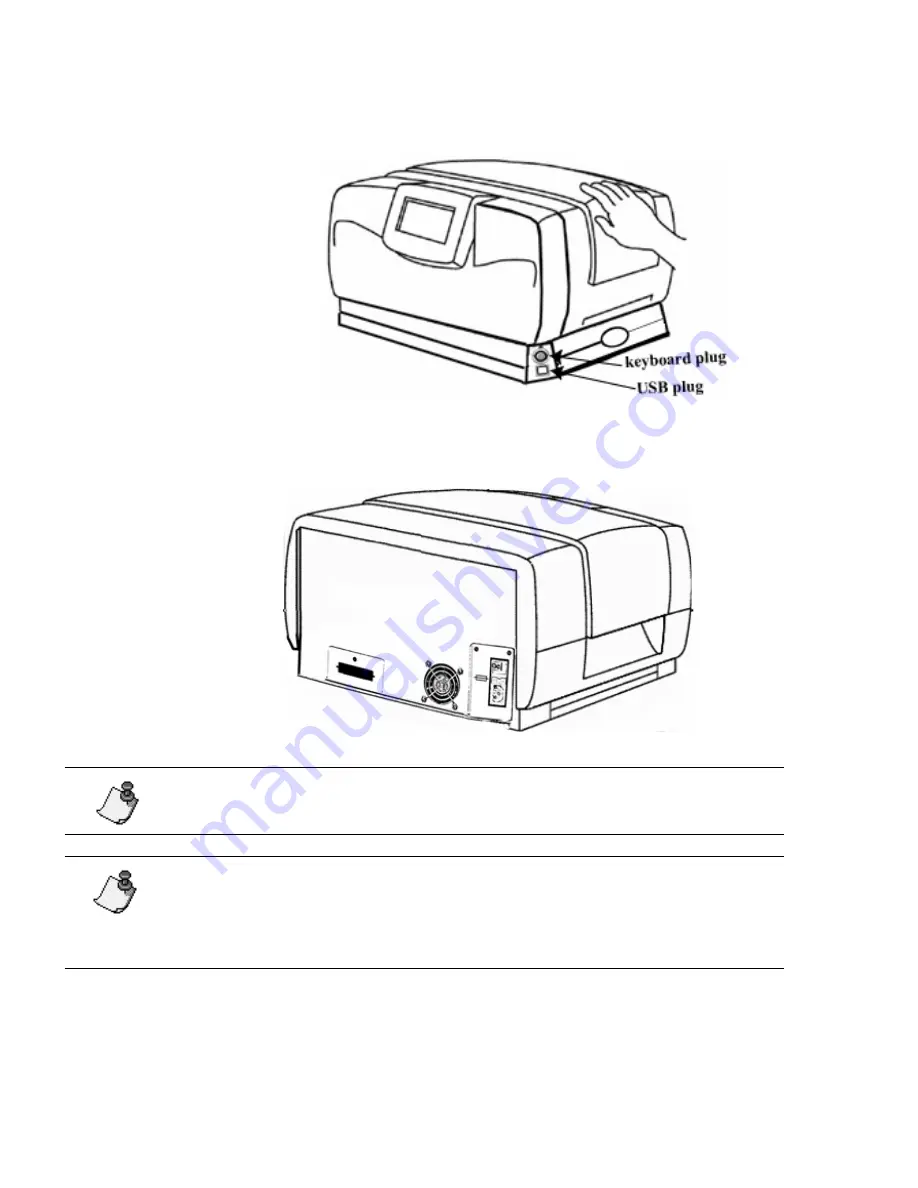
System Basics
¡
1-3
4)
Close the printer cover by pressing down on the top right side until you hear it click
into place.
5)
Plug the keyboard into the lower right side of the printer as shown above.
6)
Plug the power cord into the back of the printer as shown below. Plug the other end of
the cord into an AC power outlet.
Note:
Be sure the AC power outlet is located near the printer and is easily
accessible.
Note:
Users in countries outside of North America may need to supply their
own power cord to meet the specifications required in individual countries.
For information on power cord requirements, refer to the table on page v in
this guide.
on/off switch
Power plug
Содержание POWERMark
Страница 1: ...User s Guide Manuel d utilisation Manual de usauario...
Страница 10: ...x Specifications...
Страница 56: ...2 16 Using specialty applications...
Страница 90: ...3 34 Working with bar codes...
Страница 124: ...7 4 Maintaining the system...
Страница 125: ...1 Signs Application 0...
Страница 126: ...2 Signs Application Differences from standard operating system 1 2 2 2 2 3 4 5 6 1 7 8...
Страница 129: ...Exiting the application 5 Exiting the application 2 2 1 Note 1 Quitting application Are you sure No...
Страница 141: ...Printing signs 17 2 If the Print Range window is displayed specify which signs you want to print 72 9 8 2...
Страница 148: ...1 Hazardous Waste Labels Application 0 1 2...
Страница 149: ...2 Hazardous Waste Labels Application Differences from standard operating system 3 4 5 6 7 8 0 9...
Страница 152: ...Exiting the application 5 Exiting the application 3 8 Note 8 Quitting application Are you sure No...
Страница 168: ...1 Pipe Markers Application 0...
Страница 169: ...2 Pipe Markers Application Differences from standard operating system 1 2 3 40 5 6 7 8 9...
Страница 172: ...Exiting the application 5 Exiting the application 1 2 1 8 Note 8 Quitting application Are you sure No...
Страница 192: ......


